If your Dell laptop WiFi won't turn on in Windows 10, you may be unable to connect to any wireless network even when a stable connection is available nearby. This issue can be caused by several factors, including disabled network adapters, incorrect settings, outdated drivers, hardware switch issues, or system conflicts. Fortunately, there are multiple reliable solutions to restore your wireless functionality. In this guide, we'll walk you through all the tested methods to help you fix the Dell WiFi not turning on issue and get back online quickly and effectively.
Check the Physical WiFi Switch and Function Keys
Some Dell models come with a dedicated physical WiFi switch located on the sides or front panel of the laptop. Ensure this switch is set to the "On" position.
If there is no physical switch, try toggling the wireless functionality using the Fn (Function) key combination:
Press Fn + F2, Fn + PrtScr, or Fn + a WiFi icon key, depending on your Dell model.
Look for a WiFi indicator light or on-screen confirmation.
This simple step can often restore WiFi capability, especially if it was accidentally disabled.
Enable WiFi from Windows Settings
Sometimes the WiFi adapter is disabled at the software level, and you may not even realize it. This often occurs after a Windows update, a third-party utility change, or accidental modification of network settings.
To check:
Navigate to Settings > Network & Internet > Wi-Fi.
If you see a message like "Wi-Fi is turned off", click Change adapter options.
In the Network Connections window, right-click the wireless adapter and select Enable.
This reactivates your adapter and should allow you to reconnect to nearby networks.
Run the Network Troubleshooter
If enabling WiFi manually doesn't help, try letting Windows diagnose the problem for you. The Network Troubleshooter is a built-in utility in Windows 10 that can automatically detect and fix common connectivity issues—especially those related to settings, protocols, and adapter recognition.
To use it:
Go to Settings > Update & Security > Troubleshoot > Additional troubleshooters.
Select Internet Connections, then click Run the troubleshooter.
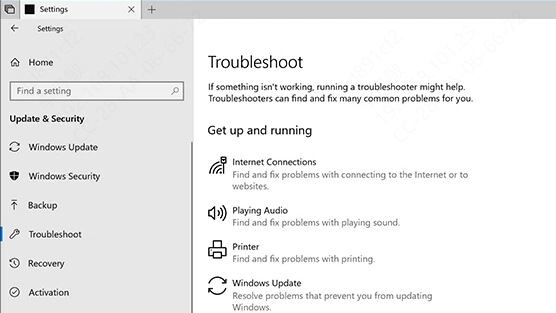
Follow the on-screen prompts.
This step is useful when the root cause is hidden or technical, as it provides a clear diagnosis and often applies a quick fix without user intervention.
Update or Reinstall WiFi Drivers
One of the most overlooked but common reasons for WiFi issues on Dell laptops is a corrupted, outdated, or missing wireless driver. Drivers act as a bridge between the operating system and your hardware, and when they malfunction, your wireless adapter may stop working entirely.
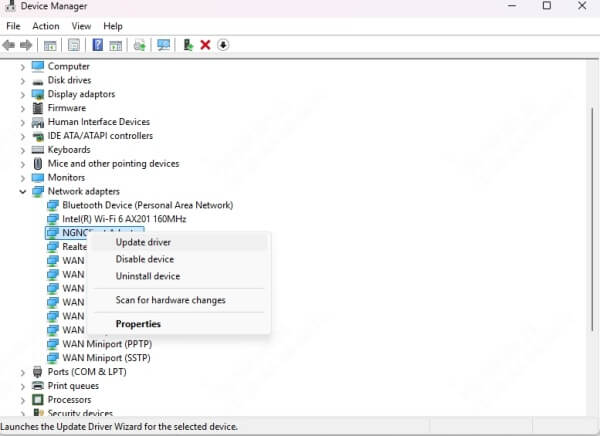
Update Drivers via Device Manager
To start, updating your drivers manually can ensure Windows is running the most compatible version:
Press Win + X, then choose Device Manager.
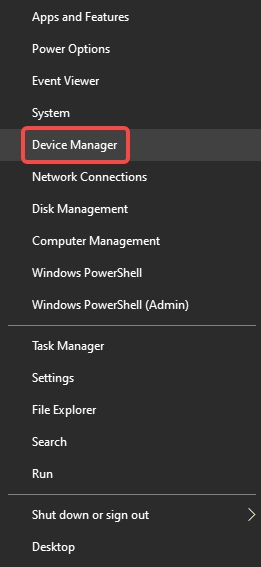
Expand the Network adapters section.

Right-click your wireless adapter and select Update driver.
Click Search automatically for updated driver software.
Windows will search for and install newer drivers if available.
Reinstall the WiFi Driver
If updating doesn't work, the driver may be corrupted:
Right-click the adapter in Device Manager and choose Uninstall device.
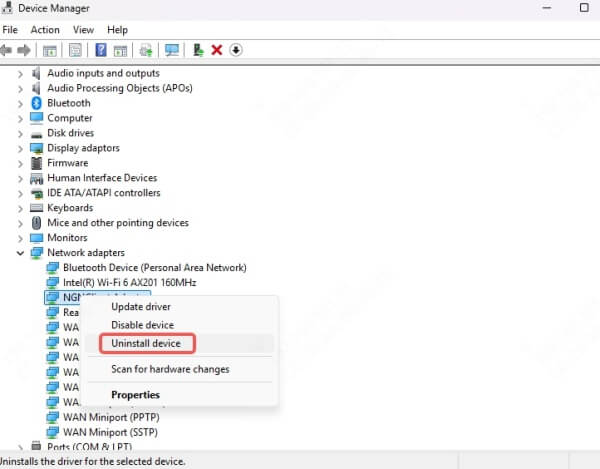
Restart your PC, and Windows will attempt to reinstall the correct driver automatically.
If it doesn't, visit Dell's official website, input your laptop's Service Tag, and manually download the appropriate WiFi driver for Windows 10.
Check WiFi Adapter in BIOS Settings
If your WiFi adapter doesn't even show up in Device Manager, it's possible that BIOS settings have disabled the hardware. BIOS controls fundamental hardware-level options, and disabling the wireless adapter here will make it invisible to Windows.
To verify:
Restart your Dell laptop and press F2 continuously to enter BIOS.
Go to the Wireless section and check for Wireless Device Enable or Internal WLAN options.
Make sure these are enabled, then save changes and exit.
Adjusting BIOS settings is a powerful way to restore hardware that has been disabled at the firmware level.
Verify WLAN AutoConfig Service is Running
The WLAN AutoConfig service is essential for handling wireless connections in Windows 10. If this service is not running or is misconfigured, your system won't detect any WiFi networks, even if the hardware is fully functional.
To check:
Press Win + R, type services.msc, and hit Enter.
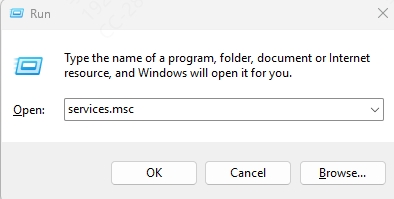
Locate WLAN AutoConfig in the list.
Right-click it, choose Properties, set Startup type to Automatic, and start the service if it's stopped.
Ensuring this background service is operational is a key step toward stabilizing wireless connectivity.
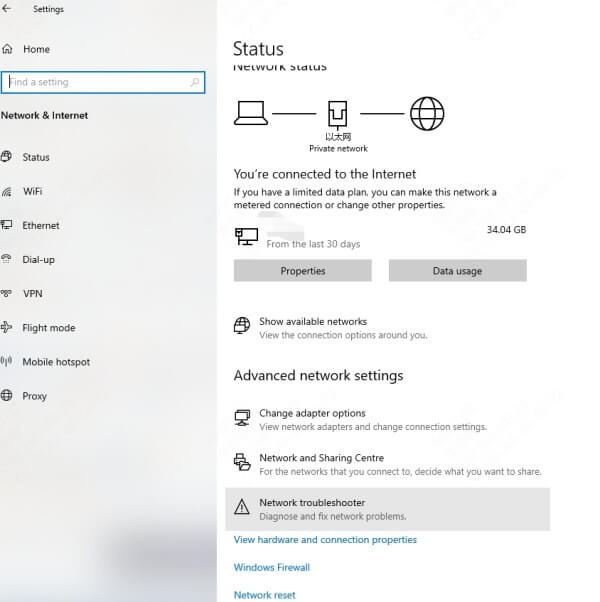
Reset Network Settings in Windows 10
When WiFi issues stem from deep networking conflicts, incorrect DNS, or proxy settings, a full network reset can eliminate lingering problems by wiping and reinstalling all network components.
To reset:
Go to Settings > Network & Internet > Status.
Scroll down and click Network reset.
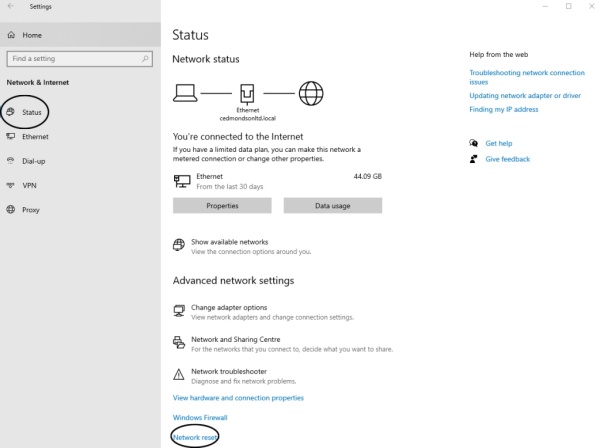
Click Reset now, then restart your PC.
This action resets your adapter configuration and clears problematic registry values.
Check for Windows 10 Updates
Sometimes, simply updating Windows 10 can resolve stubborn WiFi problems by replacing broken system files or incompatible drivers. Microsoft regularly patches networking bugs and compatibility issues through cumulative updates.
To check:
Open Settings > Update & Security > Windows Update.
Click Check for updates and install all available updates.
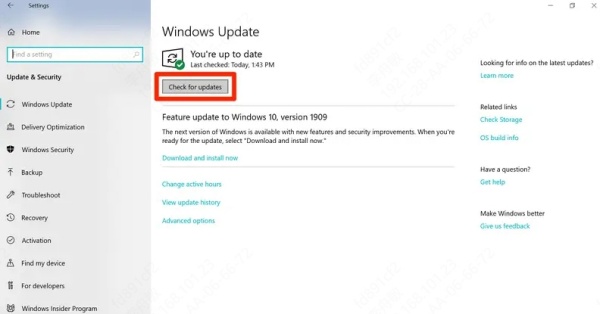
Restart your computer once the installation completes.
Staying current ensures that your system uses the most stable and supported configurations.
Use Command Prompt to Reset TCP/IP Stack
WiFi connectivity can also be disrupted by broken or corrupt TCP/IP configurations, which can occur due to malware, failed installations, or registry tweaks. You can reset your entire network stack using a few quick Command Prompt entries.
To do this:
1. Open Command Prompt as Administrator.
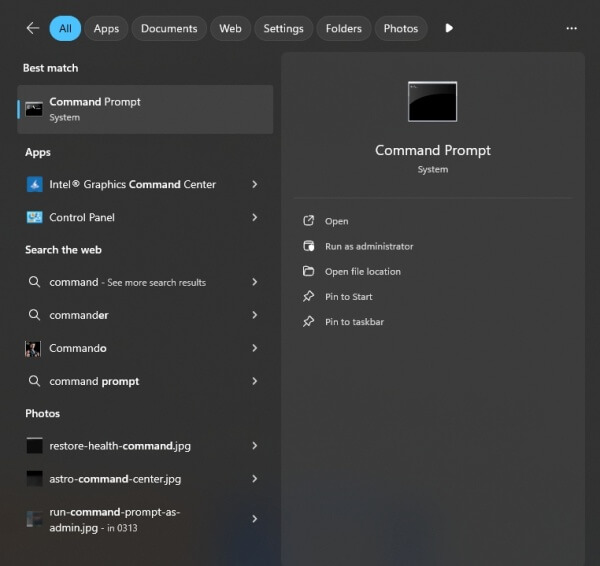
2. Enter the following commands, one by one:
netsh winsock reset
netsh int ip reset
ipconfig /release
ipconfig /renew
ipconfig /flushdns
3. Restart your laptop.
These commands will clear the DNS cache, renew your IP, and reset core network protocols.
Disable Airplane Mode
It might sound obvious, but Airplane mode disables all wireless communications, including WiFi. Sometimes, users unknowingly turn this feature on, especially using hotkeys.
To verify:
Press Win + A to open the Action Center and check that Airplane mode is off.
Or go to Settings > Network & Internet > Airplane mode to toggle it off manually.
Toggling Airplane mode on and then off again can sometimes refresh wireless services and re-enable WiFi.
Check for Conflicting VPN or Security Software
Some third-party programs—especially VPN clients, firewall utilities, or antivirus software—can interfere with wireless adapters, either by disabling them or altering critical network settings.
Try these steps:
Temporarily disable antivirus software and any active VPN clients.
Restart your computer and check if WiFi returns.
If it works, update or replace the conflicting software.
This is especially common in corporate laptops with heavy endpoint security tools.
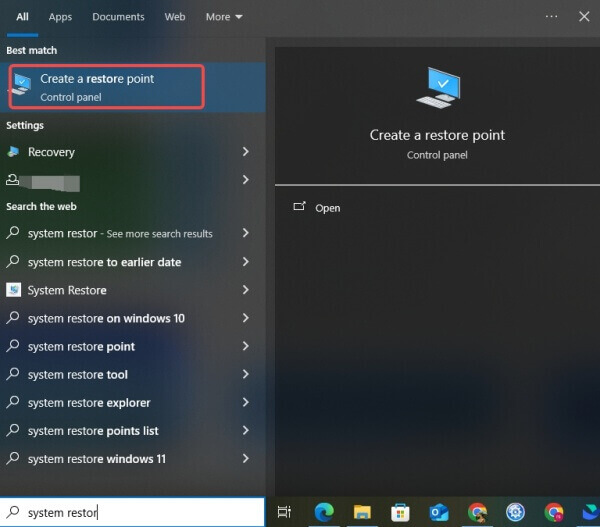
Perform a System Restore
If your Dell laptop's WiFi worked fine earlier and stopped suddenly, using System Restore can revert the system to a previous working state without affecting your personal files.
To restore:
Type System Restore in the Start menu, then click Create a restore point.
In the System Protection tab, click System Restore.
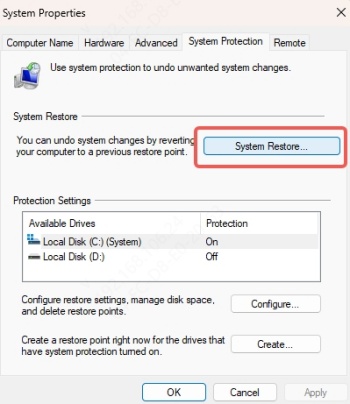
Follow the wizard and select a restore point before the issue occurred.
This method can undo incompatible driver updates or registry changes that caused the issue.
Use Driver Talent to Automatically Update WiFi Drivers
Manually updating drivers can be time-consuming, and Windows doesn't always detect the most recent versions. Driver Talent is a professional-grade driver management tool that helps you automatically detect, repair, and update all your device drivers—especially your WiFi adapter drivers—with just a few clicks.
Why Use Driver Talent?
One-click automatic driver updates
Detects missing, outdated, or corrupt WiFi drivers
Supports all Dell laptop models and Windows 10 versions
Includes backup & restore options for driver safety
How to Use Driver Talent
Download and install Driver Talent from the official website.
Launch the program and click Scan to detect outdated or missing drivers.
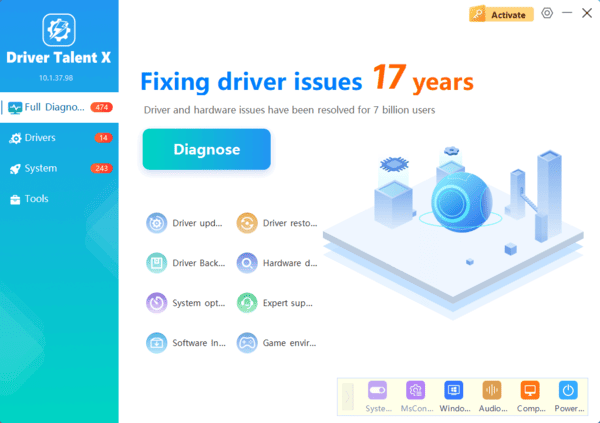
Click Download or Repair next to your wireless adapter.

Restart your PC after the update is complete.
Using Driver Talent ensures that your system uses the latest and most stable driver versions, improving overall connectivity and performance.
Contact Dell Support or Consider Hardware Repair
If none of the solutions above resolve your problem, the issue may be hardware-related, such as a failing internal WiFi card or motherboard issue. Dell provides both in-warranty support and diagnostic tools to help you identify these issues quickly.
Press F12 at startup to enter Dell Diagnostics.
Run a full hardware scan and note any failures.
Visit Dell Support or contact their service center for a repair appointment.
Conclusion
When your Dell laptop WiFi won't turn on in Windows 10, it can stem from a wide variety of sources—from minor misconfigurations to severe hardware failures. This guide provides a step-by-step breakdown of all possible fixes, from enabling settings to using Driver Talent for smart driver updates. With the right approach, you can restore full wireless functionality and avoid future connectivity setbacks.
