Wireless adapter problems in Windows 10 can make WiFi disappear completely or turn a normal connection into a frustrating mess of random disconnects, low speed, and failed network detection. In some cases, the wireless option vanishes from settings. In others, the adapter appears in Device Manager but does not work properly. These issues can affect work, streaming, gaming, downloads, and video calls. The good news is that most wireless adapter problems are caused by software, settings, or driver conflicts rather than permanent hardware failure. If you troubleshoot in the right order, you can usually find the cause and restore your wireless connection without replacing the adapter.
Common Signs of Wireless Adapter Problems
Wireless adapter issues do not always look the same. Some users cannot see any WiFi networks at all. Others see available networks, but the laptop fails to connect or keeps disconnecting
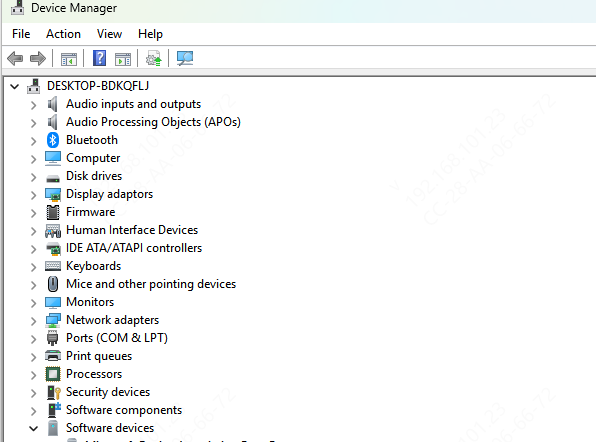
Another common sign appears in Device Manager. The wireless adapter may show a warning icon, display an error such as This device cannot start, or disappear entirely
Start With the Basic Checks
Before changing advanced settings, restart both the PC and the router. A full restart can clear temporary communication issues and restore the adapter if the problem was caused by a short-term glitch. If the router has been running for a long time, restarting it is worth trying even if other devices seem connected
Next, confirm whether other devices can use the same WiFi network normally. If phones, tablets, and other computers also have trouble connecting, the issue may be with the router or internet service rather than Windows 10. If only one PC has the problem, focus on the wireless adapter and its settings

Check Whether the Adapter Is Enabled
A surprisingly common issue is that the wireless adapter is disabled. Open Device Manager and look under Network adapters. If the wireless adapter appears disabled, enable it and test the connection again
You should also check whether airplane mode is turned on. On some laptops, wireless functions can also be disabled by a keyboard shortcut, function key, or hardware switch. If the adapter is disabled at that level, Windows may act as though the wireless hardware is missing or broken
Forget and Reconnect to the Network
If the adapter appears to work but one network will not connect properly, remove the saved WiFi profile and reconnect. A corrupted wireless profile can cause repeated authentication problems, connection loops, or no internet access even when the signal is strong
Delete the saved network in Windows 10 and then reconnect by entering the password again. This forces Windows to create a fresh profile, which can solve a surprising number of connection issues without touching the driver
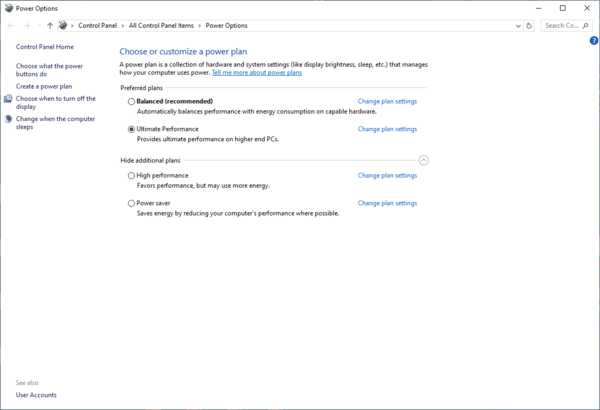
Adjust Power Management Settings
Open the wireless adapter properties in Device Manager and disable the option that allows the computer to turn off the device to save power
Then check the Windows power plan and avoid overly aggressive battery-saving settings if wireless stability matters more than small power savings
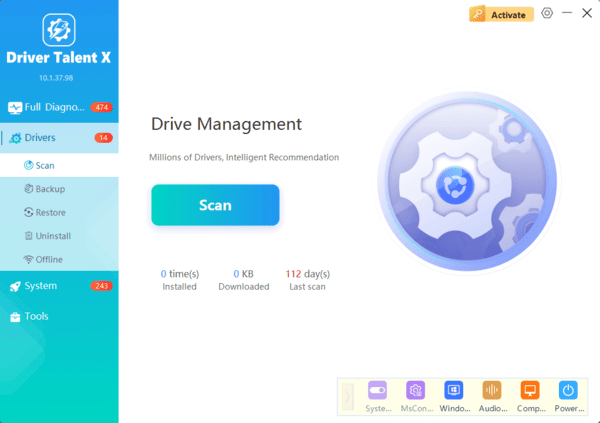
Use Driver Talent X to Repair Wireless Drivers
If you are not sure which driver is causing the problem, Driver Talent X can make the repair process easier.
Click Full Repair to fix the affected drivers, then restart the PC. After rebooting, test whether the adapter is visible again, whether WiFi networks appear normally, and whether the connection remains stable. This is especially useful when the problem started after a Windows update or when several drivers may have been affected at the same time.
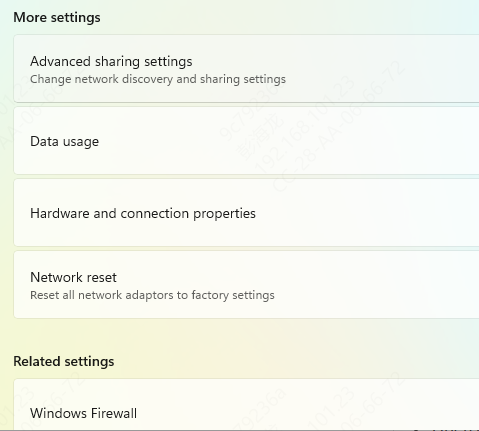
Reset Network Settings
If the adapter appears normal but network behavior is still broken, use the Windows 10 network reset feature. This rebuilds important network components and clears broken configuration data that may have been left behind by old drivers, VPN software, failed updates, or previous network changes
After the reset, Windows will restart and you will need to reconnect to the WiFi network. This is a good step when the adapter is present but the connection still fails, disappears, or behaves inconsistently
Check BIOS and Hardware Possibilities
If the wireless adapter does not appear in Windows at all, BIOS or firmware settings should be checked. Some systems allow the wireless device to be disabled at the firmware level. In that case, Windows may not detect it properly no matter how many driver fixes you try
If the adapter is enabled in BIOS and still fails to appear after driver repair, there is a chance the hardware is failing. A simple way to test this is to use a USB WiFi adapter. If the USB adapter works normally while the internal one does not, the built-in wireless card or antenna may be the real problem

Conclusion
Wireless adapter problems in Windows 10 are usually caused by a small set of common issues: damaged drivers, power management settings, broken network configuration, router compatibility, or interference. The best troubleshooting order is simple. Start by restarting the PC and router, checking whether the adapter is enabled, reconnecting to the network, and adjusting power settings.
If the problem continues, reinstall or repair the wireless driver and related chipset drivers. Driver Talent X can speed up this part by scanning the system and repairing the drivers most likely to affect wireless stability. If software fixes do not solve the issue, testing another network and using a USB WiFi adapter can help determine whether the problem is actually a failing internal wireless card or a router-side issue.
