Intel WiFi adapters are among the most widely used wireless components in laptops and desktops running Windows 10 and Windows 11. They're also among the most frequently broken by Windows updates. The generic driver either doesn't support all adapter features or fails to initialize the hardware entirely, leaving the adapter with no connection or a driver error in Device Manager. This guide covers every fix for Intel WiFi driver failures, from a one-click rollback to a full clean reinstall, along with automated and manual methods depending on your situation.
Fix 1: Roll Back the Intel WiFi Driver
If WiFi stopped working immediately after a Windows update and the adapter is still visible in Device Manager, rolling back the driver is the fastest fix
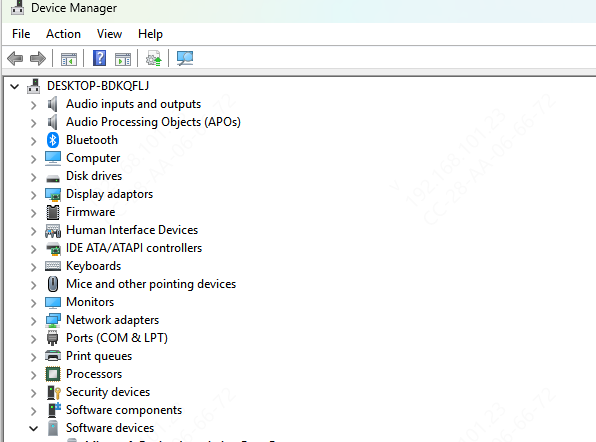
Open Device Manager. Expand Network Adapters. Right-click the Intel wireless adapter and select Properties. Go to the Driver tab. If the Roll Back Driver button is active and not greyed out, click it
Select a reason when prompted and confirm. Restart the PC and test the WiFi connection
Fix 2: Download and Reinstall the Intel WiFi Driver Manually
A clean reinstall removes the corrupted driver files entirely and installs a fresh copy, which resolves issues that updating alone cannot fix.
Download the replacement driver before uninstalling the existing one. Without a replacement ready, uninstalling the network adapter driver leaves the PC with no WiFi and no way to download anything afterward
Once the driver file is downloaded, uninstall the existing driver. Open Device Manager, right-click the Intel wireless adapter, and select Uninstall device. In the confirmation dialog, check "Delete the driver software for this device" if the option appears. Click Uninstall
Restart the PC. After the restart, run the downloaded driver installer as administrator and follow the prompts. Restart again after installation and confirm the adapter appears in Device Manager without any error icon. Connect to WiFi and test
Fix 3: Fix Intel WiFi Driver Automatically with Driver Talent X
When the adapter model isn't clearly identified, the Intel support site is confusing to navigate, or the downloaded installer keeps failing, Driver Talent X detects the exact Intel adapter hardware ID and installs the correct matched driver without requiring any manual identification
This method is particularly effective when the adapter has completely disappeared from Device Manager after a Windows feature update, or when multiple Intel driver components are broken simultaneously and need a full repair rather than just a version update

Fix 4: Disable and Re-enable the Intel WiFi Adapter
A quick device state reset sometimes resolves Code 10 errors and temporary initialization failures without requiring a full driver reinstall.
Open Device Manager. Right-click the Intel wireless adapter and select Disable device. Wait ten seconds. Right-click it again and select Enable device. Test the WiFi connection
If this doesn't resolve it, try a lightweight reinstall: right-click the adapter, select Uninstall device, but do not check the option to delete the driver software. Restart the PC. Windows will detect the adapter on startup and reinstall the driver from its cached files

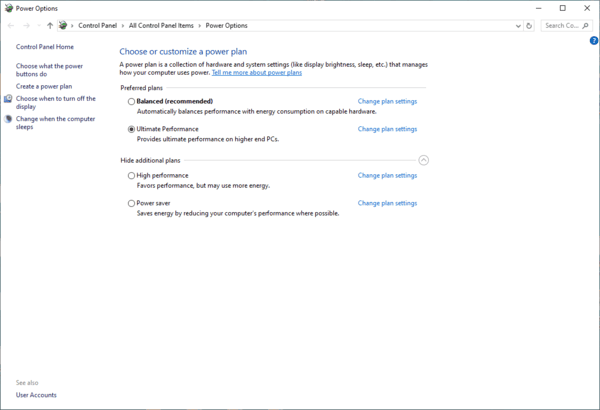
Fix 5: Change Power Management Settings for the Intel WiFi Adapter
Open Device Manager. Right-click the Intel wireless adapter and select Properties. Go to the Power Management tab. Uncheck "Allow the computer to turn off this device to save power." Click OK
For a more thorough fix, open the Control Panel and go to Power Options. Click Change plan settings next to the active plan, then Change advanced power settings. Expand Wireless Adapter Settings, then Power Saving Mode, and change it to Maximum Performance
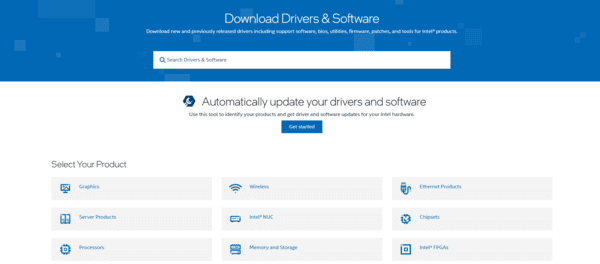
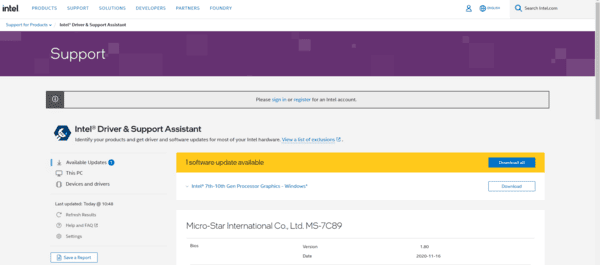
Fix 6: Use Intel Driver and Support Assistant
Intel's own detection tool scans the system and identifies available driver updates for all Intel hardware components including the WiFi adapter.
Download the Intel Driver and Support Assistant from intel.com/support/detect. Install and run it. The tool detects the Intel WiFi adapter and shows whether a newer driver is available. Download and install through the tool if an update is listed. Restart and test
Note that Intel DSA installs the latest available version, which may not always be the most stable for a specific Windows build. If the connection fails again after the Intel DSA update, the OEM driver from the laptop manufacturer's site is often the safer choice
Fix 7: Reset the Network Stack
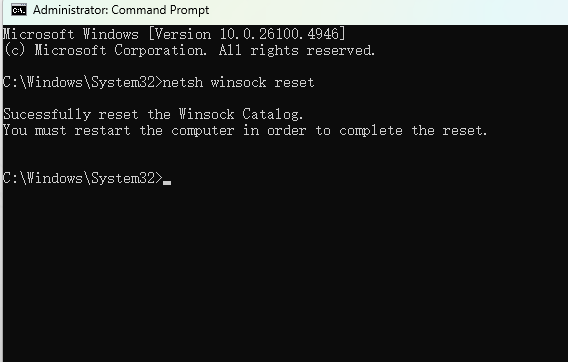
When the Intel driver is installed correctly but the adapter shows as connected with no internet access, the TCP/IP stack configuration may be corrupted independently of the driver.
Open Command Prompt as administrator by pressing Win, typing cmd, right-clicking Command Prompt, and selecting Run as administrator. Run these commands one at a time:
netsh winsock reset
netsh int ip reset
ipconfig /release
ipconfig /flushdns
ipconfig /renew
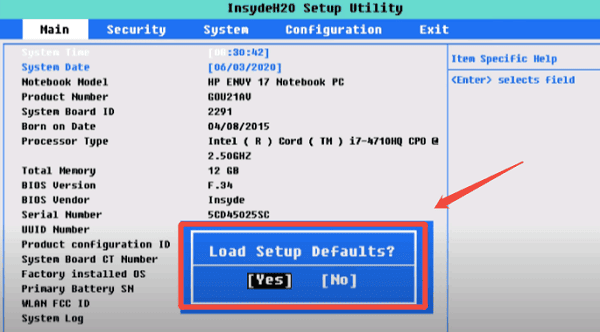
Fix 8: Check BIOS Settings
On some laptops, the Intel WiFi adapter can be disabled in BIOS settings. No Windows-level fix overrides a BIOS-level disable.
Restart the laptop and press the BIOS key during boot — usually F2, F10, or Delete depending on the manufacturer
Navigate to a Security or Advanced section and look for a Wireless LAN or Network controller option. If it is set to Disabled, change it to Enabled
Press F10 to save and exit. After the laptop restarts, check Device Manager to confirm the Intel adapter is present
Conclusion
Intel WiFi driver failures on Windows 10 and Windows 11 are most commonly caused by Windows Update replacing the Intel-provided driver with an incompatible generic version. Roll Back Driver resolves post-update failures instantly when a previous version was saved. For clean reinstallation, downloading the OEM driver from the laptop manufacturer's site and performing a full uninstall before installing is the most reliable manual approach. Driver Talent X automates hardware identification and driver matching in a single step, which is the practical choice when navigating Intel's support site or identifying the correct driver package is unclear.
