A malfunctioning Realtek audio driver can disrupt your entire PC experience. Whether you're trying to listen to music, attend virtual meetings, or enjoy a game, broken audio renders your system incomplete. In this guide, we’ll walk you through comprehensive, step-by-step solutions to resolve the “Realtek audio driver not working” issue on Windows 10 and 11.
Common Symptoms of Realtek Audio Driver Issues
Before diving into the solutions, here are some typical signs that indicate a problem with your Realtek audio driver:
No sound from speakers or headphones
Realtek audio driver missing from Device Manager
Audio device not detected
Red X on the speaker icon in the taskbar
“This device cannot start (Code 10)” error
Sound options greyed out in Settings
If any of these issues sound familiar, continue reading for proven fixes.
How to Fix Realtek Audio Driver Not Working
1. Check Physical Audio Connections First
Before exploring complex fixes, it’s important to begin with the basics. A surprisingly large number of audio issues stem from loose cables, disconnected devices, or broken headphone jacks. These hardware-level mishaps are easy to overlook but just as easy to fix.
Verify that your:
Speakers/headphones are properly plugged in
Audio device is powered on
Cables aren’t damaged or frayed
Correct audio output device is selected in Windows
Sometimes, the issue is as simple as a loose cable or incorrect output selection.
2. Enable and Set Realtek as Default Playback Device
Even if your drivers are functioning properly, Windows might still route audio to the wrong output. This is a common problem, especially after Windows updates or changes to hardware. Ensuring that Realtek is enabled and selected as the default playback device can quickly restore sound.
Here’s how:
Right-click the speaker icon in the taskbar → Select Sounds Settings
Go to the Playback tab
Find Realtek High Definition Audio
Right-click > Enable (if disabled)
Set as Default Device
If it’s missing entirely, proceed to reinstall the driver.
3. Reinstall Realtek Audio Driver via Device Manager
Drivers can become corrupted, outdated, or conflicted with other software, leading to malfunction. A clean reinstallation through Device Manager is a fast and effective way to fix Realtek audio driver problems. This method ensures that any damaged files are removed and replaced with fresh ones.
Follow these steps:
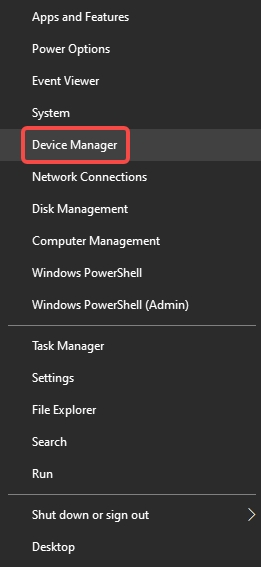
Press Windows + X → Choose Device Manager
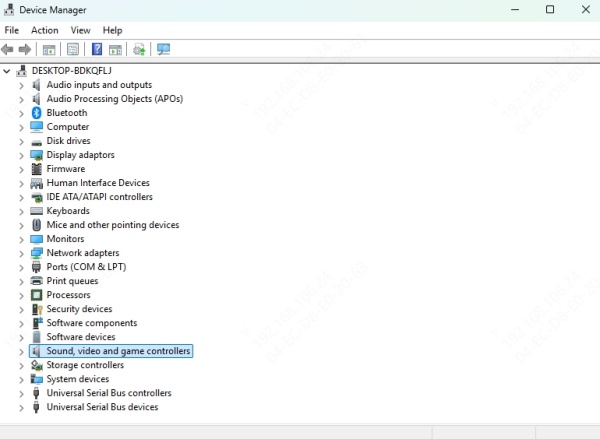
Expand Sound, video and game controllers
Right-click on Realtek High Definition Audio → Uninstall device
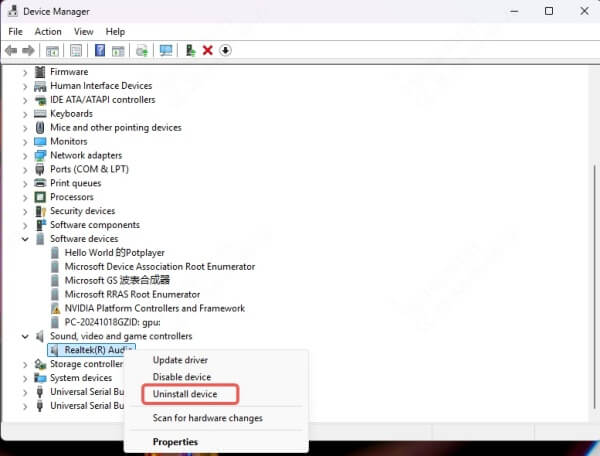
Check Delete the driver software for this device → Click Uninstall
Reboot your PC
Windows will try to reinstall the driver automatically. If not, download the latest one from the official source.
4. Download Latest Realtek Drivers from Manufacturer’s Website
When Windows fails to install the proper drivers, or installs a generic version, getting the latest Realtek audio driver directly from the source guarantees compatibility and full functionality. Manufacturers often provide newer, bug-free versions on their websites.
To manually update:
Visit the Realtek Audio Drivers Download Page
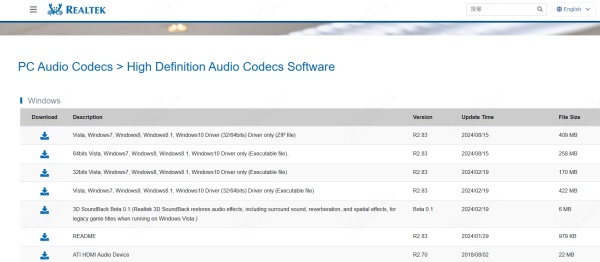
Select High Definition Audio Codecs (HDA) or Audio Driver for Windows
Choose your Windows version
Download and install the appropriate driver
Restart your system after installation to apply changes.
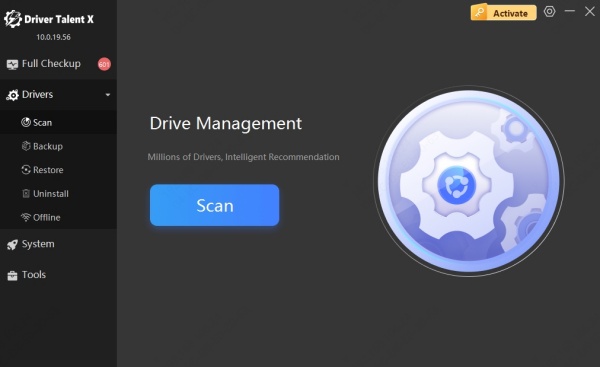
5. Use Driver Talent X to Update and Repair Realtek Driver Automatically
Manually identifying the correct audio driver, especially with variations between laptops, desktops, and motherboards, can be time-consuming. Driver Talent X simplifies this process by automatically scanning your system, identifying missing or corrupted drivers, and fixing them with one click.
How to use Driver Talent X:
Download and install Driver Talent X
Launch the tool and click Scan
Wait for it to detect issues with the Realtek audio driver
Click Repair Now or Upgrade
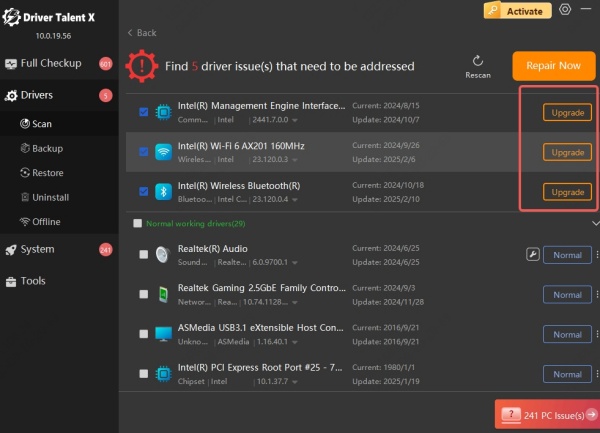
Restart your computer after the updates
Driver Talent X is an efficient, hassle-free solution that ensures your audio driver is always up-to-date.
6. Enable Realtek Audio in BIOS (If Disabled)
In rare cases, the onboard Realtek audio may be disabled directly from the BIOS or UEFI firmware. This often happens after a BIOS reset or hardware change. Without it enabled at the firmware level, no operating system tweaks or driver updates will help.
To re-enable Realtek in BIOS:
Reboot your PC and enter BIOS/UEFI (usually by pressing Del or F2 at startup)
Navigate to Integrated Peripherals or Advanced
Look for Onboard Audio, HD Audio, or Realtek Audio
Set it to Enabled
Save changes and exit BIOS
Once back in Windows, check Device Manager again for Realtek.
7. Run Windows Audio Troubleshooter
Windows includes a built-in troubleshooter that can quickly diagnose and fix minor audio issues without manual intervention. This tool is useful when you're unsure of the root cause or want a quick attempt at automated repair.
To use the troubleshooter:
Go to Settings > System > Sound
Scroll down to Advanced > Troubleshoot common sound problems
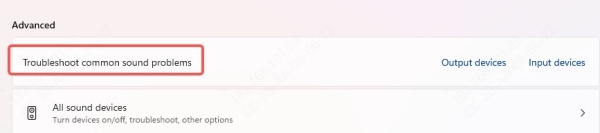
Follow the on-screen prompts
This tool can reset your audio settings and sometimes resolve conflicts.
8. Restore Realtek Audio Manager
Realtek Audio Manager is a useful utility that provides access to audio enhancements, jack detection, and output settings. If it's missing, you may lose access to advanced configuration options. Restoring the manager can help recover features that are necessary for optimal sound experience.
Here’s how to find or restore it:
Go to C:\Program Files\Realtek\Audio\HDA
Double-click RtkNGUI64.exe to launch the manager
Create a shortcut to your desktop if needed
If missing, reinstall the driver from Realtek or your OEM to restore the utility.
9. Disable Microsoft UAA Bus Driver (If Conflict Exists)
The Microsoft UAA (Universal Audio Architecture) Bus Driver sometimes interferes with Realtek drivers. This legacy component may override or conflict with Realtek’s control, especially on older systems or after certain Windows updates. Disabling it can resolve such conflicts.
Steps to disable UAA:
Open Device Manager

Click View > Show hidden devices
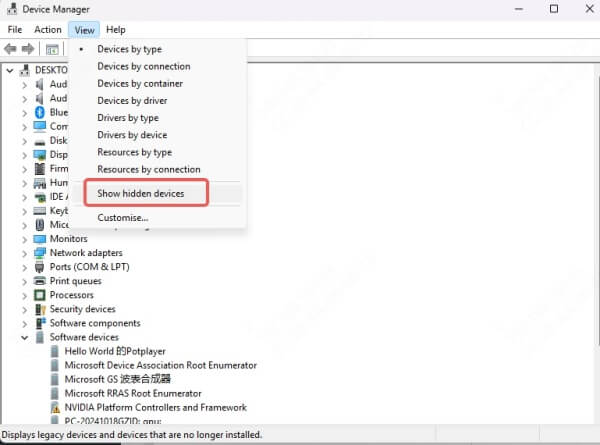
Expand System Devices
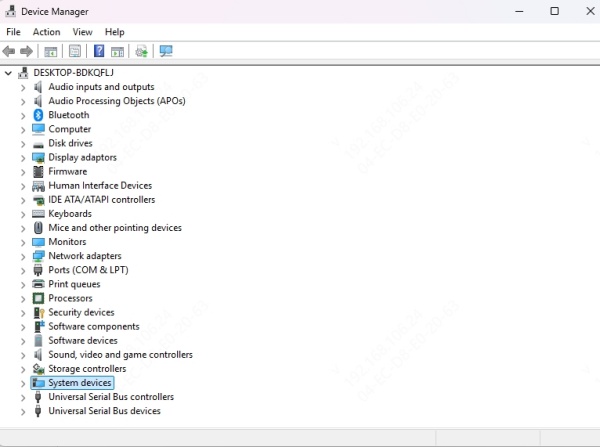
Look for Microsoft UAA Bus Driver
Right-click > Disable
Then reinstall the Realtek driver as outlined above.
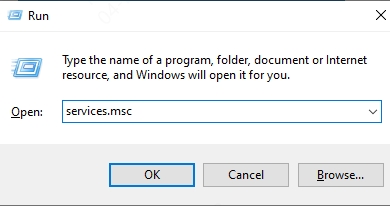
10. Reset Windows Audio Services
Windows audio depends on several background services. If these services are stopped, stuck, or misconfigured, you may experience silence even if everything else appears fine. Restarting them refreshes the audio system and can resolve unresponsive drivers.
To restart audio services:
Press Windows + R, type services.msc, press Enter
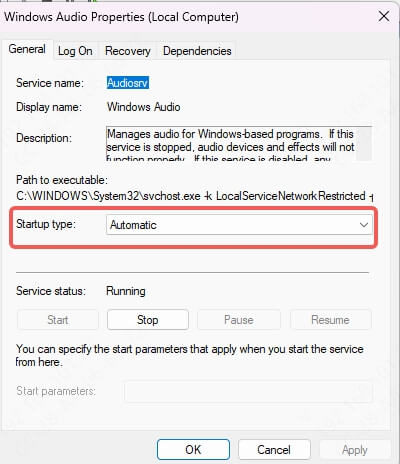
Locate these services:
Windows Audio
Windows Audio Endpoint Builder
Plug and Play
For each:
Right-click > Restart
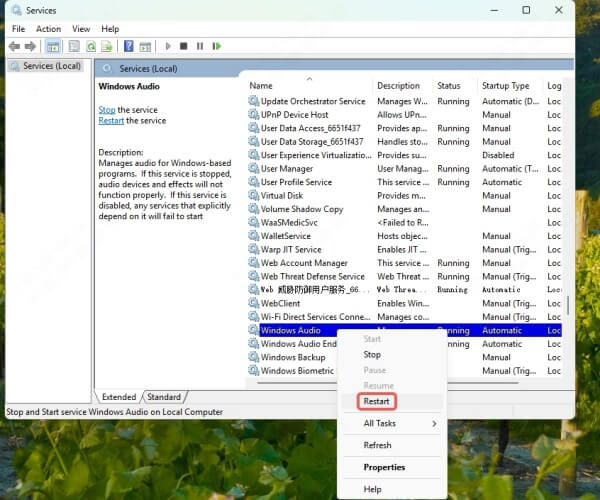
Ensure Startup Type is set to Automatic
Check your audio after restarting these services.
11. Try System Restore or Windows Update Rollback
If your audio stopped working immediately after a Windows update, driver update, or software installation, a system restore may revert your machine back to a functional state. This is especially helpful when the exact cause of the issue is unclear.
To perform a system restore:
Go to Control Panel > Recovery > Open System Restore
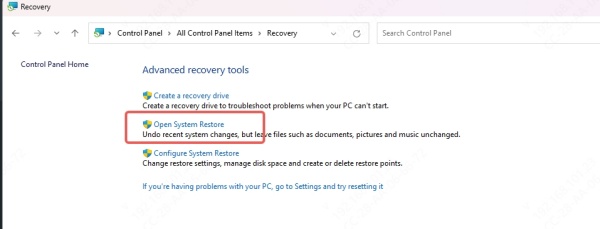
Choose a restore point before the issue occurred
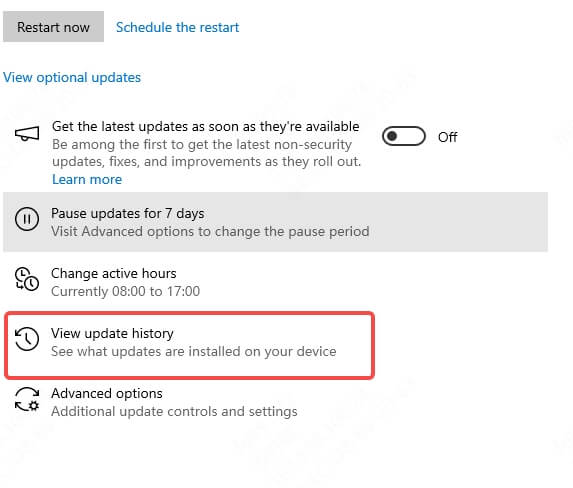
You can also rollback recent Windows updates from Settings > Update & Security > Windows Update > View update history.
12. Check for Hardware Malfunction
If software fixes fail to resolve the problem, hardware damage may be to blame. Motherboard audio chips, jacks, or connectors can malfunction over time due to power surges, moisture, or wear and tear. Verifying hardware functionality helps isolate the root cause.
Try the following:
Connect different headphones or speakers
Use a USB sound card to test audio output
Boot into Linux or use a Live USB to test audio
If USB audio works, onboard audio hardware might be faulty
In such cases, professional repair or hardware replacement may be required.
Final Thoughts
Resolving the Realtek audio driver not working issue requires a thorough, methodical approach. From basic settings to driver reinstallations and BIOS tweaks, these methods cover all angles. Keeping your drivers updated using tools like Driver Talent X can prevent such issues from recurring and ensure optimal system performance.
