If you're seeing the "wireless network capability is turned off" message after running Windows Network Diagnostics, you're not alone. This frustrating issue prevents users from connecting to Wi-Fi networks, affecting laptops and desktops alike.
In this comprehensive guide, we’ll walk you through proven solutions to fix this error and restore your wireless internet connection on Windows 10, Windows 11, and even earlier versions.
Understanding the “Wireless Capability is Turned Off” Error
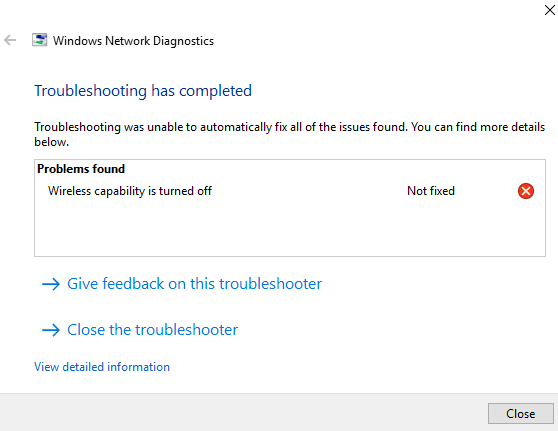
When you run the Windows troubleshooter, you may receive this result: “Wireless capability is turned off”
This diagnostic message means that Windows cannot enable your computer’s wireless function, typically because it's been manually disabled or the system is misconfigured. This is often caused by:
A disabled wireless network adapter
A function key disabling Wi-Fi
Power management settings
Outdated or corrupted network drivers
Group Policy restrictions
BIOS or firmware limitations
Fix 1. Enable Wireless Capability Using Function Keys
Many laptops are equipped with dedicated function keys to control wireless functionality. These keys allow users to quickly toggle the Wi-Fi adapter without diving into system settings. However, they can easily be pressed accidentally, disabling your wireless connection without your knowledge.
Look for the Wi-Fi icon on your keyboard (usually on F2, F3, F5, or F12).
Hold down the Fn key and press the corresponding function key.
Observe the Wi-Fi indicator light on your laptop to confirm it’s on.
Fix 2. Turn On Wireless Network Using Network Settings
Sometimes, the wireless adapter may have been disabled from the Control Panel, particularly after driver installations or Windows updates. Re-enabling it through the Network Connections window can quickly restore wireless functionality.
Steps:
Press Windows + R, type ncpa.cpl, and press Enter.

In the Network Connections window, locate your wireless adapter (usually labeled Wi-Fi).
If it shows Disabled, right-click and select Enable.
Fix 3. Check Windows Mobility Center for Wireless Control
The Windows Mobility Center provides centralized control for key mobile PC features, including wireless connections. On many laptops, wireless capability can be toggled directly from this hub, especially on business-class devices like Dell, HP, or Lenovo.
To access:
Press Windows + X, then select Mobility Center.
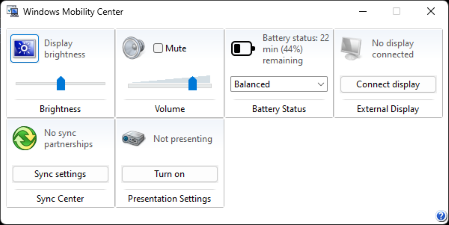
Look for a Wireless Network section.
Click Turn Wireless On, if available.
Fix 4. Re-enable Wireless Adapter in Device Manager
The Device Manager is the go-to tool for managing hardware in Windows. If your wireless network adapter is disabled due to a driver conflict or manual change, it can be reactivated here in just a few clicks.
Steps to fix:
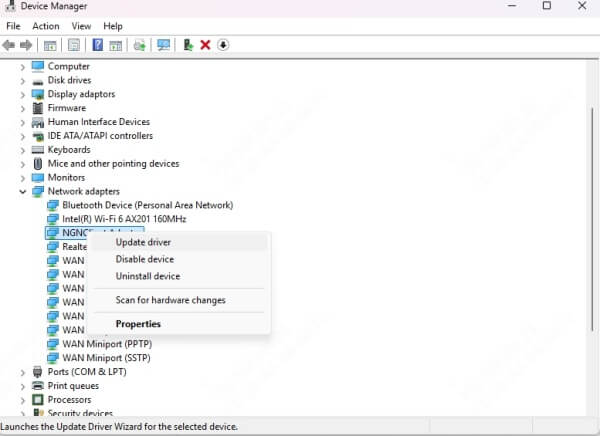
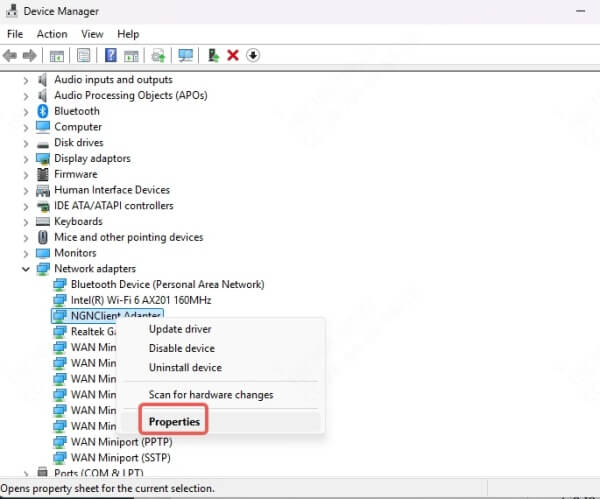
Press Windows + X and select Device Manager.

Expand Network adapters.

Right-click your wireless adapter (e.g., Intel(R) Wireless-AC, Realtek Wireless) and select Enable.
If it’s already enabled, try selecting Disable device then Enable device again.
Fix 5. Update Wireless Network Adapter Drivers
Drivers are crucial for ensuring that your wireless adapter communicates properly with the operating system. Outdated or corrupted drivers are a common source of connectivity problems, including the “wireless capability is turned off” error. Updating them ensures smooth performance and compatibility.
Update via Device Manager:
Open Device Manager.
Right-click your wireless adapter and select Update driver.
Choose Search automatically for driver.
Or use driver update software like Driver Talent, which can:
Detect missing or outdated drivers automatically
Download and install the latest certified versions
Backup and restore drivers easily
Steps to use Driver Talent:
Step 1. Download and install Driver Talent on your PC.
Step 2. Go to Drivers section and click Scan.

Step 3. Review the results and update the outdated drivers.
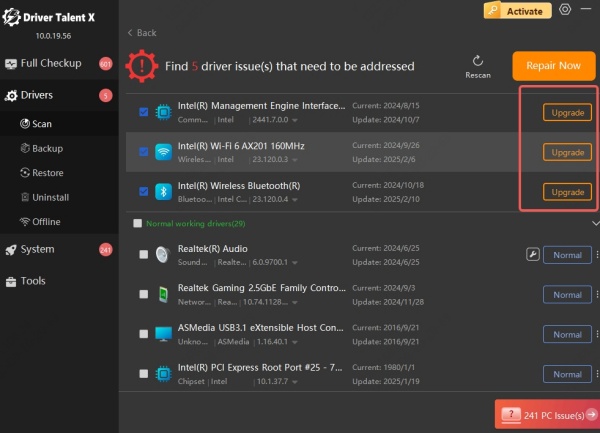
Step 4. Reboot your PC to apply the changes.
Fix 6. Disable Power Saving for Network Adapter
Windows includes aggressive power-saving features, especially for laptops. These features might turn off your wireless adapter to conserve battery, but in doing so, they can also disable your wireless connection without notice.
To fix:
Go to Device Manager > Network Adapters.
Right-click your wireless adapter > Properties.
Navigate to the Power Management tab.
Uncheck Allow the computer to turn off this device to save power.
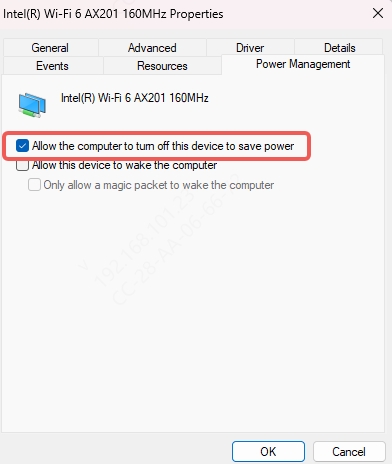
Click OK to apply changes.
Fix 7. Reset TCP/IP Stack and Winsock
Corrupted network settings can silently interfere with your connection. Resetting the TCP/IP stack and Winsock catalog can clear any misconfigurations and restore internet access, especially after malware removal or failed software installations.
Use Command Prompt (Admin):
1. Press Windows + X, select Command Prompt (Admin) or Windows Terminal (Admin).

2. Type the following commands one by one:
netsh int ip reset
netsh winsock reset
ipconfig /release
ipconfig /renew
ipconfig /flushdns
3. Restart your PC.
Fix 8. Use BIOS Settings to Enable Wireless Capability
Sometimes, wireless network capability can be disabled at a low level through BIOS/UEFI settings, especially after firmware updates or security lockdowns. Verifying the settings in your BIOS ensures the wireless adapter is not restricted before Windows even starts.
Steps:
Restart your PC and enter BIOS (commonly F2, F10, or DEL during boot).
Navigate to Advanced > Wireless Configuration.
Ensure the Wireless LAN is enabled.
Save and exit.
Conclusion
The "wireless network capability is turned off" error can be resolved through a combination of hardware checks, driver updates, and Windows settings adjustments. By following the comprehensive steps above, you can restore your wireless connectivity and avoid future interruptions.
Pro Tip: Keep your drivers up to date with tools like Driver Talent for optimal performance and fewer connection issues.
