A blinking cursor during Windows boot from USB is a critical error that halts system startup, leaving users staring at a black screen with only a cursor blinking indefinitely. This typically indicates a boot failure, often caused by improper configuration of boot media, BIOS settings, or corrupted boot records. For users trying to install or repair Windows via USB, this issue can become a major roadblock. In this in-depth guide, we’ll explore the most effective methods to fix this problem and help you successfully boot into Windows.

Understanding the Blinking Cursor
Symptoms of the Problem
A black screen with a white cursor blinking in the top-left.
No access to login screen or desktop.
No error messages.
Keyboard may or may not respond.
Difference Between Normal Boot and Cursor Hang
In a normal boot, the system loads BIOS/UEFI, then Windows. But in a blinking cursor situation, the handoff to the OS never happens—your system gets stuck in limbo.
Blinking Cursor vs. Boot Loop
In a boot loop, your PC restarts continuously. With a blinking cursor, it just sits... blinking. Both are boot-related issues but require different fixes.
Common Scenarios Where This Happens
After a Windows Update: Sometimes, updates mess with boot files or introduce incompatibility.
When Booting from USB: Improper USB formatting or wrong boot mode (UEFI/Legacy) can trigger it.
On a New PC Build or After Hardware Change: New hardware or reset BIOS settings might confuse your system’s boot order.
BIOS Misconfigurations: Fast Boot, Secure Boot, and incorrect boot order often cause blinking cursor problems.
What Causes the Blinking Cursor Issue When Booting from USB?
Before diving into the fixes, it’s important to understand the root causes behind the blinking cursor:
Improper Boot Order in BIOS/UEFI
Non-bootable USB drive or corrupted ISO file
MBR or GPT partition conflicts
Secure Boot or Fast Boot enabled
Damaged boot sector or missing boot loader
USB drive compatibility issues
Understanding these causes will help us apply the right solution with precision.
Method 1: Check and Correct Boot Order in BIOS/UEFI
One of the most overlooked but crucial elements of booting from a USB is ensuring the BIOS or UEFI is correctly configured. If your system tries to boot from an internal hard drive or another device first, the USB will be ignored, and you may be left with a blinking cursor.
Steps:
Restart your computer and press the BIOS key (usually F2, Del, or Esc) to enter the BIOS/UEFI setup.
Navigate to the Boot tab using your arrow keys.
Ensure that your USB drive is listed as the first boot device.
Save changes (F10) and exit.
Setting the correct boot priority guarantees that your computer will attempt to boot from the USB before any other devices.
Method 2: Recreate a Bootable USB Drive
A bootable USB must be created correctly using tools that format the drive, apply the correct file system, and install boot loaders. If any step in this process fails or if the ISO file is corrupted, your system may hang at a blinking cursor.
Use Rufus (Recommended Tool)
Download and install Rufus.
Insert your USB drive.
Select your USB device under "Device".
Choose your ISO image under “Boot selection”.
Select Partition Scheme as MBR (for Legacy BIOS) or GPT (for UEFI).
Click Start and wait for the process to complete.
Recreating your bootable media ensures all boot files are correctly configured and readable by your system.
Method 3: Disable Secure Boot and Fast Boot
Modern computers often come with Secure Boot and Fast Boot features enabled by default, which can block bootable media that doesn't have a verified signature. These features may also skip USB initialization altogether during startup.
Steps:
Enter BIOS/UEFI settings.
Go to Security > Secure Boot and set it to Disabled.
Go to Boot > Fast Boot and disable it as well.
Save and exit.
Disabling these settings allows your system to recognize and properly boot from third-party USB media.
Method 4: Fix Master Boot Record (MBR)
The Master Boot Record is a critical component of the boot process. If the MBR is corrupted or missing, even a correctly configured USB may fail to initiate the OS load and present a blinking cursor.
Steps to Fix MBR:
1. Boot from a Windows installation USB.
2. Select Repair your computer > Troubleshoot > Command Prompt.
3. In Command Prompt, type the following:
bootrec /fixmbr
bootrec /fixboot
bootrec /scanos
bootrec /rebuildbcd
4. Restart your computer.
Repairing the MBR restores vital boot instructions, allowing your system to continue past the blinking cursor.
Method 5: Change USB Port or Use USB 2.0
Not all USB ports are created equal—especially during the boot process. Some motherboards don’t support USB 3.0 in legacy boot mode, which may prevent your system from reading the USB drive properly during startup.
Try the following:
Plug your USB into a USB 2.0 port instead of USB 3.0.
Use ports on the back panel of your desktop for better motherboard connectivity.
Switching USB ports ensures your device is accessible at the earliest stage of booting.
Method 6: Convert USB Drive to MBR or GPT Format
Partition style compatibility plays a significant role in whether a USB will boot. Using an incorrect scheme (MBR for Legacy, GPT for UEFI) can lead to boot failures marked by a blinking cursor.
Steps:
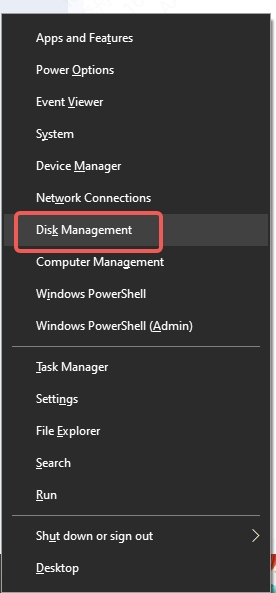
1. Open Disk Management or use Diskpart via Command Prompt.
2. Delete all partitions on the USB drive.
3. Use the command line:
diskpart
list disk
select disk #
clean
convert mbr (or convert gpt)
create partition primary
format fs=ntfs quick
active
assign
exit
Properly formatting the drive ensures compatibility with your system’s BIOS/UEFI settings.
Method 7: Use a Different ISO File
If your ISO image is corrupted or incomplete, even a perfectly made bootable USB will not work correctly. This often results in boot looping or a blinking cursor screen.
Solution:
Re-download the Windows ISO from Microsoft’s official website.
Use trusted tools like Media Creation Tool to create the ISO.
A clean, verified ISO eliminates media corruption as a potential cause of boot failure.
Method 8: Try a Different USB Stick
Hardware issues with the USB drive itself can lead to inconsistent read/write behavior. If your system fails to read critical boot files, it may freeze on the black screen with a blinking cursor.
Recommendations:
Use a reputable brand like SanDisk, Kingston, or Samsung.
Ensure the USB has sufficient capacity (at least 8GB).
Test the USB on another machine to verify bootability.
Swapping to a different USB stick removes hardware from the troubleshooting equation.
Method 9: Adjust CSM and Legacy Boot Settings
The Compatibility Support Module (CSM) allows legacy BIOS functionalities in UEFI systems. If your USB and BIOS modes don’t match, your system will fail to boot and show only a blinking cursor.
Steps:
Enter BIOS/UEFI.
Navigate to Boot Mode or CSM settings.
If using a UEFI ISO, disable CSM and ensure USB is GPT formatted.
If using a Legacy ISO, enable CSM and ensure USB is MBR formatted.
Matching boot mode to the partition scheme of your USB is essential for compatibility.
Method 10: Reset BIOS/UEFI to Default Settings
Misconfigured BIOS/UEFI settings can sometimes interfere with the boot process. A complete reset ensures you're starting with a clean slate.
Steps:
Enter BIOS.
Select Load Optimized Defaults or Reset to Default under Exit or Settings.
Save and reboot.
Alternatively, disconnect the CMOS battery for a few minutes to reset BIOS settings manually.
Resetting the BIOS removes any conflicting settings and restores optimal boot behavior.
Final Tip: Verify Bootable Media with Virtual Machine
Before spending time troubleshooting hardware, it’s wise to test your USB on a virtual machine. This method confirms that the media was created correctly and can boot successfully in a controlled environment.
Why Use a VM:
Confirms ISO integrity.
Tests USB boot logic in a simulated environment.
Rules out hardware-related faults early.
Tools like VirtualBox or VMware make it easy to test bootable ISOs before physical installation.
FAQs About Blinking Cursor
1. Why does my computer only show a blinking cursor on startup?
This usually happens when your PC can’t locate or load the bootable operating system due to misconfigured BIOS, corrupted boot files, or hardware issues.
2. Can blinking cursor mean my hard drive is dead?
Yes, it could. If your hard drive has failed or become disconnected, your system won’t be able to boot and may show only a blinking cursor.
3. How do I fix a blinking cursor after Windows update?
Try booting into Safe Mode or using the Startup Repair tool. If those don’t help, restore your system to a previous state or repair the boot files using Command Prompt.
4. Why does USB boot only show a blinking cursor?
This typically happens if the USB media wasn’t created properly or it doesn’t match the BIOS boot mode (UEFI vs. Legacy).
5. Does reinstalling Windows fix the blinking cursor issue?
Yes, a clean install will resolve the issue if it’s related to corrupted system files or broken boot records.
Conclusion
The blinking cursor on USB boot is a frustrating problem, but not one without a solution. Whether it's an issue with the BIOS boot order, USB creation process, or boot record corruption, our detailed guide provides the tools to solve it efficiently. Start with checking BIOS configurations and progressively work through formatting and boot media validation.
