When it comes to ensuring your PC runs at peak performance, installing and updating the Intel chipset driver is not just optional—it's essential. From enhancing system stability to unlocking full hardware potential, understanding the Intel chipset device driver can drastically improve your computing experience.
Pari 1. What is the Intel Chipset Driver?
The Intel chipset driver is a set of low-level system files that allow the Windows operating system to properly recognize and interact with motherboard components like the PCI Bus, USB controllers, SATA controllers, and integrated graphics. Without these chipset drivers, your hardware may not function optimally—or in some cases, not at all.
When we talk about chipset driver Intel, we’re referring to the core software package that communicates with the motherboard’s chipset, which acts as the central hub for your PC’s components.
Part 2., Why is the Intel Chipset Driver Important?
Installing the correct chipset Intel chipset driver ensures that your operating system can access the full feature set of your Intel-based motherboard. Here's what happens when the chipset driver is properly installed:
Full compatibility with Intel hardware
Reduced system crashes and hardware conflicts
Improved performance for SATA, USB, and PCI devices
Enhanced stability for overclocking and power management
Proper recognition of integrated devices in Device Manager
Without this driver, Windows may use generic drivers, which can result in degraded performance, limited functionality, and frequent errors.
Part 3. Do I Need the Intel Chipset Driver?
Yes, you do. Whether you're building a new PC, reinstalling Windows, or upgrading your motherboard, installing the Intel chipset driver is critical. Even if your system appears to work fine, you're likely not accessing all features your hardware offers unless the chipset driver is correctly installed.
Here's how you know you need it:
You're using a new Intel motherboard
You see “Unknown device” in Device Manager
You're installing Windows from scratch
You want to ensure optimal compatibility and performance
Part 4. How to Update Intel Chipset Driver
Keeping your Intel chipset device driver updated ensures your system remains stable, secure, and compatible with the latest hardware and Windows updates.
Method 1: Use Intel Driver & Support Assistant
Visit the Intel Driver & Support Assistant.
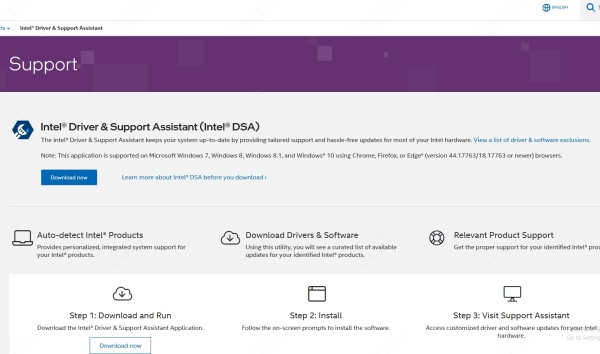
Download and install the tool.
Launch the tool, and it will automatically detect outdated drivers.
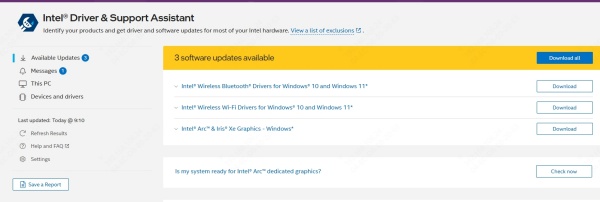
If a new chipset driver Intel version is available, it will prompt you to install it.
Method 2: Manually Download from Intel’s Website
Go to the official Intel Download Center.
Search for your chipset model (e.g., B660, Z790).
Download the latest Intel chipset device driver.
Unzip the downloaded file and run the setup.
Follow the on-screen instructions and restart your PC when prompted.
Method 3: Update via Device Manager
Although you can use Device Manager:
Right-click the Start Menu and select Device Manager.

Expand System Devices.
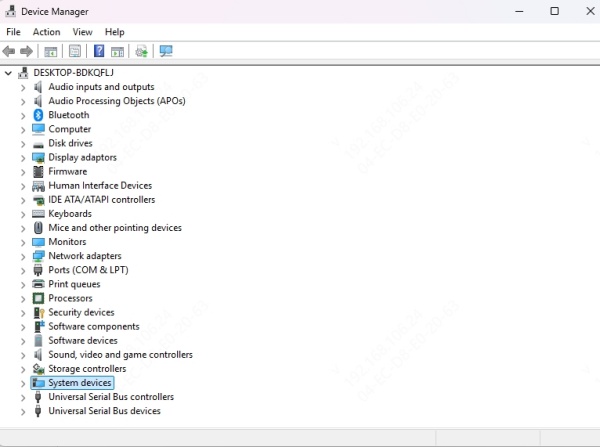
Right-click on items like “Intel SMBus” or “Intel PCI” and choose Update driver.
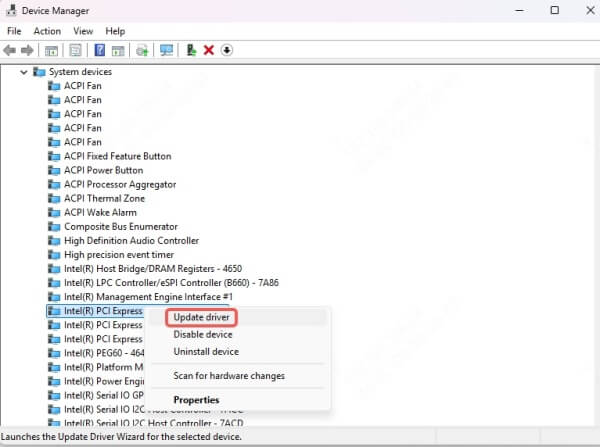
Click Search automatically for drivers.
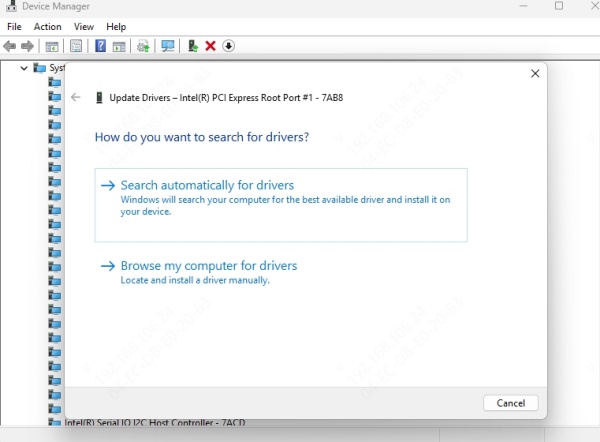
This method is not ideal since Device Manager often doesn't find the latest version.
Part 5. Automated Driver Management Tools
If you're unsure which chipset driver you need or don’t want to manually manage updates, you can use a reliable tool like Driver Talent X:
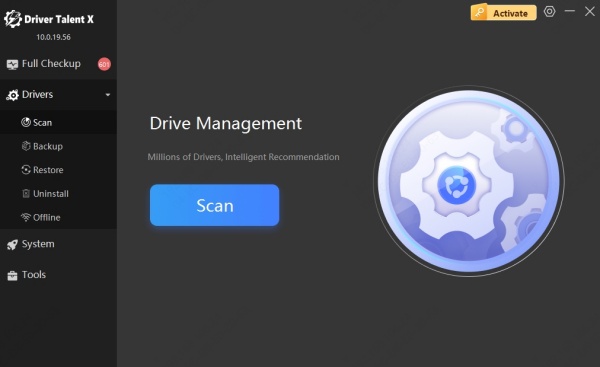
Auto-detects your hardware and missing drivers
Provides official drivers from Intel and other OEMs
Supports bulk downloads and auto-install
Great for new setups or post-Windows reinstall
Conclusion
Installing and updating the Intel chipset driver is a critical step in maintaining a healthy and high-performing PC. It ensures that your system hardware is recognized correctly, offers better stability, and allows other drivers to work without issues. Always use official sources or trusted driver tools like Intel Driver X & Support Assistant or Driver Talent to avoid compatibility problems.
If you want to manage your drivers easily, then download Driver Talent Xnow!
