Intel hardware powers most Windows PCs, including processors, integrated graphics, WiFi, Ethernet, Bluetooth, and chipset components. Each requires its own driver to work properly. After a clean Windows install or major update, Windows often replaces OEM drivers with generic Microsoft versions that lack full hardware support. This can lead to display scaling problems, unstable WiFi, missing HDMI audio, touchpad lag, or unrecognized USB devices. This guide explains the main Intel driver categories, how to identify the correct versions, where to download them, the proper installation order, and how to fix common installation issues.
Step 1: Identify Intel Hardware Before Downloading
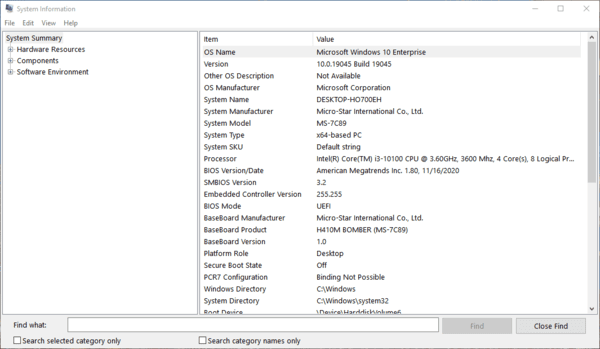
To identify the processor and generation, press Win + R, type msinfo32, and press Enter. The Processor field in the System Information window shows the full processor name including generation — for example, 12th Gen Intel Core i5-1235U or Intel Core i7-10750H. The generation number determines which chipset and graphics driver applies
Note the current driver version and date for each device before updating. In Device Manager, right-click the device, select Properties, go to the Driver tab, and record the Driver Version and Driver Date fields. This confirms whether a downloaded driver is actually newer than what is installed
Step 2: Download Intel Drivers from the Right Source
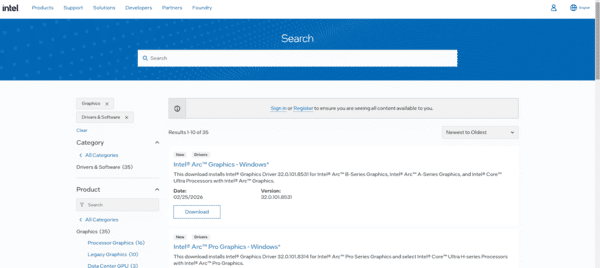
Intel's official support site is the appropriate direct source for the chipset driver package, Intel wireless driver (when the laptop manufacturer's site does not have an updated version), Intel Ethernet driver, and Intel Management Engine Interface driver.
Step 3: Install Intel Drivers in the Correct Order
Installation order matters on Intel platforms. Installing out of sequence causes failed installations or incomplete hardware initialization
Run all installers as administrator by right-clicking the file and selecting Run as administrator. Do not interrupt the Intel graphics driver installation — it briefly turns the screen black while the new driver initializes, which is expected behavior
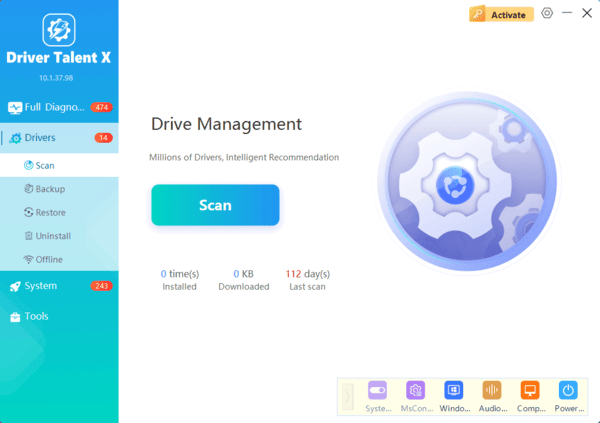
Update All Intel Drivers Automatically
When starting from a clean Windows install with no drivers present, or when multiple Intel hardware categories are unrecognized at the same time, installing each driver manually across all categories is time-consuming
Driver Talent X identifies all Intel hardware by hardware ID and installs the correct driver version for each component in a single scan
Conclusion
Intel drivers cover multiple hardware categories that must be downloaded from the correct source, installed in the correct order, and verified through Device Manager after completion. For laptops, OEM versions from the laptop manufacturer are preferred for graphics and WiFi drivers. Intel's support site is the appropriate direct source for chipset, ME Interface, and Ethernet drivers. Driver Talent X covers all Intel hardware categories in a single scan and is the most efficient approach when multiple components need updating at the same time or after a clean Windows installation.
