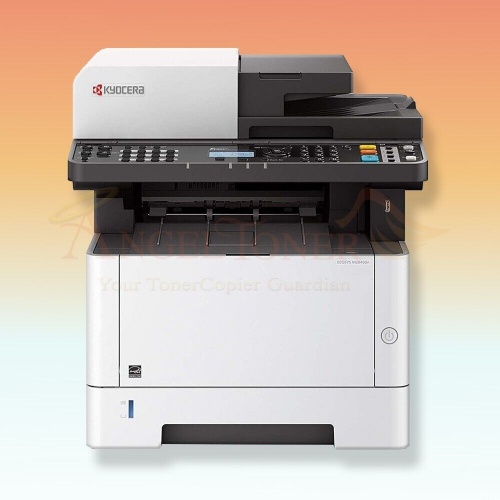
When it comes to efficient printing, Kyocera printers are known for their reliability, speed, and performance. However, even the best printer cannot function optimally without the correct Kyocera drivers. In this comprehensive guide, we will walk you through everything you need to know about Kyocera printer drivers, including how to download, install, update, and troubleshoot them.
Part 1. Why You Need the Right Kyocera Drivers
Kyocera printer drivers serve as a bridge between your computer’s operating system and the hardware of the printer. Without the correct drivers, your PC cannot communicate properly with the printer, leading to issues such as failed print jobs, limited features, or complete non-functionality.
By installing the latest Kyocera drivers, you ensure:
Seamless printer performance
Access to full printing functionalities
Improved compatibility with the latest OS updates
Fewer software bugs and printing errors
Part 2.Where to Download Official Kyocera Drivers
To avoid malware or outdated software, always download Kyocera drivers from the official Kyocera support website or trusted platforms.
Steps to Download Kyocera Printer Drivers:
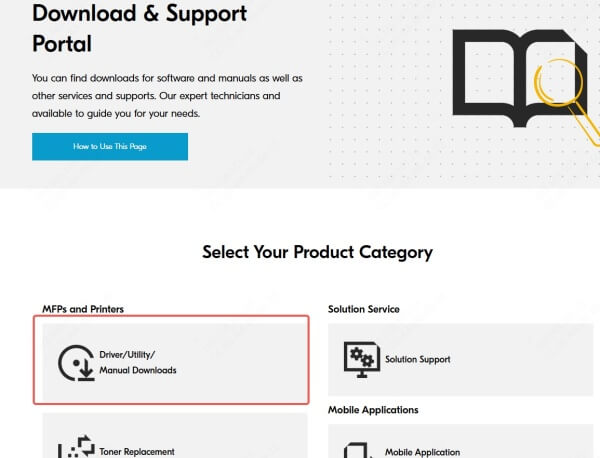
Visit the Official Kyocera Website
Go to https://www.kyoceradocumentsolutions.com

Navigate to the Support Section
Click on Support & Downloads > Drivers & Downloads
Search Your Printer Model
Enter your printer model (e.g., Kyocera ECOSYS M2540dn, Kyocera TASKalfa 2553ci, etc.)
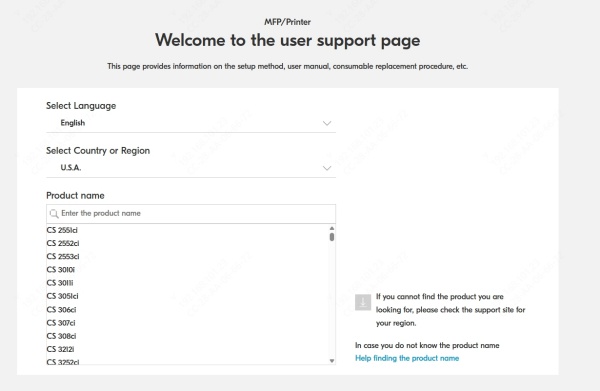
Select Your Operating System
Choose your OS (Windows 11/10/8/7, macOS, Linux)
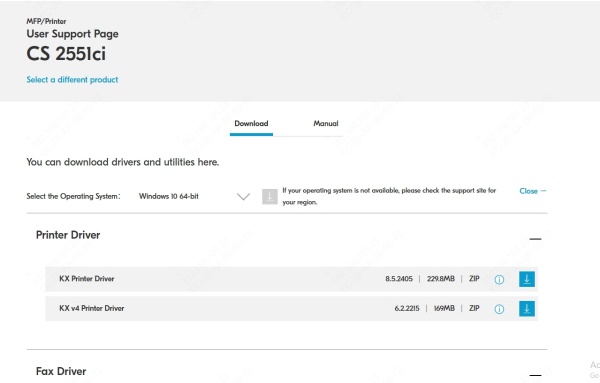
Download the Correct Driver Package
Select and download the latest available driver for your printer and OS.
Part 3. How to Install Kyocera Drivers on Windows
Installing Kyocera drivers on Windows is a straightforward process:
Manual Installation Steps:
1. Unzip the Downloaded File
Locate the .zip file and extract its contents to a folder.
2. Run the Installer
Open the extracted folder and double-click on the setup executable file.
3. Follow the On-Screen Instructions
Accept the license agreement and follow prompts to complete the installation.
4. Restart Your PC
Restart your computer to apply the changes.
Plug-and-Play Installation (For USB Printers):
Plug the printer into the computer via USB.
Windows may automatically detect and install the required Kyocera drivers.
If it doesn’t, install manually using Device Manager > Update Driver.
Part 4. Automatically Detect and Install Drivers with Driver Talent X
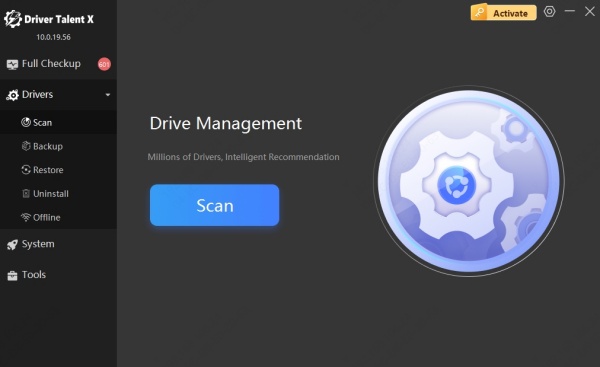
If you’re unsure which driver version you need or want a quick and reliable solution, Driver Talent X is a powerful tool that can help.
What Is Driver Talent X?
Driver Talent X is an intelligent driver management software for Windows that can:
Automatically scan for missing, outdated, or corrupt drivers
Download and install the correct drivers instantly
Back up and restore drivers with one click
Resolve driver conflicts that may affect hardware functionality
It supports over 500,000 drivers from various manufacturers, including Kyocera, making it ideal for ensuring your printer drivers are always up to date.
How to Use Driver Talent to Install or Update Kyocera Drivers
1. Download and install Driver Talent X.
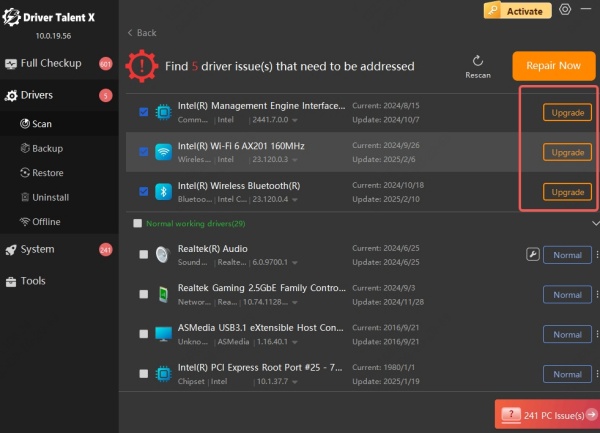
2. Click the Scan button. Driver Talent will analyze your PC and list all missing, outdated, or faulty drivers.
3. Click Install or Upgrade next to the Kyocera driver entry. Driver Talent X will download and install the correct version.
4. After installation, restart your PC to ensure the driver is properly integrated into your system.
Conclusion
Keeping your Kyocera printer drivers updated is essential for avoiding printing issues and maintaining smooth device performance. Whether you choose to download drivers manually from the official Kyocera site or use Driver Talent X for automated detection and installation, always make sure you’re using the correct and most recent driver.
Driver Talent X simplifies the entire process, saving time and reducing risk, especially for those less experienced with manual driver management. Download it now!
