HP printer not printing in color? This guide covers the most effective fixes — verifying print settings and disabling grayscale mode, cleaning the printhead, checking ink cartridge levels, calibrating the printer, and updating HP printer drivers with Driver Talent X — to restore full color printing quickly.
Method 1: Check Print Settings and Software Configuration
If the driver is confirmed to be up-to-date, the next most likely cause is an incorrect setting that is forcing the printer into a black-and-white mode.
Solution 1: Verify Printer Preferences
You must check the settings both in the application you are printing from and in the Windows printer preferences menu.
Access Printing Preferences: In Windows, search for and open "Printers & scanners". Click on your HP printer, select "Manage", then "Printing preferences" or "Printer properties".

Check Color Settings: Navigate through the Paper/Quality, Color, or Advanced tabs.
Disable Grayscale: Crucially, look for any options such as "Print in Grayscale", "Black & White Only" or "Print All Text as Black". Ensure these options are unchecked or set to "Off".

Confirm Color: On the Color tab, explicitly confirm that the print mode is set to "Color" and not "Black & White" or "Grayscale". Save your changes by clicking "Apply" and "OK".
Solution 2: Print Quality Diagnostic Report
Printing a diagnostic report directly from the printer helps determine if the hardware (cartridges and printhead) is capable of producing color.
Access Printer Tools: On your HP printer's control panel (or via the HP Smart app), navigate to the Setup, Tools, or Maintenance menu.
Run Report: Select the option to print a "Print Quality Diagnostic" Report or "Test Page".

Analyze Results: If the test page prints correctly in full color, the issue is definitely software or computer-related. If colors are missing or streaked, the problem is hardware-related (see Method 3).
Method 2: Hardware Maintenance and Calibration
If software and settings are correct, the issue is physical, meaning the printer cannot dispense the color ink properly.
Solution 1: Check Ink Cartridge Status and Clean Printhead
Low ink levels, especially in a single color, can cause the printer to switch to grayscale mode to preserve ink. Clogged nozzles also prevent ink flow.
Check Ink Levels: Verify the ink levels on your printer's display or through the HP Smart app. Replace any color cartridges that are critically low or empty.
Clean the Printhead: Use the printer's built-in utility to clean the printhead. On the control panel (or via the HP Smart app), go to "Setup" > "Tools" > "Clean Cartridges" or "Clean Printhead". This process forces ink through the nozzles to clear blockages. You may need to run the cleaning utility two or three times.

Inspect Cartridges: Power off the printer, open the cartridge access door, and remove the color cartridges. Gently wipe the copper-colored electrical contacts on the cartridges with a lint-free cloth to ensure a good connection.
Solution 2: Calibrate the Printer
Color calibration aligns the printhead nozzles and optimizes color density to ensure accurate, vibrant color output.
Start Calibration: On the printer's control panel, navigate to the Setup or Tools menu.
Select Calibration: Look for options like "Align Printhead", "Calibrate Device" or "Color Calibration".
Follow Instructions: Start the calibration process. The printer will print a test page, often scanning it with an internal sensor, to automatically correct any alignment or color inconsistencies.
Method 3: Driver Update
Outdated or corrupt printer drivers are a leading cause of miscommunication between your computer and your HP device, often leading to default settings (like grayscale) overriding color instructions.

Download and Install:
Click the "Download" button to download the software package.
Install it on your computer.
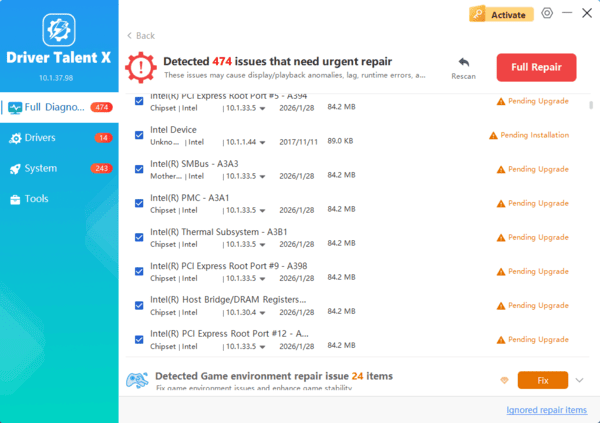
Start a System Scan:
Open the program and go to "Drivers" > "Scan", click "Scan".
The software will perform a comprehensive scan of all your hardware, including your connected HP printer.
One-Click Update:
After the scan is complete, the software will display a list of all drivers that need attention. Select the printer driver and click the "Upgrade" or "Repair Now" button.
Driver Talent X will download the latest, certified driver and install it, often performing a clean installation to remove conflicting files.
Restart and Test:
Restart your computer and your printer.
Attempt to print a known color document to check if the issue is resolved.
Conclusion
When your HP printer refuses to print in color, the solution typically lies in addressing a three-pronged approach: software, configuration, and hardware.
It's very important to start by ensuring your drivers and firmware are fully updated using Driver Talent X. By following these detailed steps, you can successfully restore your HP printer's ability to produce high-quality color prints.
