Setting up your HP printer on Wi-Fi in Windows makes printing more convenient by eliminating the need for USB cables. Once both your printer and PC are connected to the same wireless network, you can print from anywhere in your home or office. This guide provides step-by-step instructions for connecting an HP printer to Wi-Fi, installing the correct drivers, and keeping them updated for stable performance, including using Driver Talent X for automatic driver updates.
Why Use Wi-Fi for HP Printer Setup?
Connecting your HP printer to Wi-Fi allows you to:
Print from any device connected to the same network (PC, laptop, or smartphone).
Reduce cable clutter in your workspace.
Share one printer with multiple devices.
Access advanced features such as HP Smart App printing and cloud printing.
Step 1: Prepare Your HP Printer for Wi-Fi Setup
Before starting, make sure your printer is powered on and in a ready state.
Steps:
Turn on your HP printer.
Ensure the Wi-Fi indicator light on the printer is blinking. If not, press and hold the Wireless button (or Wireless + Cancel button on some models) until the light starts flashing. This puts your printer into Wi-Fi setup mode.
Place your printer near your Wi-Fi router for a stable connection.
Step 2: Connect Your HP Printer to Wi-Fi (Wireless Setup)
You can connect your HP printer to Wi-Fi using the HP Smart App or the Wireless Setup Wizard (for printers with a display panel).
Method 1: Using the HP Smart App
Download the HP Smart App from the Microsoft Store.

Open the app and click "Set up a new printer".
The app will search for printers in Wi-Fi setup mode.
Select your printer from the list.
Enter your Wi-Fi network name and password.
Follow the on-screen prompts until the setup is complete.
Method 2: Using the Printer Control Panel (for printers with display)
On the printer's control panel, press the Wireless icon.
Select "Wireless Setup Wizard".
From the list of available networks, choose your Wi-Fi network.
Enter your Wi-Fi password using the keypad.
Confirm and wait for the printer to connect. The Wi-Fi light will turn solid blue when connected successfully.
Step 3: Update Printer Drivers Automatically with Driver Talent X
Manually downloading drivers works, but it can take time. A quicker and safer method is to use Driver Talent X, which automatically finds and updates the correct drivers for your printer.
Download and Install Driver Talent X:
Click the "Download" button to download and install Driver Talent X.
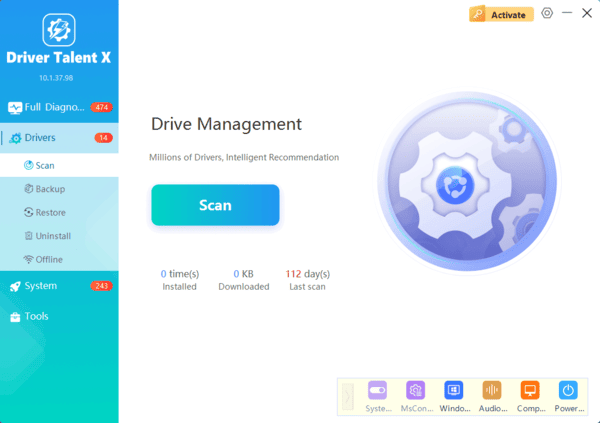
Open Driver Talent X.
Click "Scan" to detect outdated, missing, or corrupted drivers.
Update Drivers:
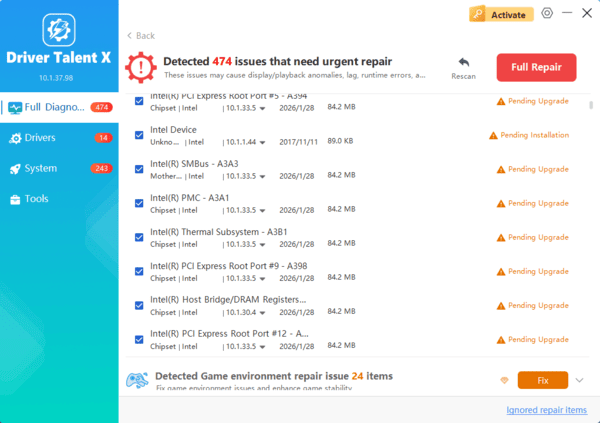
Once the scan completes, you'll see a list of drivers needing updates.
Select the HP printer driver.
Click "Upgrade" (or "Repair Now" for multiple drivers).
Restart Your PC:
Reboot to apply the updates.
Tip: Driver Talent X also allows you to back up your current drivers, so you can restore them if needed.
Step 4: Install the HP Printer Drivers From Official Website
To make sure your printer works properly on Windows, you must install the correct driver.
Steps:
Go to the HP Customer Support – Software and Driver (https://support.hp.com/us-en/drivers).
Enter your printer model (e.g., HP DeskJet 4155, HP Envy 6000).

Select your operating system (Windows 10 or Windows 11).
Download the recommended Full Feature Software and Driver package.
Run the downloaded file and follow the on-screen instructions.
Restart your PC to complete the installation.
Step 5: Add the HP Printer in Windows
After the Wi-Fi connection and driver installation, you need to add the printer in Windows.
Steps:
Press Win + I to open Settings.
Go to "Devices" > "Printers & scanners".
Click "Add a printer or scanner".

Windows will search for available printers.
Select your HP printer and click "Add device".
Print a test page to confirm everything works.
Final Tips for a Smooth Wi-Fi Printer Setup
Always keep your printer close to the router for a strong Wi-Fi signal.
Update your drivers regularly using Driver Talent X to avoid compatibility issues.
If the printer is not detected, restart your router, printer, and PC.
For multi-device use, ensure all devices are on the same Wi-Fi network.
Conclusion
Setting up your HP printer on Wi-Fi in Windows is straightforward if you follow the correct steps.
By following this guide, you'll enjoy hassle-free, cable-free printing and keep your HP printer running smoothly on Windows 10 or Windows 11.
