The NVIDIA Control Panel is an important utility for managing NVIDIA graphics settings, optimizing gaming performance, configuring displays, and adjusting GPU features on Windows 11. However, some users may find that the NVIDIA Control Panel is missing, unavailable, or fails to open after a Windows update, driver change, or clean system installation. In most cases, the problem is not the application itself but an outdated, corrupted, or incomplete NVIDIA graphics driver installation. This guide explains how to download and install NVIDIA Control Panel on Windows 11, update NVIDIA drivers correctly, and fix common issues when the Control Panel does not appear or work properly.
Download NVIDIA Control Panel
The NVIDIA Control Panel is available through the Microsoft Store and can also be installed with the graphics driver package.
Microsoft Store Method:
Open the Microsoft Store.
Search for NVIDIA Control Panel.
Click "Get" to download and install the application.
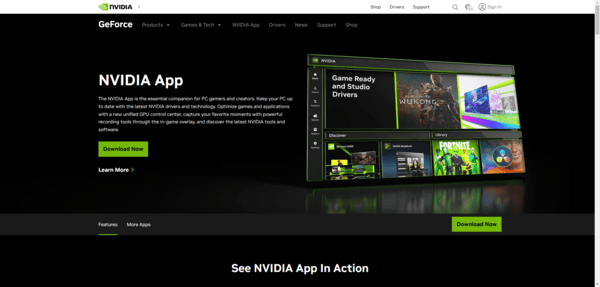
Driver Package Method:
Visit the official NVIDIA website.
Download the latest GeForce Game Ready or Studio Driver for your GPU.
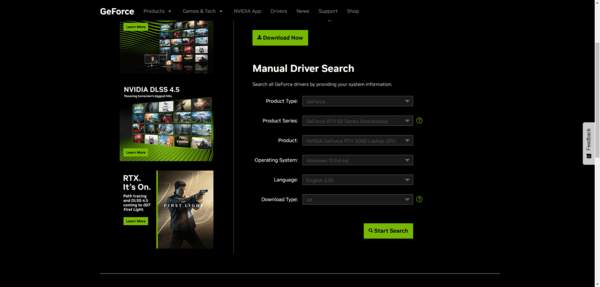
Run the installer and select Custom Installation.
Ensure NVIDIA Control Panel is selected in the components.
Complete the installation and restart your system.
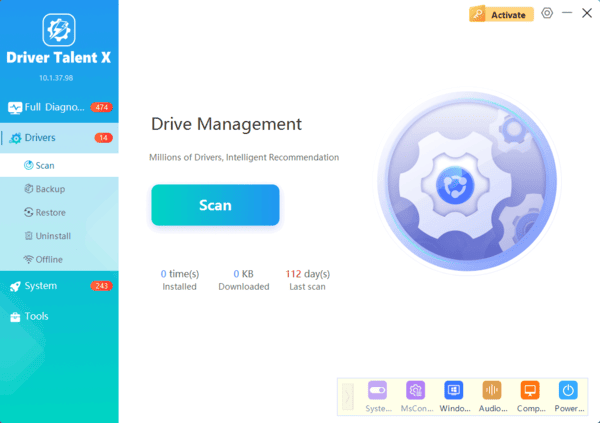
Update Drivers with Driver Talent X
Updating drivers ensures that your NVIDIA Control Panel installs correctly and functions without errors.

Troubleshoot NVIDIA Control Panel Issues
If the Control Panel does not appear after installation, try the following methods:
Method 1: Restart NVIDIA Services
Press Windows + R, type "services.msc", and press Enter.
Locate NVIDIA Display Container LS, right-click and select "Restart".
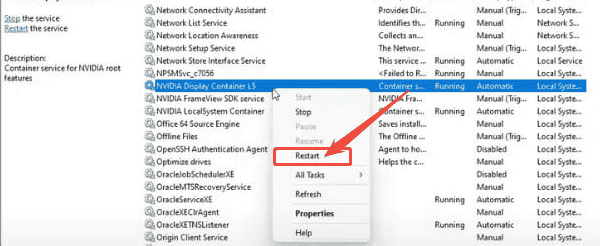
Check if the NVIDIA Control Panel is accessible.
Method 2: Reinstall NVIDIA Drivers
Uninstall your current NVIDIA drivers via Device Manager or Control Panel > Programs.
Use Driver Talent X to scan and reinstall the latest drivers automatically.
Restart the system and check the NVIDIA Control Panel.
Method 3: Enable NVIDIA Control Panel
Right-click on your desktop and select Display settings > Advanced display settings.
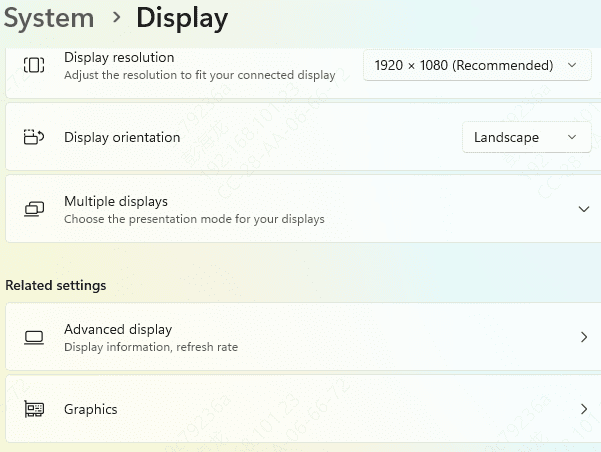
Ensure your GPU is selected as the default graphics processor.
The NVIDIA Control Panel should now appear in the context menu or system tray.
Method 4: Check Microsoft Store Settings
Open Microsoft Store > Library > Get updates to ensure the NVIDIA Control Panel app is updated.
Reinstall the app if necessary.
Optimize Graphics Settings
Once the NVIDIA Control Panel is installed, you can optimize your settings:
Adjust 3D Settings: Set Performance or Quality modes based on your needs.
Manage Display: Configure multiple monitors, resolution, and refresh rates.
Enable G-Sync or V-Sync: Improve gaming performance and reduce screen tearing.
Update Drivers Regularly: Use Driver Talent X to keep NVIDIA drivers up to date.
Conclusion
Downloading and using the NVIDIA Control Panel on Windows 11 requires up-to-date drivers to function correctly. By first updating your NVIDIA drivers with Driver Talent X, you reduce the risk of errors and improve system stability.
Following the methods outlined in this guide ensures that the Control Panel installs successfully and provides full access to advanced graphics settings, enabling you to optimize performance and display quality efficiently.