NVIDIA graphics driver issues are a common cause of black screens, game crashes, low FPS, screen flickering, failed driver installations, and Device Manager errors on Windows. In many cases, the graphics card itself is not faulty—the problem is often an outdated driver, a corrupted installation, a conflict with a Windows update, or leftover files from a previous driver version. Because of this, properly updating the NVIDIA driver is usually the best first step. A successful driver update can improve stability, restore performance, fix display problems, and ensure Windows communicates correctly with the GPU. If updating does not resolve the issue, a clean driver reinstall and additional system troubleshooting may be necessary. This guide covers the most common causes of NVIDIA driver problems and the safest ways to fix them on Windows 10 and Windows 11.
Perform a Clean NVIDIA Driver Reinstallation
Open Device Manager, expand Display adapters, right-click your NVIDIA graphics card, and choose to uninstall the device. If Windows gives you the option to delete the driver software, select it. Then restart the computer
This step is often effective when the driver appears installed but games still crash, the display flickers, or the system keeps showing GPU-related errors after every reboot
Update the NVIDIA Graphics Driver
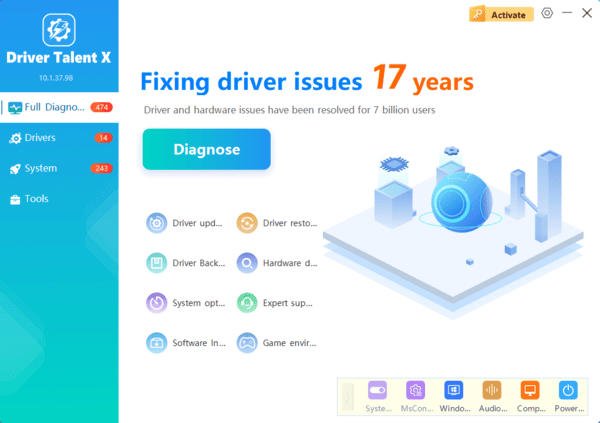
You can update the driver manually through NVIDIA website, but many users prefer an easier option that reduces the chance of installing the wrong version. Driver Talent X is one way to do this. It can scan your system, detect the NVIDIA GPU model automatically, and identify outdated, missing, or damaged drivers. It can also check motherboard and chipset drivers that may affect graphics stability.

To use this method, install Driver Talent X, run a driver scan, review the results, and update the recommended NVIDIA-related drivers. After the installation finishes, restart the computer so Windows can fully load the new driver environment.
Update Windows Completely
Go to Windows Update, check for updates, and install everything available, including optional system updates if they are relevant. Then restart the computer and test the system again.

Reinstall the NVIDIA Control Panel
If the Control Panel is not working correctly, reinstall it from the Microsoft Store and restart the system afterward. This can restore access to important settings such as display scaling, 3D settings, G-Sync controls, and power management options.
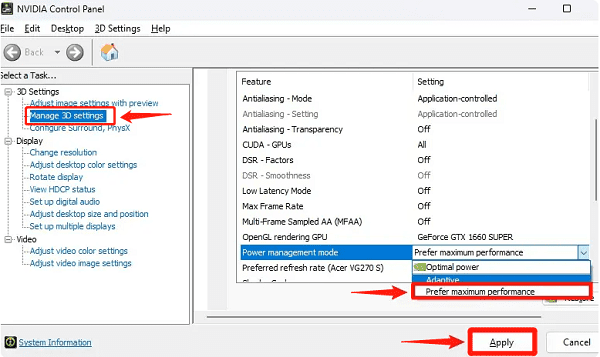
Adjust Power Management Settings
Power settings can also affect NVIDIA stability, especially during gaming or GPU-intensive work. If the graphics card is switching power states too aggressively, some systems may show stuttering, unexpected drops in performance, or even driver timeout issues
Open the NVIDIA Control Panel and check the power management mode under 3D settings. Setting it to prefer maximum performance can help stabilize performance in games and applications that place a steady load on the GPU
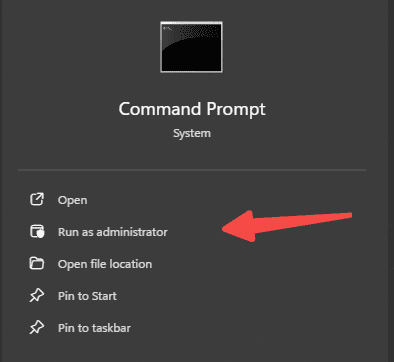
Run System File Checker
Open Command Prompt as administrator and run:
sfc /scannow
This tool checks important Windows files and repairs damaged versions where possible. It is useful when the driver installs correctly but Windows still behaves abnormally afterward.
Final Thoughts
NVIDIA graphics card driver problems on Windows are common, but they are usually fixable without replacing the GPU. In most cases, the safest repair path is clear: update the driver properly, perform a clean reinstall if needed, update Windows, stop automatic driver replacement, repair the NVIDIA Control Panel if necessary, and run system file checks when the problem seems deeper.
