When using a Windows laptop or desktop, issues like WiFi not connecting or the wireless network icon disappearing are often caused by the WiFi adapter being disabled.
This article provides a comprehensive overview of the common causes and practical solutions to help you quickly restore your network connection.
1. What Is a WiFi Adapter?
A WiFi adapter (also known as a wireless network card) is a hardware component that allows your computer to connect to wireless networks. The Windows system recognizes this hardware through a driver. If the adapter is disabled, the system won't detect any wireless networks, which may result in:
Inability to connect to WiFi
Disappearance of the wireless network icon
Wireless option missing from network settings
2. Common Reasons Why the WiFi Adapter Is Disabled
User error: Accidentally clicking the "Disable" button.
Windows update or driver conflicts: System updates may cause adapter issues.
Power-saving settings: The system disables wireless devices to save power.
Antivirus or firewall restrictions: Some third-party security software may block network devices.
Hardware problems: A loose or damaged wireless card may also render the adapter unusable.
3. How to Determine If the WiFi Adapter Is Disabled
Method 1: Check in Device Manager
Right-click the Start button and select "Device Manager".
Expand the Network adapters category.
Look for a device labeled "Wireless" or "WiFi".
If there is a downward arrow on the icon, the device is disabled.
Method 2: Check in Network Connections
Press Win + R, type "ncpa.cpl", and press Enter.
In the Network Connections window, find Wireless Network Connection.
If it shows as "Disabled", right-click and select Enable.
4. How to Fix a Disabled WiFi Adapter
Method 1: Update the WiFi Driver
Outdated or corrupted drivers, or incompatibility with the OS, are common causes of a disabled WiFi adapter. It's recommend to use Driver Talent X for automatic detection and updating, which saves time and prevents driver installation errors.
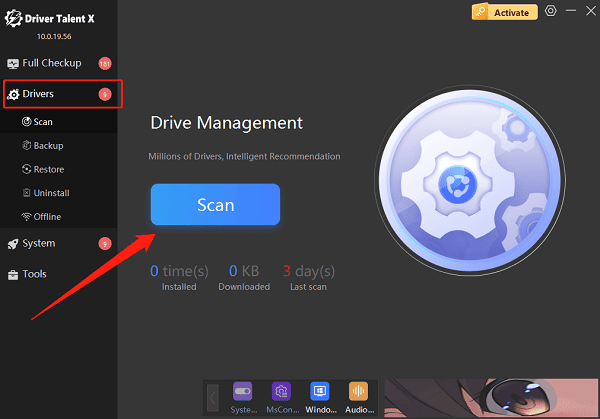
Click the Download button to get the latest Driver Talent X. Install and launch the software.
In the "Drivers" tab, select "Scan", then click "Scan" to detect all drivers.

Locate the WiFi adapter driver in the scan results and click "Upgrade".
Restart your computer to apply the updates.
Method 2: Re-enable the Adapter in Device Manager
Open Device Manager.
Right-click the disabled wireless adapter, then select "Enable device".
Restart your computer and check if WiFi is working.
Method 3: Disable Power Saving Settings
Open Device Manager.
Right-click the wireless adapter and select "Properties".
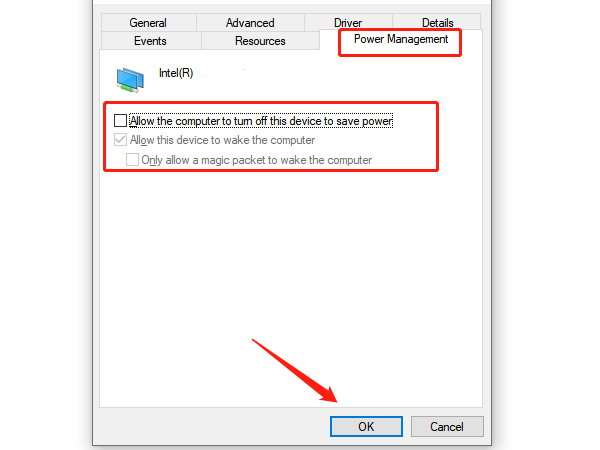
Go to the "Power Management" tab.
Uncheck "Allow the computer to turn off this device to save power".

Click "OK" to save settings.
Method 4: Check BIOS Settings or Physical Wireless Switch
Some laptops have a physical wireless switch or a function key (e.g., Fn + F2). Make sure the wireless function is turned on. Also, advanced users can enter the BIOS to check whether the wireless adapter is disabled.
Method 5: Reset Network Settings
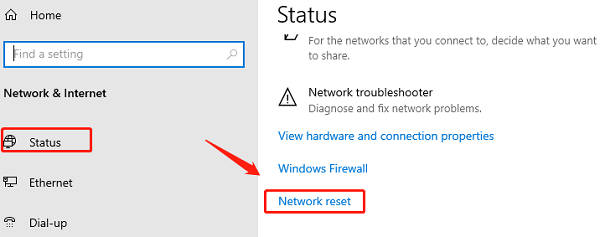
Open Settings (Win + I), then click "Network & Internet".
On the left pane, select "Status", scroll down, and click "Network reset".

Click "Reset now" and confirm.
Wait for the system to restart and reconfigure network settings.
Method 6: Run the Windows Troubleshooter
Open Settings, then go to "Update & Security".
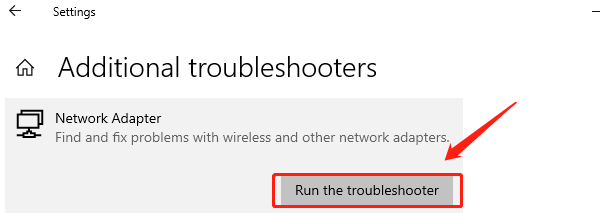
Select Troubleshoot, then click "Additional troubleshooters".
Find "Network Adapter", and click "Run the troubleshooter".

Follow the on-screen instructions to complete the fix.
A disabled WiFi adapter is a common issue among Windows users, but with the methods provided in this guide, you can quickly identify the cause and fix it.
Whether it's manually enabling the adapter, updating the driver, or adjusting power settings, these steps can effectively resolve most wireless connection problems.
