As a well-known motherboard brand, Gigabyte is widely used in gaming, office, and DIY PC builds. To ensure stable performance and optimal hardware functionality in Windows systems, correctly installing Gigabyte motherboard drivers is essential.
This article provides a practical installation guide to help users easily download, install, and update motherboard drivers—avoiding common issues such as blue screens, unresponsive devices, and performance drops caused by incorrect drivers.
1. Why Install or Update Motherboard Drivers?
Motherboard drivers enable communication between hardware and the operating system. They are essential for the system to recognize components like sound cards, network adapters, chipsets, USB ports, and more. Without proper drivers, the following issues may occur:
No internet connection or network adapter not recognized
USB ports not working or showing abnormal transfer speeds
Distorted audio or unresponsive sound card
System instability or frequent blue screen errors
GPU or PCI devices not functioning properly
Therefore, installing the latest and most compatible motherboard drivers is crucial.
2. How to Obtain Gigabyte Motherboard Drivers
Method 1: Use Driver Talent X for Automatic Installation
If you're unsure of your motherboard model or prefer a simpler process, we recommend using Driver Talent X, a driver management tool that automatically detects your hardware and installs the correct drivers.
Click the download button to get the latest version of Driver Talent X, then install and launch the software.
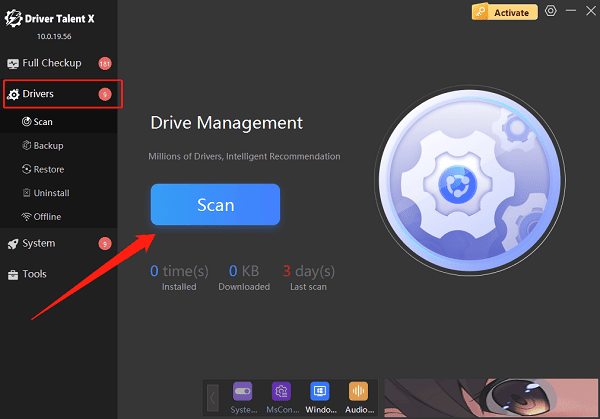
In the "Drivers" section, click "Scan". The tool will automatically detect all driver statuses on your PC.

After finding the driver that needs to be updated in the scan results, click the "Upgrade" button.
Restart your computer after the update to ensure the driver takes effect.
Method 2: Manually Download from the Gigabyte Official Website
Open a browser and go to the Gigabyte official website.
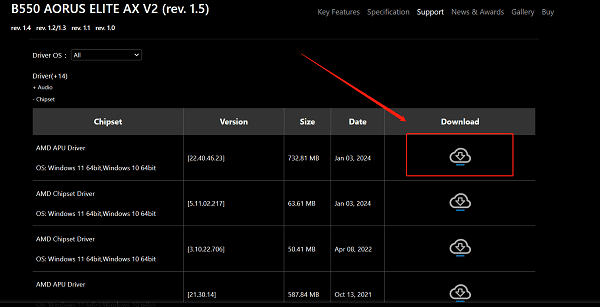
From the top menu, choose Support, then go to the Downloads Center.
Enter your motherboard model (e.g., "B550 AORUS ELITE").
Select the Driver section and choose your corresponding operating system (e.g., Windows 11 64-bit).

Download all the recommended drivers, including Chipset, LAN, Audio, USB, and SATA/NVMe controller drivers.
3. Recommended Installation Order
Following the correct installation order helps improve system stability. We recommend installing drivers in the following sequence:
Chipset Driver
Processor-related Drivers (e.g., Intel ME, AMD Ryzen Chipset)
LAN Driver (wired/wireless network)
Audio Driver (e.g., Realtek Audio)
SATA/NVMe/RAID Controller Drivers
USB or Other Motherboard Expansion Drivers
Other Special Utilities (e.g., RGB control software, BIOS update tools)
4. How to Confirm Driver Installation Is Successful
Method 1: Use Device Manager
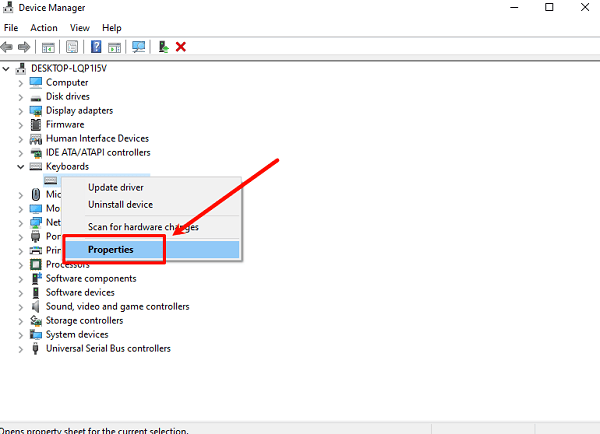
Press Windows + X, then select "Device Manager".
Check for any yellow exclamation marks or unrecognized devices.
Right-click a device > Properties > Driver tab to view the version.

Compare with the official version from Gigabyte to ensure it's updated.
Method 2: Re-scan Using Driver Talent X
Open Driver Talent X.
Click "Scan" again. If there are no items left to update, the installation was successful.
5. Common Issues and Solutions
Issue 1: Can't find the motherboard model?
Check the physical board, the packaging box, or enter the BIOS. You can also use tools like CPU-Z to identify the model.
Issue 2: Blue screen after driver installation?
Boot into Safe Mode and uninstall the problematic driver. Re-download the correct version, preferably from the official Gigabyte website.
Issue 3: No sound or no network after installing drivers?
Check whether the relevant device (e.g., sound card or network adapter) is enabled. Also, confirm that the device is not disabled in the BIOS. Try reinstalling or rolling back the driver.
Correctly installing Gigabyte motherboard drivers in Windows is fundamental to ensuring system stability and maximizing hardware performance. Whether you opt for a manual download from Gigabyte's official site or prefer using a professional driver management tool, the key is to ensure driver compatibility with your operating system.
By following the detailed steps in this guide, you can complete the installation process smoothly and enable your motherboard and system to work efficiently together, unlocking their full potential.
