You open the Camera app or join a video call and get a black screen, a message saying no camera is found, or the feed freezes immediately. It's one of the more frustrating laptop problems because it tends to happen right when you need the camera most — before a meeting or call. The good news is that Lenovo camera failures on Windows are almost always software-related. The hardware itself is rarely the issue. Privacy settings, a disabled device, or a replaced driver account for the vast majority of cases, and all of them are fixable without any hardware repair.
Fix 1: Check the Physical Privacy Shutter and Fn Key
Many Lenovo laptops — particularly ThinkPad models — have a physical privacy shutter built into the camera housing. It's a small sliding cover that physically blocks the lens
If it's closed, no software fix will produce a working camera image. Check the area around the camera lens at the top of the screen and slide the shutter open if it is covering the lens
Some Lenovo models also have an Fn key combination that enables and disables the camera at the hardware level. On many ThinkPads and IdeaPads this is Fn + F8, though the specific key varies by model — look for a camera icon on the F-row keys. Press the combination once and open the Camera app to test
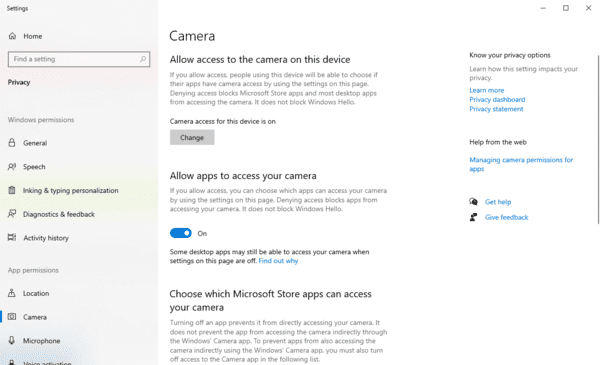
Fix 2: Check Windows Camera Privacy Settings
Windows 10 and Windows 11 both include a master privacy toggle that controls whether any application on the system can access the camera. If this is off, no app — including the built-in Camera app — will be able to use the camera regardless of driver status
On Windows 10, go to Settings, then Privacy, then Camera. On Windows 11, go to Settings, then Privacy and Security, then Camera. Confirm that the toggle for Camera access is switched on. Scroll down the same page and confirm the specific application you're trying to use also has its individual toggle switched on
Fix 3: Check App Permissions for the Specific Application
If the Windows privacy setting is on but a specific application still can't access the camera, the application may not have been granted individual camera permission.
In Microsoft Teams, Zoom, or Discord, open the application's settings and navigate to the Video or Camera section
Confirm your Lenovo camera is selected as the active input device. If it's selected but still not working, go back to Windows privacy settings and confirm that app has camera access toggled on individually
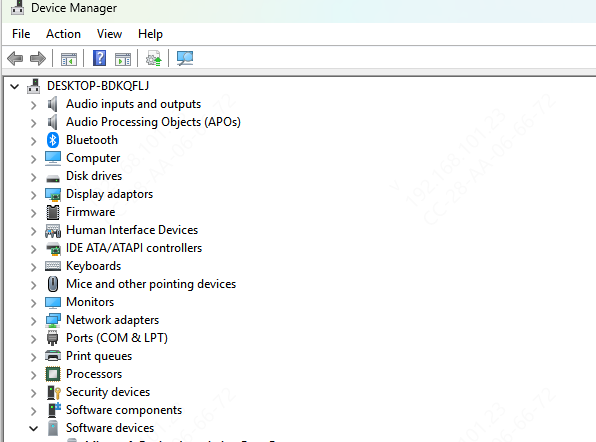
Fix 4: Enable the Camera in Device Manager
Press Win + X and select Device Manager. Expand the Cameras section, or if it doesn't appear there, check Imaging devices. Look for the Lenovo camera entry
If the icon has a small downward-pointing arrow, the device is disabled. Right-click it and select Enable device. Wait a few seconds and test the camera
If no camera device appears in either section, click View in the Device Manager menu and select Show hidden devices. Greyed-out entries represent previously installed devices. If a camera entry appears, right-click and select Enable device
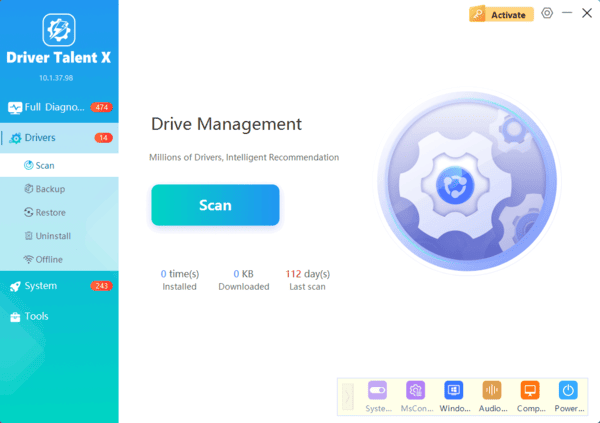
Fix 5: Update or Reinstall the Camera Driver
In Device Manager, right-click the camera entry and select Update driver. Choose Search automatically for drivers. If Windows finds a newer driver, install it and restart.
For a full clean reinstall, right-click the camera entry and select Uninstall device. Restart the PC. Windows will reinstall a driver automatically. If the camera works after the restart, the reinstall resolved it. If Windows reinstalls the same generic driver and the problem persists, use Driver Talent X.
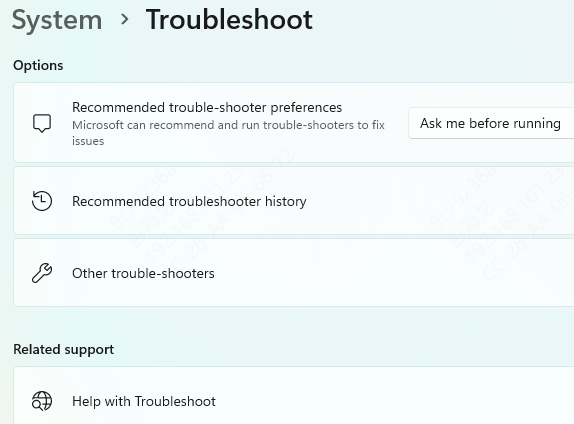
Fix 6: Run the Windows Camera Troubleshooter
Windows 11 includes a dedicated camera troubleshooter that can automatically detect and fix certain camera access and driver issues.
Go to Settings, then System, then Troubleshoot, then Other troubleshooters
Find Camera in the list and click Run. Follow any prompts and apply suggested fixes. Restart and test after the troubleshooter completes
Fix 7: Reset the Camera App
Go to Settings, then Apps. Find the Camera app in the list and click it. Select Advanced options. Scroll down and click Reset. Confirm the reset and reopen the Camera app to test
Run this fix before attempting driver-level repairs if the issue only occurs in the built-in Camera app but the camera works in other applications like Zoom or Teams
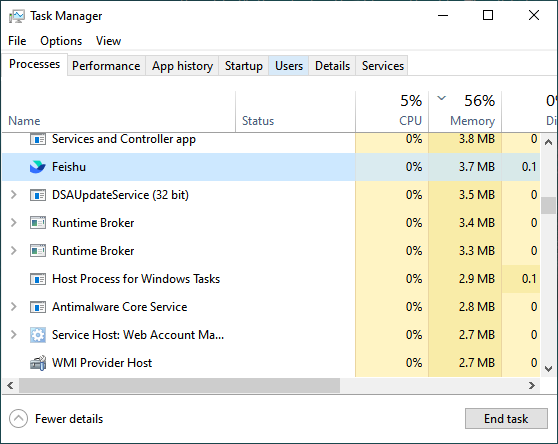
Fix 8: Close Competing Applications
Press Ctrl + Shift + Esc to open Task Manager. Look for any video conferencing, streaming, or camera-related applications running in the background processes list. Close them all. Then open only the application you want to use and test the camera
Antivirus software with a webcam protection feature can also block camera access independently of Windows privacy settings. If you have third-party security software installed, open its settings and check for a webcam or camera protection option. Temporarily disable it to test whether it's the blocking source
Conclusion
Most Lenovo camera failures come down to three things: the physical shutter or Fn key, a privacy setting that's blocking access, or a driver that was replaced by Windows with an incompatible version. Fix 1, Fix 2, and Fix 5 resolve the problem for the vast majority of users. When the camera driver has been silently swapped out by a Windows update, Driver Talent X installs the correct Lenovo-specific driver automatically without requiring any manual hardware identification.
