A Lenovo portable monitor is designed to provide a convenient secondary display for productivity, multitasking, or gaming. However, some users may experience issues such as connection failures, black screens, flickering displays, or the monitor not being detected via USB-C. In most cases, these problems are caused by outdated or incompatible drivers, incorrect display settings, insufficient power delivery, or faulty cables. This guide explains the most common causes and provides effective solutions to help you fix Lenovo portable monitor issues and restore a stable display connection.
Other Effective Fixes for Lenovo Portable Monitor Not Working
If the issue persists, continue with the following detailed solutions.
1. Check the USB-C Port and Cable Compatibility
Not all USB-C ports support video output. Some ports only support data transfer or charging.
How to Check Compatibility:
Look for a DisplayPort or Thunderbolt icon next to your laptop's USB-C port.
If your USB-C port does not have a video symbol, it cannot output display signals.
Try connecting to another USB-C port that supports DP Alt Mode or Thunderbolt 3/4.

Use the original Lenovo USB-C cable or a certified USB-C 3.1 Gen 2 cable that supports video transmission.
Avoid USB-C charging-only cables as they will not work for display output.
2. Ensure the Monitor Is Powered Properly
Some Lenovo portable monitors require additional power through a second USB-C or USB-A connection.
Steps:
Connect the primary USB-C cable to the laptop and the monitor.
If the screen still does not light up, connect the secondary USB-C or USB-A power cable to a wall adapter or USB port.
Check whether the power LED turns on.
Try switching to another power adapter with at least 10W output.
3. Adjust Windows Display Settings
Sometimes the system detects the monitor but does not activate the display.
Steps:
Right-click the desktop and select "Display settings".
Scroll down to "Multiple displays", click "Detect" if Windows does not show the second monitor.

Select "Extend these displays" from the dropdown menu.
Adjust the resolution to match the portable monitor's native resolution.
Click "Apply" and verify if the screen starts working.
4. Reset the Lenovo Portable Monitor Settings
A settings misconfiguration can cause your monitor to stop displaying.
Steps:
Press the menu or settings button on the portable monitor.
Navigate to Reset or Factory Reset using the side buttons.
Press OK to confirm.
Reconnect the monitor and test again.
5. Try Using HDMI (If Your Model Supports It)
Some Lenovo portable monitors come with mini HDMI or micro HDMI ports.
Steps:
Use a high-quality mini HDMI to HDMI cable.

Connect the HDMI cable from the monitor to the laptop.
Ensure the monitor is powered through USB-C or USB-A.
Open Display settings on Windows and check if the monitor appears.
If HDMI works but USB-C does not, the issue may be related to USB video drivers or faulty USB-C hardware.
6. Update BIOS and Chipset Drivers Manually
Incorrect firmware or outdated motherboard drivers can prevent USB-C displays from working.
Steps:
Visit the Lenovo support website.
Enter your laptop model number.

Download the latest BIOS update.
Install the update following on-screen instructions.
Download and install the latest chipset drivers.
Restart your system and reconnect the portable monitor.
7. Test the Monitor on Another Device
To confirm whether the issue is with the monitor or your laptop:
Connect the portable monitor to another Windows laptop or a USB-C smartphone with video output support.
If it works on another device, the problem is with your computer configuration.
If it still does not work, the monitor may have internal hardware damage.
8. Inspect for Hardware Issues
Portable monitors are prone to internal cable or port failures.
Check the following:
Loose USB-C port on the monitor
Physical damage on the cable
Bent pins inside the USB-C connector
Flickering or intermittent connection caused by worn wires
If hardware symptoms appear, professional repair may be required.
Update Drivers
Outdated or corrupted graphics, USB-C, or chipset drivers are a major cause of portable monitors not displaying properly. Driver Talent X can automatically detect missing or malfunctioning drivers and install the correct versions.

Download and Install:
Click the "Download" button to download the software package.
Run the installer and follow the on-screen prompts. Choose your preferred installation directory and complete the setup.
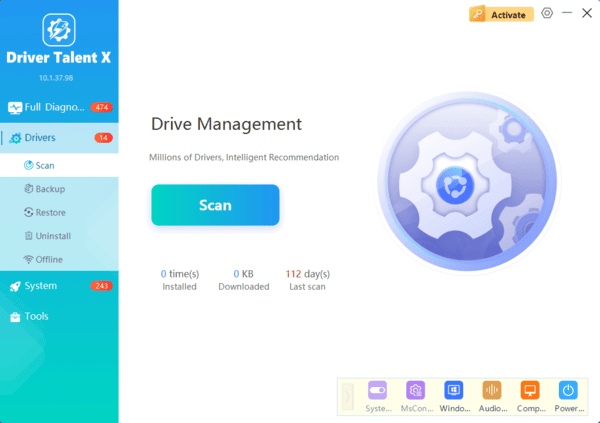
Start a System Scan:
Open the program from the desktop shortcut or Windows Start menu, go to "Drivers" > "Scan", click "Scan".
Driver Talent X will analyze all hardware drivers including graphics drivers, display adapters, monitor drivers, and chipset drivers.
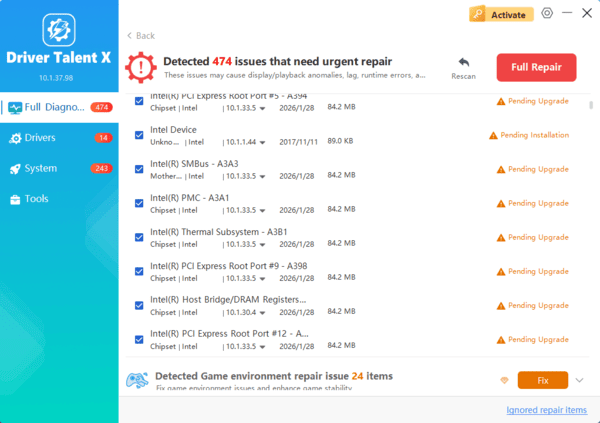
Update All Drivers:
Identify outdated, missing, or corrupted drivers. Pay attention to graphics card drivers (NVIDIA, AMD, Intel), monitor drivers, and system chipset drivers.
Select the "Upgrade" or "Repair Now" button to automatically download and install all recommended versions.
Restart Your PC:
Restart your computer to apply the updated drivers.
Reconnect your Lenovo portable monitor and check if the display works normally.
If driver issues caused the problem, the monitor should now be detected by Windows immediately.
Conclusion
A Lenovo portable monitor may stop working due to driver issues, incorrect configurations, incompatible USB-C ports, or hardware failures. Updating all drivers with Driver Talent X is the most efficient first step and resolves display recognition issues in most cases. If the problem continues, the additional solutions in this guide will help you diagnose and fix the issue thoroughly.
