A Lenovo ThinkPad that refuses to turn on can be highly disruptive, especially when it is needed for work or urgent tasks. In some cases, the laptop may show no lights at all, remain stuck on a black screen, or power on but fail to boot into Windows. This issue can be caused by a variety of factors, including firmware or BIOS problems, faulty or outdated drivers, battery or power supply failure, internal hardware conflicts, or system corruption. This guide explains the most common causes and provides step-by-step solutions to help you diagnose and fix a Lenovo ThinkPad that won't turn on.
Solutions to Fix the Lenovo ThinkPad Not Turning On
Solution 1. Perform a Hard Reset
A power drain can block startup.
How to Hard Reset a ThinkPad:
1. Disconnect the AC adapter.
2. Remove any USB devices and external monitors.

3. On models with removable batteries:
Remove the battery, then hold the power button for 15 seconds.
4. On models with internal batteries:
Use the reset pinhole on the bottom cover and press it with a paperclip.
5. Reconnect the charger and try powering on again.
Solution 2. Check AC Adapter and Battery Health
If the ThinkPad is completely dead with no LEDs, the power source may be faulty.
Steps:
Test the power adapter on another Lenovo laptop if available.
Confirm that the charging LED turns on when plugged in.
Remove the battery (if removable) and power on with AC only.
Replace the battery or charger if there is no response.
Solution 3. Use the Novo Button to Access Recovery
The ThinkPad Novo button helps bypass normal startup.
How to Use the Novo Button:
Locate the small pinhole usually labeled with a curved arrow.
Press it using a paperclip.
Choose "BIOS Setup", "Boot Menu", or "System Recovery".

If the ThinkPad boots through Novo, the issue may be firmware or driver related.
Solution 4. Reset BIOS Settings
Corrupted BIOS configurations can cause black screen startup failure.
Steps:
Press the Novo button and choose BIOS Setup.
Press F9 to load default settings.
Press F10 to save changes and restart.
If you can access BIOS but Windows does not load, the storage device may be at fault.
Solution 5. Test RAM and Reseat Memory Modules
Loose or faulty RAM will prevent the laptop from turning on.
Steps:
Turn the laptop off and disconnect all power sources.
Remove the back cover using a screwdriver.
Take out the RAM sticks and reseat them firmly.

Test each stick individually in each slot.
Replace faulty RAM if the system boots only with one stick inserted.
Solution 6. Check the SSD for Startup Failure
A dead SSD can cause a black or non-booting ThinkPad.
How to Diagnose:
Enter BIOS using the Novo button.
Check whether the SSD is detected under Storage.
If missing, reseat the SSD or replace it.
If detected but unbootable, boot using a Windows installation USB and run Startup Repair.
Solution 7. Try Booting with External Monitor
Sometimes the laptop is on but the built-in display fails.
Steps:
Connect the ThinkPad to an external monitor or TV using HDMI or USB-C.
Press Windows key + P and select "Duplicate" or "Second screen only".

If the external display works, update graphics drivers using Driver Talent X and check the built-in screen's cable.
Solution 8. Run Lenovo Diagnostics
Lenovo provides built-in diagnostics to check hardware failures.
How to Run Diagnostics:
Press the power button and immediately press F10 or F12 depending on model.
Select Lenovo Diagnostics.
Run tests for memory, storage, and motherboard.
Follow recommended repair steps if any component fails.
Update Essential System Drivers
Outdated or corrupted system drivers, including chipset, power management, ACPI, or graphics drivers, can prevent a ThinkPad from booting properly. Driver Talent X allows you to detect problematic drivers even when Windows fails to load normally.

Download and Install:
On another working PC, download the latest version of Driver Talent X.
Transfer the installer to your Lenovo ThinkPad using a USB drive if the laptop can boot into Safe Mode.
Perform a Full Scan:
Open the software from your desktop or Start menu, go to "Drivers" > "Scan", click "Scan".
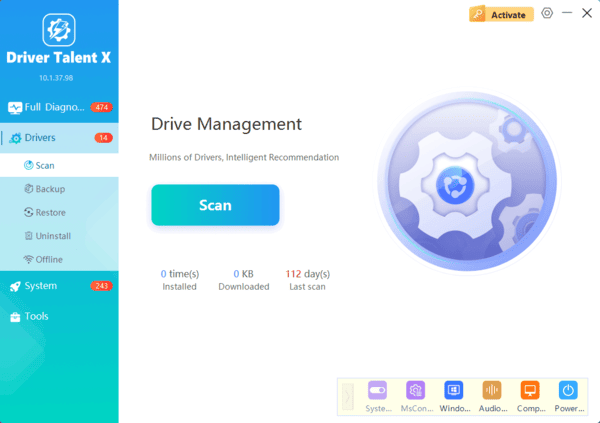
The software will perform a deep analysis of your system, focusing on all core components vital to business laptop performance.
Update All Drivers:
After the scan is complete, the software will display a list of all drivers that need attention. Select the necessary drivers and click the "Upgrade" or "Repair Now" button.
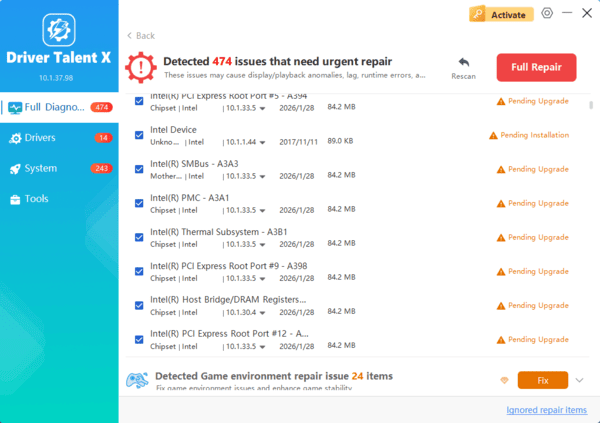
Driver Talent X will download the latest, certified drivers that are customized for your Lenovo ThinkPad, which is critical for restoring system stability.
Restart Your Laptop:
Restart your laptop and check whether it boots normally.
If driver corruption was preventing startup, the system should now function normally.
Final Thoughts
A Lenovo ThinkPad may fail to power on due to driver issues, corrupted firmware, storage failure, RAM problems, or simple power drainage. By updating essential system drivers using Driver Talent X and following the detailed solutions in this guide, you can resolve most startup problems efficiently.
