Nowadays, many people use a USB interface to connect their computer to an HDMI monitor or TV to extend the screen or play high-definition videos. However, not all devices support this type of conversion, and compatibility issues or image errors may occur.
This article will explain in detail how USB to HDMI works, tips for driver installation, and configuration suggestions to help you successfully achieve multi-screen connection or HD video output.
1. How Does USB to HDMI Work?
USB itself does not support video output. Therefore, to enable a connection from USB to HDMI, you need a USB-to-HDMI video converter (also called an adapter or dongle). These devices typically contain a built-in graphics chipset, such as DisplayLink or MCT, which can convert USB data streams into HDMI audio and video signals.
2. Common Use Cases for USB to HDMI
Laptops without HDMI ports needing connection to projectors or TVs
Multi-screen office setups to improve productivity

Mini PCs outputting to large displays via USB
HD video transmission via USB 3.0 or Type-C ports
3. Compatibility Checklist Before You Begin
USB Port Type:
USB 3.0 or higher – Recommended for higher bandwidth and support for HD video.
USB 2.0 – May not reliably support 1080p or higher resolutions.
Operating System Support:
Most USB-to-HDMI adapters support Windows 10/11.
Check whether the manufacturer provides drivers compatible with your OS.

Chipset Compatibility:
For example, DisplayLink chipsets are widely supported, frequently updated, and highly compatible.
It's recommended to confirm the chipset type before purchasing the adapter.
4. USB to HDMI Setup Guide (Windows Example)
Step 1: Connect Hardware
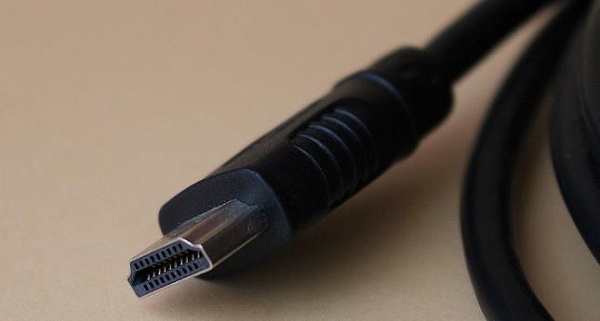
Insert the USB-to-HDMI adapter into your computer's USB port. Then connect your monitor or TV via an HDMI cable.
Step 2: Install Driver
Usually, a driver installation prompt will appear automatically. Follow the instructions to complete the installation.
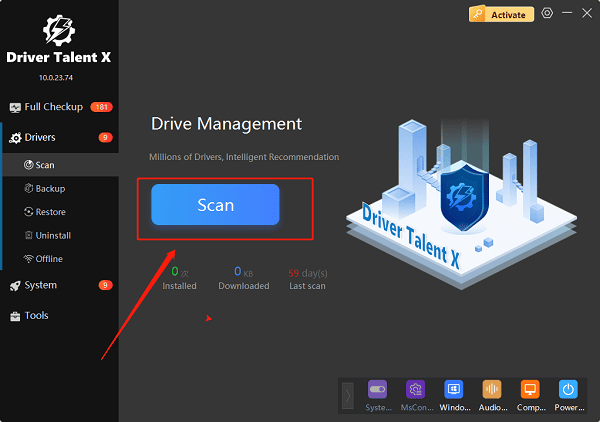
If the prompt does not appear, it's recommended to use Driver Talent X to download and install the driver manually:
Click the "Download" button to get the latest version of Driver Talent X, install and launch the software
Go to the "Drivers" section and click "Scan" to detect all driver statuses on your PC.

In the scan results, find the driver that needs updating and click "Upgrade".
Restart the computer after the update to ensure the driver takes effect.
Step 3: Configure Display Mode
Right-click on your desktop and select "Display settings".
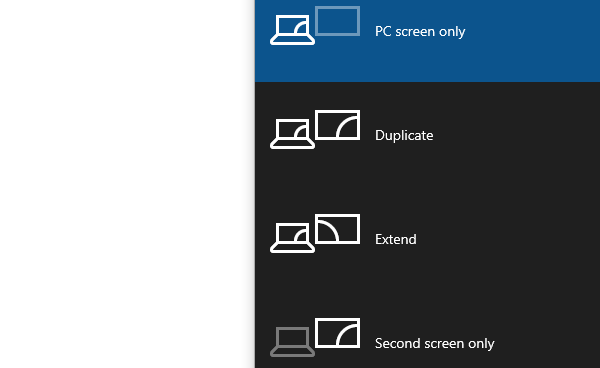
Under the "Multiple displays" section, choose:
Extend these displays
Second screen only
Duplicate these displays

Set resolution and screen layout as needed
5. Common Issues and Solutions
| Problem | Possible Cause | Solution |
| No signal on the monitor | Driver missing or not detected | Check Device Manager and reinstall driver |
| Low resolution or blur | USB 2.0 has low bandwidth | Use a USB 3.0 or higher-spec port |
| No sound output | Audio not set to HDMI | Switch sound output to HDMI in settings |
| Video lag | Weak converter chipset | Use a high-performance chipset |
6. How to Choose the Right USB-to-HDMI Adapter
Prefer USB 3.0 or USB-C interfaces for higher bandwidth.
Support for 1080p or 4K output, depending on your monitor.
Check if it supports multiple systems (e.g., Windows, Linux).
Choose well-known brands to avoid compatibility issues.
Connecting display devices via USB to HDMI brings great convenience for daily work and media entertainment. As long as the interface type, operating system, and drivers are correctly matched, it's easy to achieve multi-screen display or HD video transmission.
When purchasing, it's best to choose a reputable, compatible product and follow this setup guide to configure everything properly and resolve any image or audio output issues quickly.
