Logitech webcams are widely used for video calls, streaming, and content creation thanks to their reliable performance. Setting up a Logitech webcam on Windows 11 is usually straightforward, but sometimes users encounter recognition or driver issues. This guide walks you through everything—from initial connection to troubleshooting—so your webcam works flawlessly.
Step 1: Unbox and Connect the Webcam
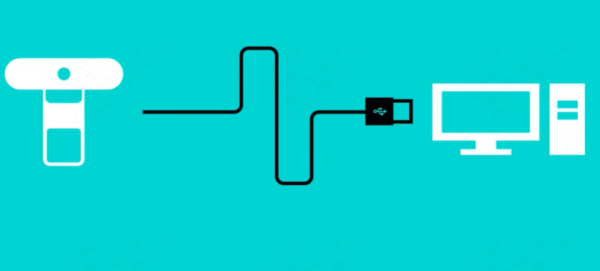
Unbox your Logitech webcam and identify the USB cable. Most Logitech webcams use a USB-A or USB-C connection.
Connect the webcam to an available USB port on your PC. For the best results, plug directly into your computer rather than using a USB hub
If your webcam has a clip, attach it securely to your monitor or laptop
Make sure the webcam is positioned at eye level for optimal framing during video calls
Step 2: Check Windows Recognition
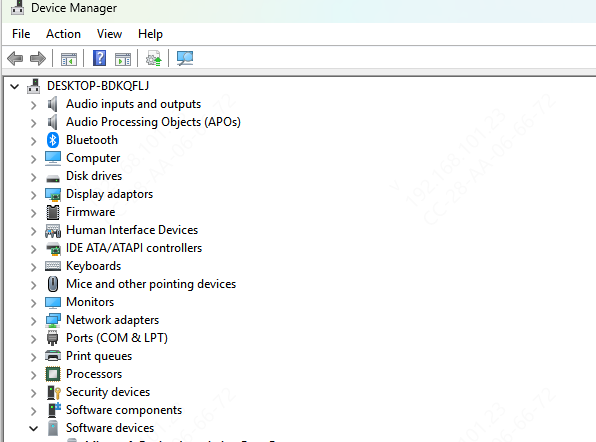
Open Device Manager (Win + X → Device Manager)
Expand the Cameras or Imaging Devices section
Your Logitech webcam should appear in the list
If the webcam does not appear, try:
Reconnecting it to a different USB port
Restarting your PC

Step 3: Install Logitech Software
Many Logitech webcams include additional software for advanced features:
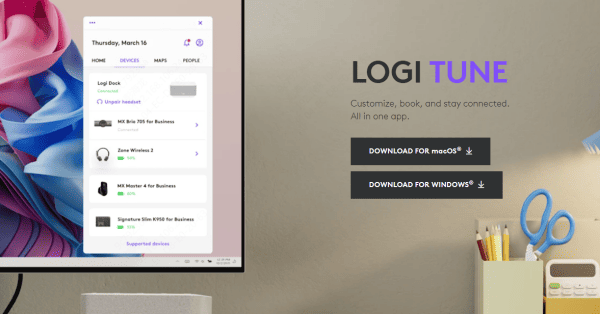
Download Logitech Capture or LogiTune from the official Logitech Support website
Install the software and follow the on-screen instructions
Use the software to configure webcam settings such as resolution, frame rate, zoom, and field of view
Logitech Capture allows you to switch between multiple cameras, adjust exposure, and even add filters, which is helpful for streaming or professional calls
Step 4: Set the Webcam as Default in Windows 11
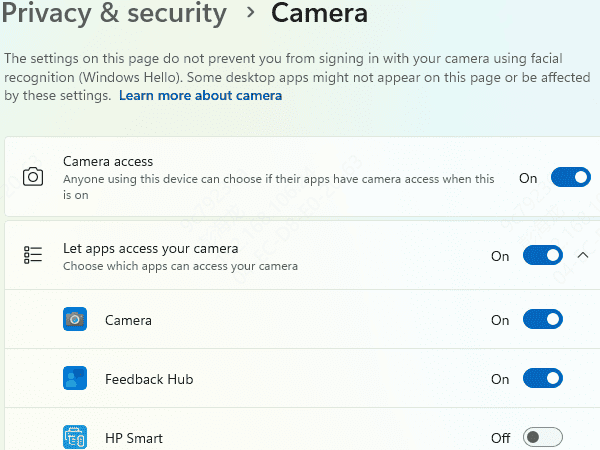
Open Settings → Privacy & Security → Camera
Make sure Camera access is turned on for your device
Scroll down to Let apps access your camera and enable access for the apps you want to use (Zoom, Teams, Skype, OBS, etc.)
Open your video application and select the Logitech webcam as the input device in settings
If multiple cameras are connected, explicitly select the Logitech webcam in the app to avoid defaulting to a built-in camera
Step 5: Update Webcam Drivers
Outdated or missing drivers can prevent the webcam from working properly:
Update via Device Manager
Device Manager → Cameras → Right-click your Logitech webcam → Update driver → Search automatically
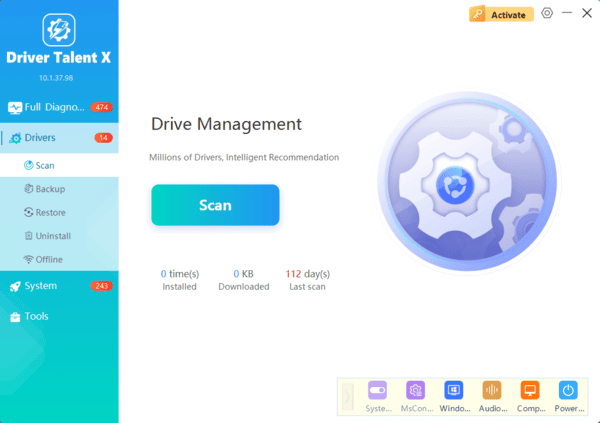
Automatic Update via Driver Talent X (Recommended)
Download and install Driver Talent X
Launch → Click Diagnose → Scan for outdated or missing drivers
Repair or update the webcam driver automatically
Restart your PC
Using Driver Talent X ensures your webcam and all related USB drivers are compatible with Windows 11, avoiding detection or performance issues
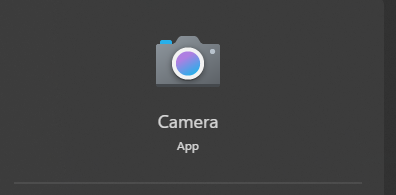
Step 6: Test the Webcam
Open Camera app in Windows 11 (Search → Camera)
Your Logitech webcam should display a live feed
Test video quality, microphone (if built-in), and adjust lighting
Ensure no other app is using the webcam, as this can prevent it from being recognized by new applications
Troubleshooting Common Issues
Webcam Not Detected: Try a different USB port, restart the PC, and ensure the cable is not damaged
Poor Image Quality: Adjust lighting, resolution settings in Logitech Capture, and webcam angle
App Doesn't Detect Webcam: Check app permissions in Windows 11 Privacy settings
Long-Term Maintenance
Keep drivers updated using Driver Talent X for seamless Windows 11 compatibility
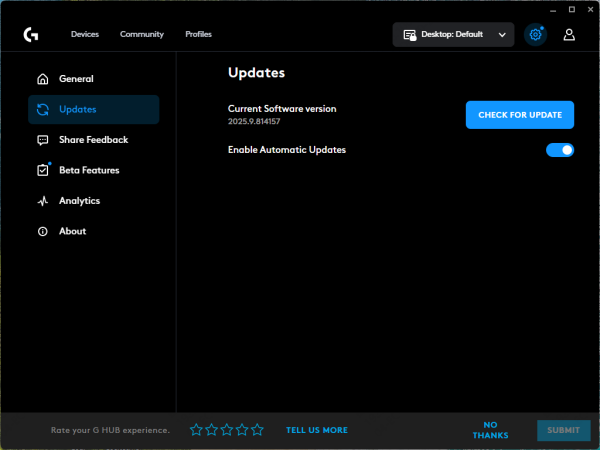
Regularly check Logitech Capture or G HUB for firmware and software updates
Avoid disconnecting the webcam frequently to reduce wear on the USB connector
Clean the lens gently to maintain image clarity
Conclusion
Setting up a Logitech webcam on Windows 11 is simple when following these steps: connect the device, install Logitech software, configure Windows settings, update drivers (especially with Driver Talent X), and test the webcam in your apps. Routine maintenance ensures high-quality video and reliable performance for streaming, video calls, and content creation.
