When disk usage remains at 100% in Windows 10, the computer may respond slowly even when few applications are open. Programs can take longer to launch, files may load slowly, and the system may freeze temporarily. The problem can originate from busy Windows services, driver conflicts, background programs, incorrect memory settings, corrupted files, or a failing storage drive. This guide explains how to identify the cause and reduce excessive disk activity.
Common Causes of 100% Disk Usage
Resource-Heavy System Processes
Driver Issues
Virus or Malware Infection
Improper Virtual Memory Settings
Severe Disk Fragmentation
Too Many Startup Items or Background Processes
Hardware Failure
Method 1: Disable Superfetch (SysMain) Service
Press Win + R, type "services.msc", and press Enter.
Find SysMain in the list, right-click and choose "Properties".
Click "Stop", change Startup type to "Disabled", and confirm.
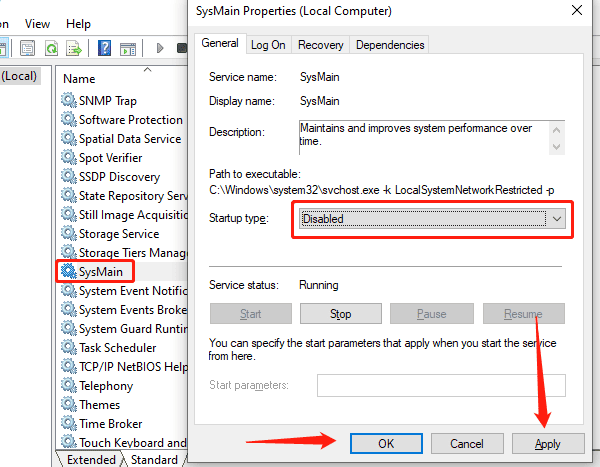
Restart your PC to check if disk usage decreases.
Method 2: Turn Off Windows Search Indexing
In the Services window, locate Windows Search, right-click it and choose "Properties".
Click "Stop" and set Startup type to "Disabled".
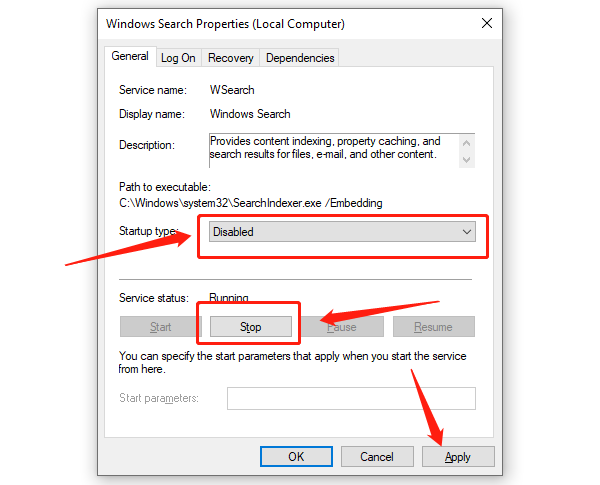
Restart your system to test the result.
Method 3: Adjust Virtual Memory Settings
Right-click This PC, select Properties > Advanced system settings.
Under "Performance", click "Settings", then go to the "Advanced" tab.
Click "Change" under Virtual Memory. Uncheck "Automatically manage", and manually set the Initial and Maximum size (typically 1.5 to 3 times your physical RAM).
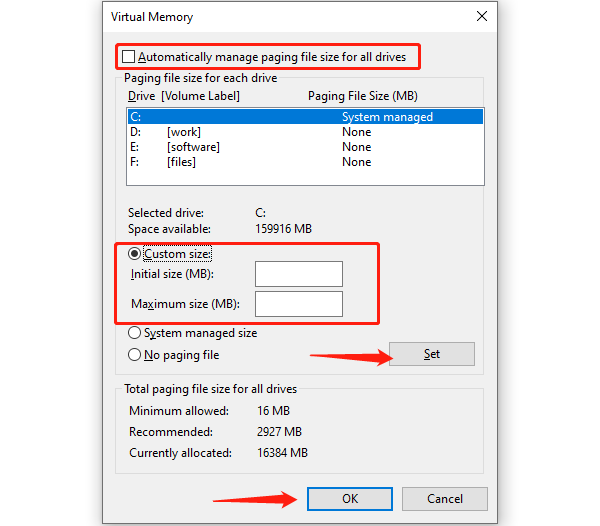
Save changes and restart your computer.
Method 4: Manage Background Programs
Press Ctrl + Shift + Esc to open Task Manager and go to the Startup tab.
Disable unnecessary startup programs to reduce load on boot.
Under the "Processes" tab, end tasks that are using a high percentage of disk.
Method 5: Defragment the Disk (For HDD Only)
Open File Explorer, right-click the drive you want to optimize (e.g., C:), and choose "Properties".
Go to the "Tools" tab and click "Optimize" under "Optimize and defragment drive".
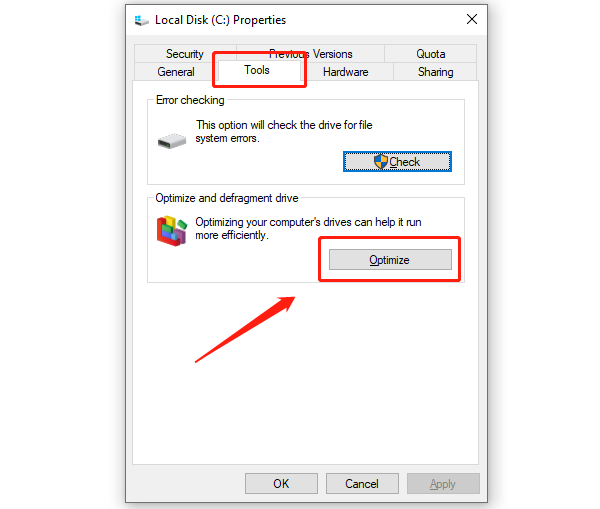
Run the defragmentation process.
Method 6: Update Disk Drivers
Driver issues are one of the most common causes of sustained 100% disk usage in Windows. If you're not familiar with manual driver updates, you can use Driver Talent X, a tool that automatically identifies, downloads, and installs the most compatible drivers for your device.

Click the download button to get the latest version of Driver Talent X.
Install and launch the software, then go to the "Drivers" section and click "Scan".
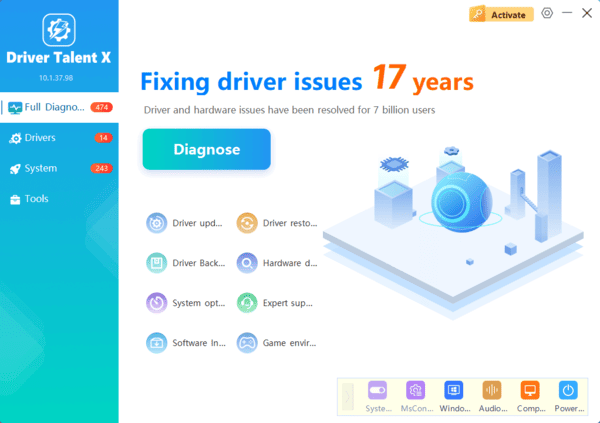
After scanning, locate the disk driver in the results and click "Upgrade".
Restart your computer to ensure the new driver takes effect.
Method 7: Check Disk Health
In the Windows search bar, type "cmd", right-click Command Prompt, and select "Run as administrator".
Enter the command: chkdsk C: /f /r
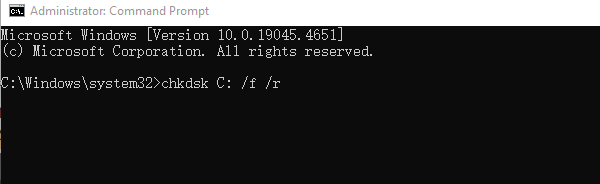
If prompted, type "Y" to schedule the check on the next reboot.
Restart your PC to allow the disk check and repair process to run.
Frequently Asked Questions
Q1: Can 100% disk usage damage the hard drive?
A: Prolonged high usage can accelerate wear and tear, especially on HDDs. It's recommended to identify and fix the root cause as soon as possible.
Q2: Can SSDs also show 100% usage?
A: Yes, although SSDs are faster, outdated drivers or system bugs can still lead to 100% disk usage.
Q3: What if none of the methods work?
A: If the issue persists, consider backing up your data and reinstalling the operating system, or consult a professional technician to check for hardware failure.
In Windows 10, persistent 100% disk usage is a common issue. However, in most cases, disabling unnecessary services, updating drivers, optimizing memory settings, or scanning for malware can effectively resolve the problem.
Follow the steps in this guide to troubleshoot methodically and select the solution that best fits your situation—so your PC can return to smooth, responsive performance.