While an ASUS ROG desktop computer not turning on can sometimes indicate a hardware failure, it is more often caused by power supply glitches, improperly seated components, or, surprisingly, outdated system drivers that control core power functions.
To systematically troubleshoot and fix your ASUS ROG desktop, this guide provides detailed, step-by-step solutions, starting with the software and driver integrity that governs system power.
Part I: Driver and System Integrity Checks
Even when a PC won't turn on, certain drivers and firmware can affect how the power button and motherboard communicate, especially if the issue is intermittent or happened after an attempted shutdown.
Automated Driver Update with Driver Talent X
If your PC previously suffered from an interrupted shutdown or sudden crash, corrupted drivers for the chipset or power management (ACPI) can prevent a proper boot. A specialized utility helps diagnose and repair these core system drivers.
Preparation (If Possible): If your PC powers on but immediately turns off, boot into "Safe Mode". If your PC won't turn on at all, proceed to Part II first, and use this method once you achieve a temporary boot.
Download and Install:
Click the "Download" button to download the software package.
Install it on your ASUS ROG desktop.
Run Scan:
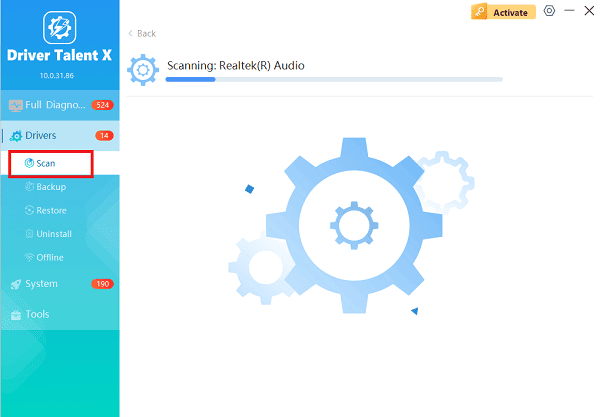
Launch the application and go to "Drivers" > "Scan", click "Scan".
The software will perform a deep analysis of your system.

Install the Update:
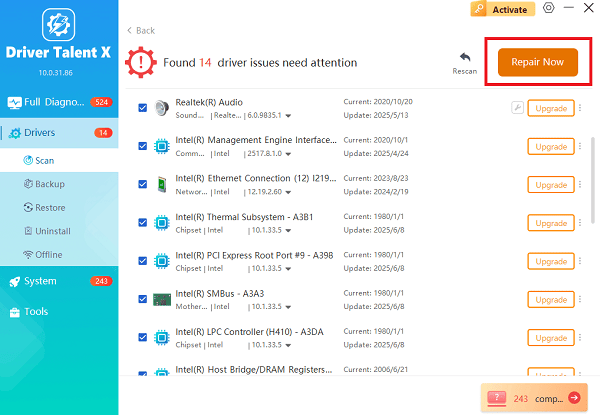
After the scan is complete, the software will display a list of all drivers that need attention.
Select the necessary power and system drivers and click the "Upgrade" or "Repair Now" button. Driver Talent X will download the latest, certified versions specific to your ASUS ROG motherboard.

Finalize:
After the installation is complete, restart your computer to ensure the new power management drivers load correctly.
Part II: Hardware and Physical Checks
These steps address the most common physical causes of boot failure, focusing on power and cable connections.
Method 1: Perform a Power Drain (Hard Reset)
Residual electrical charge (flea power) can sometimes prevent the motherboard from initializing the power-on sequence.
Disconnect Everything: Turn off the computer. Unplug the main power cable from the back of the desktop tower.
Hold Power Button: Press and hold the main power button on the front of the tower for 30 to 40 seconds. This drains all residual charge from the system components.

Reconnect: Plug the power cable back into the tower and the wall outlet (ensure the wall outlet is working).
Attempt Boot: Try turning the ASUS ROG desktop back on.
Method 2: Check Power Supply Switch and Cables
Simple physical disconnections are often the most overlooked cause.
PSU Switch: Check the power supply unit (PSU) switch on the back of the tower. Ensure it is flipped to the "I" (On) position, not "O" (Off).
Wall Outlet: Test the wall outlet by plugging in another device (like a lamp or phone charger). If the outlet is dead, use a different one.
Internal Cables (Advanced): Open the side panel of the tower. Gently push down on the main motherboard power cables (24-pin ATX and 8-pin CPU/EPS) and the GPU power cables to ensure they are securely seated. A slight nudge can fix a loose connection.
Part III: Component and BIOS Troubleshooting
If the system attempts to power on but fails, a component conflict or BIOS error may be the issue.
Method 1: Reseat RAM and Graphics Card
A component that has shifted slightly out of its slot can prevent the system from passing the Power-On Self-Test (POST).
Power Down and Unplug: Ensure the PC is completely off and unplugged from the wall (repeat Method 1 in Part II).
RAM: Locate the RAM sticks. Gently unclip them, remove them completely, and then firmly seat them back into their slots until the clips lock into place.
GPU: Unclip the graphics card (release the retention clip on the PCIe slot) and remove the card. Re-seat it firmly into the slot and ensure the retention clip locks properly.
Attempt Boot: Plug the PC back in and attempt to turn it on.
Method 2: Clear CMOS (Reset BIOS Settings)
A corrupted BIOS setting can block the boot process. Clearing the Complementary Metal-Oxide-Semiconductor (CMOS) resets the BIOS to factory defaults.
Power Down and Unplug: Ensure the PC is completely off and unplugged.
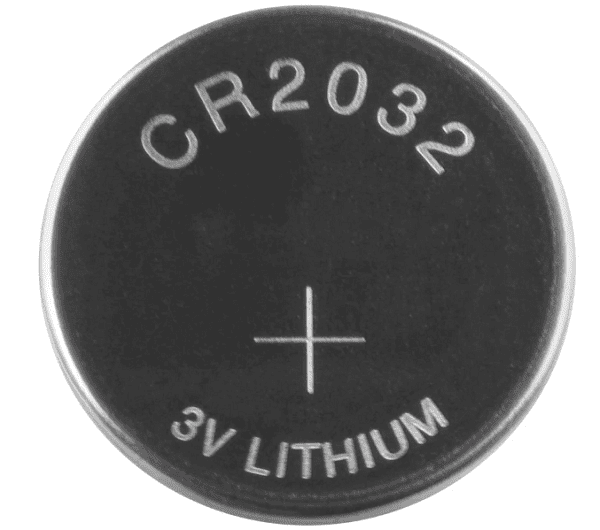
Locate CMOS Battery: Find the small, flat silver coin-style battery (CR2032) on the motherboard.

Remove Battery: Gently remove the battery using a small non-metallic tool.
Wait: Wait for 5 minutes to ensure the CMOS memory is cleared.
Replace and Test: Reinstall the battery, plug the PC back in, and attempt to turn it on.
Conclusion
A non-responsive ASUS ROG desktop computer is often solved by performing a Power Drain or confirming that all internal cables are fully seated.
For long-term reliability and to prevent driver-related power conflicts, it is crucial to ensure that your core system drivers are optimized by using Driver Talent X. By systematically checking power, connections, and internal components, you can reliably restore power to your system.
