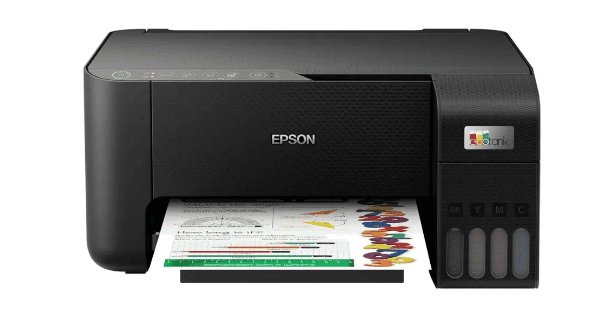
If your Epson scanner is not recognized after connecting to your computer, cannot scan properly, or displays a "driver not found" message, it is likely that the driver is not correctly installed or is outdated.
This article provides a step-by-step Epson scanner driver download and installation guide for Windows 10/11, helping you quickly restore scanning functionality and improve device performance.
1. Why Do You Need to Install the Epson Scanner Driver?
A driver is the bridge between your computer and the scanner. Installing the correct driver ensures that your scanner functions properly by:
Identifying the device model
Supporting high-resolution scanning
Enabling advanced features such as multi-page scanning and OCR recognition
Avoiding compatibility issues or system errors
If you encounter problems like "device not responding" or "unable to initialize scanner", your first step should be to check whether the driver is installed correctly.
2. Preparations Before Installation
Before installing the Epson scanner driver, make sure you have the following information ready:
Scanner model: e.g., Epson V39, Epson L3250, Epson Perfection V600

Connection method: Ensure USB or Wi-Fi connections are functioning properly
Operating system: Windows 10 or Windows 11, 32-bit or 64-bit
Administrator privileges: Required to install drivers
3. Methods to Download and Install the Epson Scanner Driver
Method 1: Download from the Epson Official Website
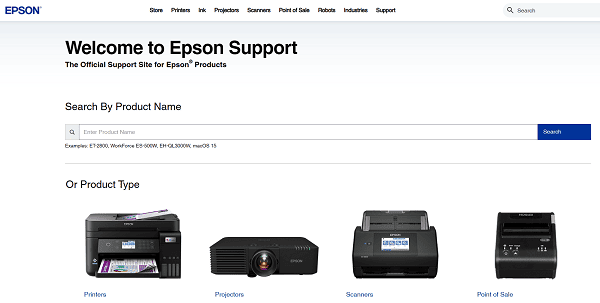
Visit the Epson website:
Open your browser, search for, and visit the Epson official site.
Search for your scanner model:
Go to "Support" > "Scanner", enter your scanner model (e.g., Epson L3250), and click search.

Select your operating system version:
The site will automatically detect your OS. If it's incorrect, manually choose Windows 10 or Windows 11, and select the correct 32-bit or 64-bit version.
Download the driver:
Locate the "Drivers and Downloads" section, click the "Download" button, and save the installer to your computer.
Run the installer:
Double-click the downloaded driver file and follow the on-screen instructions to complete the installation. Restart your computer afterward for the changes to take effect.
Method 2: One-Click Installation with Driver Talent X
If you're unsure of your device model or unfamiliar with manual download steps, consider using a third-party driver management tool like Driver Talent X, which supports one-click scanning and automatic installation of compatible drivers, saving time.
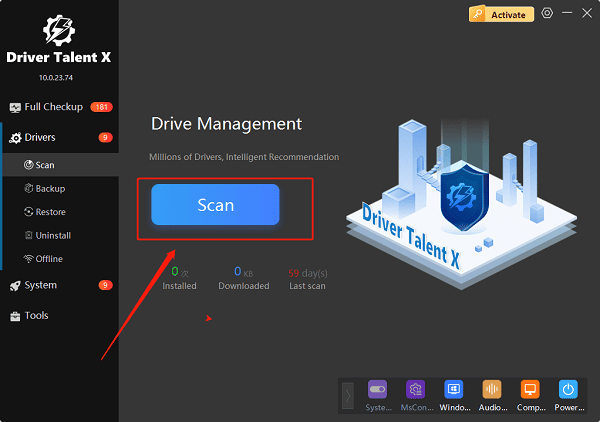
Click the "Download" button to get the latest version of Driver Talent X, then install and launch the software.
Under the "Drivers" section, select the "Scan" option and click "Scan". The program will automatically check the status of all drivers.

Find the scanner driver in the scan results and click "Install" or "Upgrade".
Restart your computer after the update to ensure the driver takes effect.
4. Frequently Asked Questions (FAQ)
Q1: The scanner is still not recognized after installing the driver.
A: Ensure that the USB cable is firmly connected, or try switching to another port. For wireless connections, make sure the scanner and computer are connected to the same Wi-Fi network.

Q2: The system says "scanner not found" or "scanner not ready".
A: Restart both the scanner and the computer, and confirm that the driver is installed successfully. Check in Device Manager for any yellow exclamation marks.
Q3: Do I have to use the official Epson driver?
A: It's recommended to use the official driver for best compatibility and full functionality. Generic drivers may have feature limitations.
5. Conclusion
Installing the correct Epson scanner driver is essential for stable operation and efficient scanning.
Whether you are using Windows 10 or Windows 11, it's best to download and install the official driver from Epson's website, or use Driver Talent X for a one-click installation — particularly helpful for beginners.
If issues persist, consult Epson's official support documentation or use a driver repair tool for further troubleshooting.
