More and more Windows users are choosing to replace traditional mechanical hard drives with SSDs to improve their computer's speed and responsiveness.
However, some users find that after installing a new SSD, it does not show up in the BIOS, causing the system to fail to recognize the drive, preventing OS installation or data access.
This article will explain the common reasons why a newly installed SSD might not appear in BIOS and provide effective solutions to help you quickly restore normal SSD detection.
1. Common Reasons Why a New SSD Does Not Show Up in BIOS
Hardware connection issues: The SSD is not properly connected to the motherboard or the power cable is loose, causing the hardware to be unrecognized.
BIOS settings have disabled the relevant interface: SATA or NVMe interfaces are disabled, or the interface mode is incorrectly set (e.g., AHCI mode not enabled).
SSD not initialized or formatted: The new drive has not been initialized, and no drive letter is assigned in Windows Disk Management.
Outdated motherboard firmware (BIOS): An older BIOS version may not support newer SSD models or interfaces.
Damaged data or power cables: SATA cables, M.2 slots, or power connectors may be damaged, affecting SSD recognition.
SSD hardware failure: The SSD itself may be defective or have quality issues.
2. Detailed Steps to Resolve the Issue
Step 1: Check Hardware Connections
Power off the computer and unplug the power cable.
Open the case and confirm the SSD is securely inserted into the SATA port or M.2 slot.
Check that the SATA data and power cables are firmly connected.
If possible, replace the SATA cable or try a different SATA port.
For M.2 SSDs, ensure the screw is tightened and the slot is free of dust.
Step 2: Enter BIOS and Check Drive Settings
During startup, press Del, F2, or the key specified by your motherboard to enter BIOS.
Locate the "Storage Configuration" or "Advanced"menu and check if the SATA/NVMe interfaces are enabled.
Verify the "SATA Mode" is set to AHCI (not IDE or RAID) to ensure compatibility.
If using an M.2 SSD, confirm the M.2 slot is not disabled.
Save changes, exit BIOS, and restart.
Step 3: Update SSD Drivers
Outdated, corrupted, or improperly installed drivers can also cause the system to fail to detect a new SSD. It is recommended to use the Driver Talent X tool to save time and avoid downloading or installing incorrect drivers.
Click the download button to get the latest version of Driver Talent X, install and launch the software.
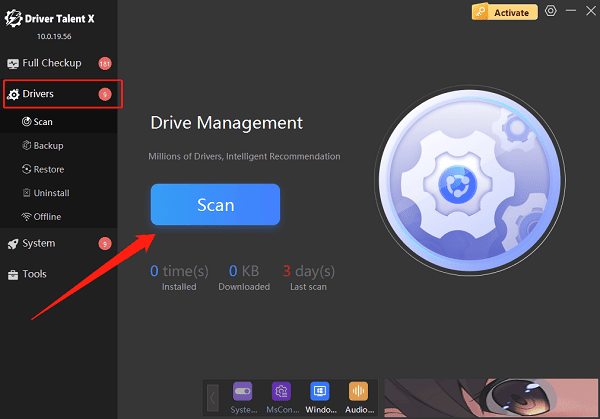
In the "Drivers" section, select the "Scan" option and click "Scan"; the software will automatically detect all driver statuses.

Find the hard drive driver in the scan results and click "Upgrade".
After updating, restart the computer to ensure the driver takes effect.
Step 4: Disable Fast Startup or Secure Boot (for some systems)
Some systems enabling "Fast Startup" or "Secure Boot" may cause hard drive recognition issues:
Enter BIOS and locate the "Secure Boot" setting, then disable it.
To Disable Windows Fast Startup:
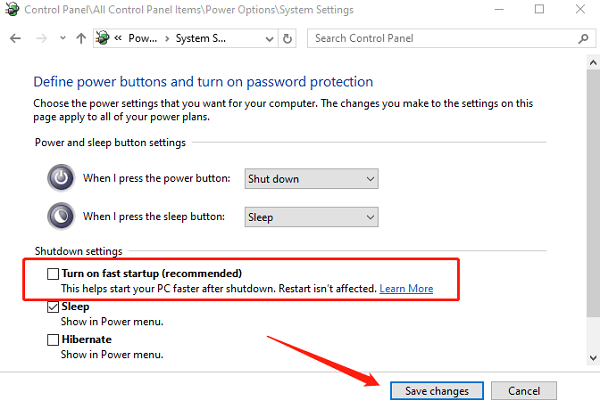
Control Panel > Power Options > Choose what the power buttons do > Change settings that are currently unavailable > Uncheck "Turn on fast startup (recommended)".

Step 5: Initialize the SSD in Disk Management
If the SSD appears in BIOS but is not recognized by the operating system:
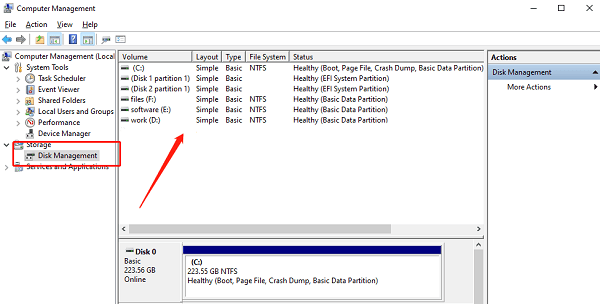
Right-click "This PC" > "Manage" > "Disk Management".

Locate the new drive; if it shows "Not Initialized", right-click and select "Initialize Disk".
Choose either GPT or MBR partition style (GPT is generally recommended for newer computers).
After initialization, right-click the unallocated space, select "New Simple Volume", and complete the formatting process.
Step 6: Update Motherboard BIOS Firmware
Visit your motherboard manufacturer's website and download the latest BIOS version.
Follow the official instructions carefully to safely update your BIOS.
After updating, re-enter BIOS to check if the SSD is detected.
Step 7: Test or Replace the SSD
If all the above methods fail, the SSD might have a hardware defect.
Test the SSD on another computer to see if it is recognized.
Contact the seller or manufacturer for replacement or repair according to the warranty policy.
A newly installed SSD not showing up in BIOS is usually caused by connection issues, BIOS settings, or hardware compatibility. By following the above steps, most problems can be effectively resolved. If software troubleshooting fails, focus on checking the SSD itself and the quality of cables and hardware.
