Lenovo laptop touchpad not working on Yoga, IdeaPad, or ThinkPad? This guide covers proven fixes — updating touchpad drivers with Driver Talent X, reinstalling via Device Manager, toggling the Fn key lock, checking Windows touchpad settings, and disabling power saving — to restore full touchpad functionality fast.
Physical and Setting Checks
These steps address common user errors or accidental settings that lock the touchpad.
Method 1: Check Keyboard Function Lock
Many Lenovo laptops have a specific function key to quickly toggle the touchpad on or off, which can be pressed accidentally.
Identify Lock Key: Look for a key on the top row (F1 through F12) that has a touchpad or touch surface icon with a line through it.
Toggle Lock: Press the Fn key and the corresponding function key simultaneously (e.g., Fn + F6 or Fn + F10). Pressing this combination should toggle the touchpad back on.
Try BIOS Fix: If the function key doesn't work, restart your PC and press the required key (F1 or F2) to enter the BIOS/UEFI. If the touchpad works in the BIOS, the issue is definitely software-related in Windows.
Method 2: Check Windows Touchpad Settings
Ensure the touchpad hasn't been accidentally disabled in the Windows settings menu.
Press Windows Key + I to open Settings.
Go to "Bluetooth & devices" > "Touchpad" (or "Devices" > "Touchpad" on older Windows versions).
Ensure the main "Touchpad" toggle switch at the top is set to "On".

Also, check the setting "Leave touchpad on when mouse is connected" and ensure it is checked if you keep an external mouse plugged in.
System and Power Fixes
These solutions address deeper system conflicts that affect the touchpad's power state.
Disable Power Saving for the Touchpad
Windows may be putting the touchpad to sleep to conserve power, leading to unresponsiveness.
Press Windows Key + X and select "Device Manager".
Expand the "Human Interface Devices" or "Mice and other pointing devices" category.
Right-click on the touchpad entry and select "Properties".

Go to the "Power Management" tab.
Uncheck the box that says "Allow the computer to turn off this device to save power". Click "OK".
Driver Integrity and System Synchronization
The touchpad relies on a stable driver that communicates directly with the Windows system and the motherboard chipset. An outdated or corrupted driver is the most frequent cause of an unresponsive touchpad.
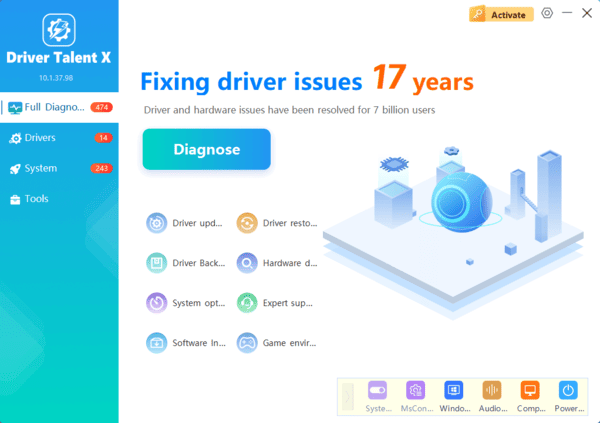
Method 1: Automated Driver Update with Driver Talent X
Manually troubleshooting and updating the various Human Interface Device (HID), touchpad, and chipset drivers can be complex. A specialized utility automates this process, ensuring that the necessary input drivers are perfectly compatible with your Lenovo hardware and the latest Windows build.
Preparation:
Use an external mouse to navigate.
Download and install the Driver Talent X application onto your Lenovo laptop.
Run Scan:
Launch the application and go to "Drivers" > "Scan", click "Scan".
The software will perform a deep analysis of your system, focusing on peripheral and controller drivers.
Execute Update:
After the scan is complete, the software will display a list of all drivers that need attention. Select the necessary drivers and click the "Repair Now" button.
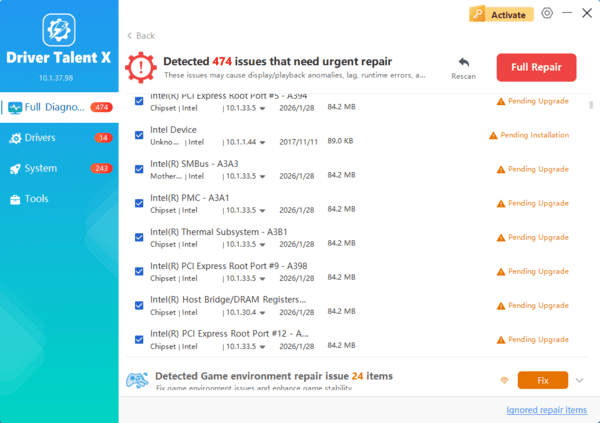
Driver Talent X will download the latest, certified versions specific to your Lenovo touchpad hardware (e.g., Synaptics or Elan), crucial for resolving responsiveness issues.
Finalize:
After the installation is complete, restart your computer and test the touchpad.
Method 2: Reinstall Touchpad Driver via Device Manager
This method forces Windows to forget the existing problematic driver installation and load a fresh, default copy, which is often effective for post-update conflicts.
Press Windows Key + X and select "Device Manager".
Expand the "Mice and other pointing devices" category.
Right-click on your touchpad entry (often labeled as "Synaptics Pointing Device", "ELAN" or "HID-compliant mouse").
Select "Uninstall device". Do NOT check the box to delete the driver software.

In the Device Manager menu, click "Action" > "Scan for hardware changes". Windows will automatically detect the uninstalled device and load a fresh default driver.

Restart the laptop to confirm the fix.
Conclusion
A Lenovo laptop touchpad failing to work is highly fixable by addressing software and configuration conflicts. The most reliable solution is to first ensure driver stability across your entire system with Driver Talent X. By combining a clean driver installation with checking the Fn key lock combination and verifying Windows Touchpad Settings, you can systematically eliminate common failure points and restore full touchpad control.
