Setting up a Dell docking station is an effective way to expand your laptop's connectivity and create a more efficient workstation. Devices like the Dell WD19 or WD15 allow you to connect multiple peripherals—including external monitors, keyboards, mice, printers, and Ethernet—using a single cable connection. This guide will walk you through the proper setup process for your Dell docking station, helping you achieve seamless laptop connectivity, stable performance, and improved productivity whether you're working from home or in an office environment.
Position Your Docking Station
Choose a stable location on your desk or workstation to place the docking station
Ensure there's enough room for all peripherals (monitor, keyboard, mouse, etc.) to connect easily without tangling cables. Make sure the docking station is placed near a power source as some models require external power

Connect Your Laptop to the Dell Docking Station
For USB-C/Thunderbolt Connection: Plug the USB-C or Thunderbolt cable into the port on your laptop and the matching port on the docking station
Ensure that your laptop recognizes the connection. You should hear a sound indicating a new device has been connected, or the screen should show the connection status
For USB-A Connection (if applicable): If you're using a USB-A connection, connect the USB-A cable from the docking station to your laptop's USB-A port
If necessary, install any required drivers from the Dell support page

Connect Your Peripherals to the Docking Station
Monitors: Connect monitors to the docking station using HDMI, DisplayPort, or VGA, depending on your docking station's available ports
Keyboard and Mouse: Plug your keyboard and mouse into the USB ports on the docking station
Ethernet Cable: If you need a wired internet connection, plug the Ethernet cable into the docking station's Ethernet port
Other Peripherals: Attach any other devices you regularly use, such as printers, external hard drives, or speakers

Power On the Docking Station and Laptop
Turn on the docking station (if there's a power button)
Power on your laptop
The system should automatically detect the docking station and recognize the peripherals connected to it

Install Necessary Drivers and Software
For most Dell docking stations, the drivers will install automatically once the device is plugged in. If the drivers do not install automatically, follow these steps:
Manually Install Drivers
Visit the Dell Support Website
Enter your docking station model (e.g., WD19, WD15, D6000) in the search bar
Download and install the latest drivers for your operating system
Restart your laptop after installation
Use Driver Talent X
You can also use Driver Talent X for automated updating driver
Driver Talent X is a reliable tool that automatically detects and installs the correct drivers for your system, making it easier to fix issues related to your docking station

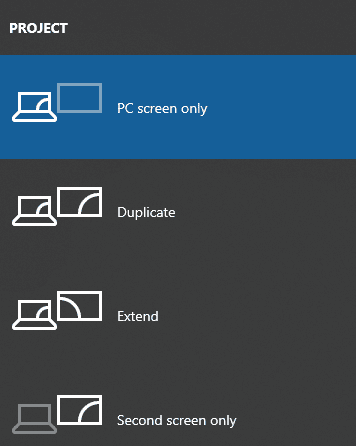
Configure Display Settings
Right-click on the desktop and select Display Settings
Under Multiple Displays, choose whether you want to duplicate, extend, or use a second screen only
You can also rearrange the monitor layout by dragging and dropping the monitors in the settings window
Troubleshooting Common Issues
Monitor Not Detected: Ensure all video cables are securely connected to the docking station and monitor. Check that your laptop recognizes the external monitors
No USB Devices Working: Verify that the USB devices are properly plugged into the docking station. Try plugging them directly into your laptop to ensure they're working
Ethernet Connection Not Working: Check the Ethernet cable connection to both the docking station and the router. Ensure that the docking station's network drivers are installed
No Power to the Docking Station: Make sure the docking station is properly connected to an electrical outlet. Some docking stations require an external power source to function

Conclusion
Setting up your Dell docking station for laptop connectivity is a straightforward process that provides a significant boost to your productivity. Whether you're using it for work, home use, or gaming, connecting multiple peripherals with a single cable helps streamline your workstation and reduce cable clutter. With the step-by-step instructions in this guide, you'll have your Dell docking station set up quickly and be ready to enjoy the enhanced connectivity it offers.
