When using the Windows system, some users may encounter the issue where Windows cannot detect the NVIDIA graphics card. This problem not only affects graphical performance but may also cause game lag and prevent the use of CUDA and other features.
This article will analyze the possible causes in detail and provide multiple effective solutions to help you quickly restore normal detection of your graphics card.
Common Causes Analysis
Windows failing to recognize the NVIDIA graphics card is usually caused by one or more of the following reasons:
The graphics card driver is not properly installed or is corrupted
The graphics card hardware is not correctly seated or has a fault
The BIOS has not enabled the discrete graphics card
Windows updates cause driver conflicts
The system has not switched to the high-performance graphics mode
Solution 1: Reinstall the NVIDIA Graphics Driver
Outdated, corrupted, or incompatible drivers are common causes of Windows not detecting the NVIDIA graphics card. It is recommended to use the Driver Talent X driver management tool to save time and effort, and avoid the risk of downloading or installing incorrect drivers.
Click the "Download" button to get and install the latest version of Driver Talent X.
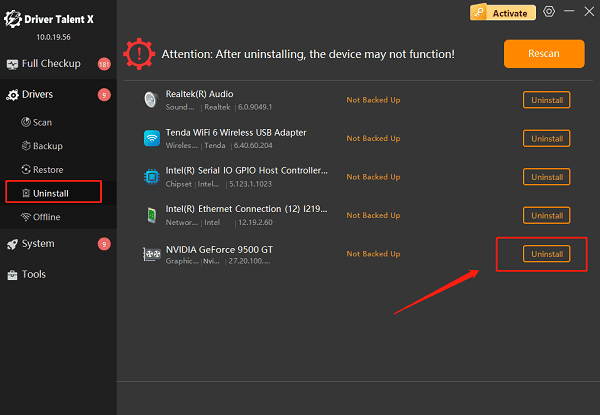
Launch the software and go to the 【Drivers】 page, then switch to the "Uninstall" tab.
Find the NVIDIA graphics driver in the list and click the corresponding "Uninstall" button.

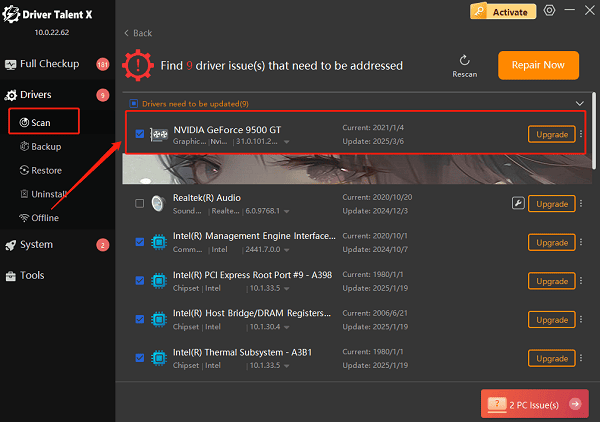
After uninstalling, switch to the "Scan" tab, scan the system, then find the NVIDIA graphics driver in the results and click "Upgrade" to reinstall it.

After installation, restart the computer to ensure the new driver takes effect and runs properly.
Solution 2: Check Hardware Connections
Turn off the computer and unplug the power.
Open the case.
Re-seat the graphics card, ensuring it is firmly inserted into the PCI-E slot.
Check if the graphics card's additional power connectors (such as 6-pin or 8-pin) are connected.
If possible, install the graphics card in another computer to test whether it works properly.
Solution 3: Force Use of the Discrete GPU via NVIDIA Control Panel
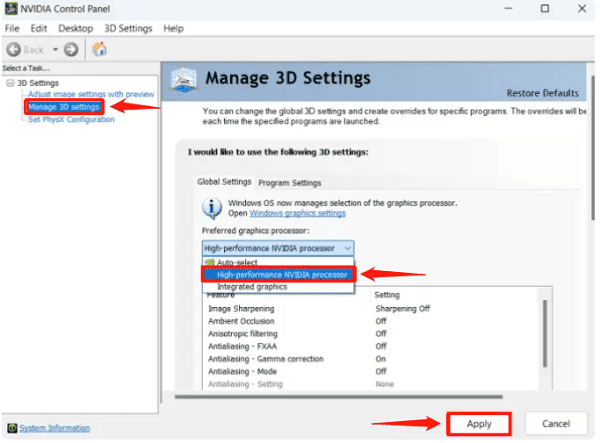
Right-click on the desktop and open the "NVIDIA Control Panel".
Click "Manage 3D Settings".
In "Preferred graphics processor", select "High-performance NVIDIA processor".

Click "Apply" to save the changes.
Solution 4: Enable Discrete Graphics in BIOS
Press Del or F2 during startup to enter BIOS settings.
Find the "Graphics Configuration" or "Primary Display" option.
Change the display setting to "PCI-E" or "Discrete".
Save the settings and restart the system.
Solution 5: Disable and Re-enable the Graphics Device
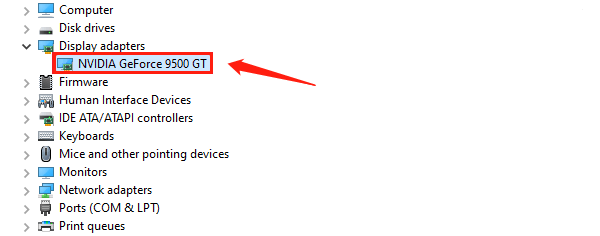
Press Windows key + X to open "Device Manager".
Under "Display adapters", locate the "NVIDIA graphics card" device.

Right-click and select "Disable device", wait a few minutes, then re-enable it.
If the graphics card still does not appear, click "Action" > "Scan for hardware changes".
Solution 6: Update Windows System
Go to "Settings" > "Update & Security" > "Windows Update".
Click "Check for updates" and install the latest system patches.
If the issue appeared after an update, try rolling back to the previous version.
When Windows cannot detect the NVIDIA graphics card, don't panic. You can troubleshoot step-by-step from driver issues, BIOS settings, and hardware connections. Following the methods provided in this article, most problems can be resolved on your own.
If the issue persists after trying these solutions, it is recommended to contact NVIDIA official support or your computer manufacturer's technical support.
