Updating the BIOS (Basic Input/Output System) on your ASUS ROG Strix motherboard is an important maintenance task that helps ensure system stability and compatibility. The BIOS is the core firmware responsible for initializing your hardware and loading the operating system. A BIOS update is often required to support new CPUs, fix critical stability issues, and improve overall system performance—especially for gaming. However, it is also one of the most sensitive procedures, since any interruption or incorrect step can potentially damage or "brick" your motherboard. This guide provides safe, step-by-step instructions to help you successfully update your ROG Strix BIOS with minimal risk.
1. Preparation: Ensure System Stability and Driver Compatibility
Before attempting any BIOS update, you must ensure your operating system and core system drivers are perfectly stable. Conflicts or errors caused by outdated drivers can interfere with the BIOS utility software or lead to unforeseen instability during the flash process.
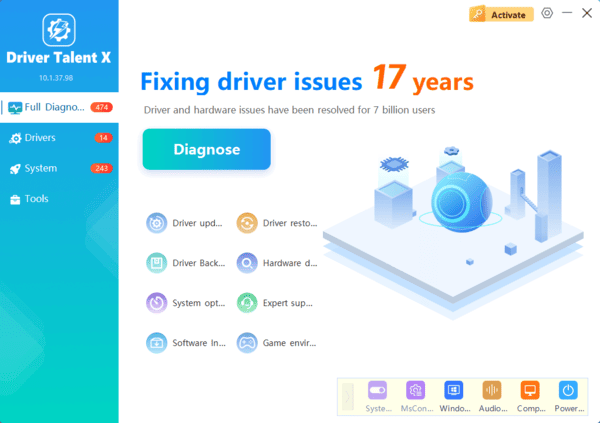
Driver Talent X is an efficient tool that automates the driver update process, making it the quickest and safest way to ensure your entire system—especially your Chipset and Storage Controller drivers—is stable and optimized before the BIOS flash.
Download and Install:
Click the "Download" button to download the software package.
Install it on your Windows PC.
Scan Your System:
Launch the application. Go to "Drivers" > "Scan", click "Scan".
Driver Talent X will automatically perform a comprehensive scan, identifying all outdated, missing, or corrupted drivers, focusing specifically on your Chipset Drivers and Storage Controller Drivers.
One-Click Update:
The results will show you a list of all drivers that need attention. Click the "Repair Now" button.
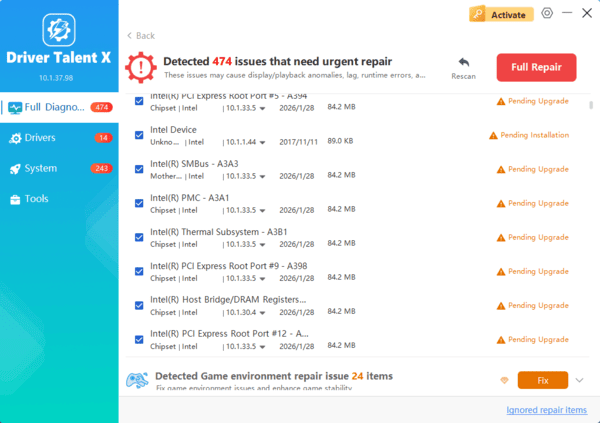
The tool will automatically download and install the latest, verified versions, optimizing your system's stability.
Restart Your PC:
Once the installation is finished, it is absolutely crucial to restart your computer.
Do not proceed to the BIOS update until this critical stability step is complete.
2. The Primary Method: Use the EZ Flash 3 Utility
The ASUS ROG Strix motherboard features the built-in EZ Flash 3 utility, accessible directly from the BIOS screen. This is the safest way to perform the update as it operates independent of the Windows OS.
Identify Model and Download BIOS File:
Find the exact model name of your ROG Strix motherboard (e.g., ROG Strix Z690-F Gaming).
Go to the official ASUS Support website, search for your motherboard, and navigate to the "Driver & Tools" section, then "BIOS & FIRMWARE".
Download the latest BIOS file.

Prepare USB Drive:
Use a USB flash drive (8GB or smaller is often preferred).

Format the drive to FAT32.
Extract the downloaded BIOS file (usually a .CAP file) and place it on the root directory of the USB drive.
Rename File (Optional but Recommended):
ASUS often provides a specific renaming utility within the BIOS ZIP file.
Use this utility, or manually rename the .CAP file to match the simple name required by your motherboard (check the ASUS support page for the exact filename).
Enter EZ Flash 3:
Restart your PC and repeatedly press the DEL or F2 key to enter the BIOS/UEFI.
Navigate to the "Tool" tab and select "ASUS EZ Flash 3 Utility."

Perform Flash:
Select the USB drive where you saved the BIOS file.
Select the ".CAP" file and press Enter.
The utility will verify the file and ask for confirmation. DO NOT power off or restart the PC during this process.
Reboot:
The system will automatically reboot once the flash is complete.
3. Alternative Method: BIOS FlashBack (The No-CPU/RAM Option)
Many ROG Strix motherboards include a dedicated BIOS FlashBack button. This allows you to update the BIOS even without a CPU, RAM, or graphics card installed, making it perfect for supporting a brand-new CPU out of the box.
Prepare USB Drive:
Download and format the USB drive.
Crucial Step: Use the BIOS Renamer utility provided by ASUS to rename the .CAP file to the specific file name required for the FlashBack port (e.g., ROG.CAP).
Locate FlashBack Port:
Locate the designated BIOS FlashBack USB port on the rear I/O panel (it is usually marked with a white outline and the text "BIOS FlashBack").

Perform Flash:
Plug the prepared USB drive into the FlashBack port.
Press and hold the FlashBack button (located near the I/O shield) for three seconds until the light flashes.
Release the button. The light will continue to flash slowly for several minutes. When the light turns solid or goes out, the process is complete.
Conclusion
Updating the BIOS on your ASUS ROG Strix motherboard is essential for maintaining cutting-edge performance and compatibility. By first ensuring fundamental system stability with Driver Talent X, then utilizing the simple and safe EZ Flash 3 utility or the advanced BIOS FlashBack feature, you can successfully perform this critical update without risk, ensuring your high-end PC runs reliably.
