Updating the BIOS (Basic Input/Output System) on your ASRock motherboard is an important step for maintaining system stability, improving hardware compatibility, enabling support for newer CPUs, and fixing known system bugs. As the core firmware of your system, the BIOS ensures proper communication between the motherboard and all connected components.
1. Preparation: Ensure System Stability and Driver Compatibility
Before initiating a BIOS update, the stability of your operating system and core system drivers is paramount. Unstable Chipset Drivers or Storage Controller Drivers can lead to system freezes or unexpected errors that could fatally interfere with the BIOS utility software.
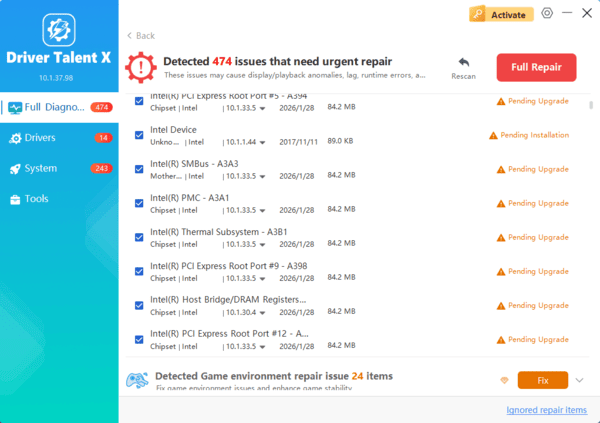
Driver Talent X is an efficient tool that automates the driver update process, making it the quickest and safest way to ensure your entire system—especially components crucial for stability—is optimized before the BIOS flash.
Download and Install:
Click the "Download" button to download the software package.
Install it on your Windows PC.
Scan Your System:
Launch the application. Go to "Drivers" > "Scan", click "Scan".
Driver Talent X will automatically perform a comprehensive scan, identifying all outdated, missing, or corrupted drivers, focusing specifically on your Chipset Drivers and Storage Controller Drivers.

One-Click Update:
The results will show you a list of all drivers that need attention. Click the "Repair Now" button.
The tool will automatically download and install the latest, verified versions, optimizing your system's stability.
Restart Your PC:
Once the installation is finished, it is absolutely crucial to restart your computer.
Do not proceed to the BIOS update until this critical stability step is complete.
2. The Primary Method: Use ASRock Instant Flash
ASRock's Instant Flash utility is built directly into the BIOS itself. This is the recommended method as it operates independently of the Windows environment, minimizing the risk of software conflicts.
Identify Model and Download BIOS File:
Find the exact model name of your ASRock motherboard (e.g., ASRock Z690 Steel Legend).
Go to the official ASRock Support website, search for your motherboard model, and navigate to the "Downloads" or "BIOS" section.
Download the latest BIOS file (it will be a compressed .ZIP file).

Prepare USB Drive:
Format a USB flash drive (8GB or smaller is often ideal) to FAT32.
Unzip the downloaded BIOS file and copy the extracted BIOS file (which usually has a .ROM or .CAP extension) to the root directory of the USB drive.
Enter BIOS/UEFI:
Restart your PC and repeatedly press the DEL or F2 key to enter the BIOS/UEFI screen.
Launch Instant Flash:
Depending on your specific ASRock BIOS version, navigate to the "Smart" menu and select "Instant Flash".

The utility will automatically scan all connected devices (including your USB drive) for the correct BIOS file.
Perform Flash:
Select the BIOS file you placed on the USB drive.
The utility will verify the file and ask for confirmation. CRITICAL WARNING: DO NOT power off, restart, or interrupt the PC during the flash process.
Reboot:
The system will automatically reboot once the flash is complete.
3. Alternative Method: ASRock Internet Flash
If your system has a stable internet connection, some ASRock motherboards support flashing the BIOS directly from the internet within the BIOS utility, eliminating the need for a USB drive.
Enter BIOS/UEFI: Restart your PC and press DEL or F2.
Launch Internet Flash: Navigate to the "Tool" menu and select "Internet Flash".
Connect: Ensure your network cable is plugged directly into the motherboard's Ethernet port.
Download and Flash: The utility will connect to the ASRock server, check for the latest BIOS version for your specific model, download it, and automatically begin the flash process. DO NOT interrupt the connection or power.
4. Post-Update Steps (Crucial)
After a successful BIOS flash, you must perform these steps to ensure system stability.
Clear CMOS/Load Defaults: Immediately after the reboot, re-enter the BIOS/UEFI (press DEL or F2).
Load Optimized Defaults: Navigate to the "Exit" tab and select "Load UEFI BIOS Defaults" or "Load Optimized Defaults". This clears out old settings that might conflict with the new firmware.

Reconfigure: Re-apply any custom settings, such as enabling XMP/EXPO for memory speed or setting your boot order.
Save and Exit: Save your changes and reboot into Windows.
Conclusion
Updating the BIOS on your ASRock motherboard is vital for leveraging new hardware features and maintaining optimal system performance. By securing system stability first with Driver Talent X, then executing the update using the dependable ASRock Instant Flash utility, you can ensure the process is completed safely and successfully, extending the life and capabilities of your PC.
