Setting up a new printer can sometimes feel overwhelming, but the HP DeskJet 2700 series is designed for a simple and user-friendly installation process. This all-in-one printer is a popular choice for home and small office use, offering printing, scanning, and copying in one compact device. This comprehensive guide will walk you through everything you need to know for a successful setup—from initial preparation to final connection—using both the recommended wireless setup method and the traditional USB cable method, so you can get your printer up and running quickly.
The First Step to a Smooth Setup: Update PC Drivers
Outdated USB or chipset drivers can sometimes cause frustrating connectivity issues during printer installation. It's recommend to use Driver Talent X to perform a system scan. A quick system check can prevent these headaches and ensure a seamless setup.
Download and Install:
Click the "Download" button to download the software.
Install it on your Windows PC.
Scan Your System:
Launch the application. Go to "Drivers" > "Scan", click "Scan".
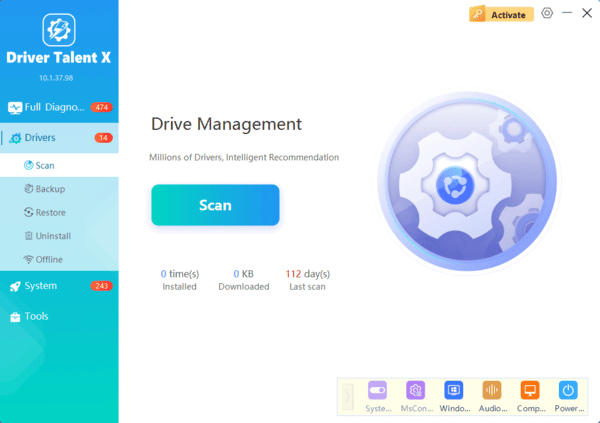
Driver Talent X will automatically perform a comprehensive scan of your entire system to identify any outdated, missing, or corrupted drivers.
One-Click Update:
The results will show you all the drivers that need attention. Simply click the "Repair Now" button.
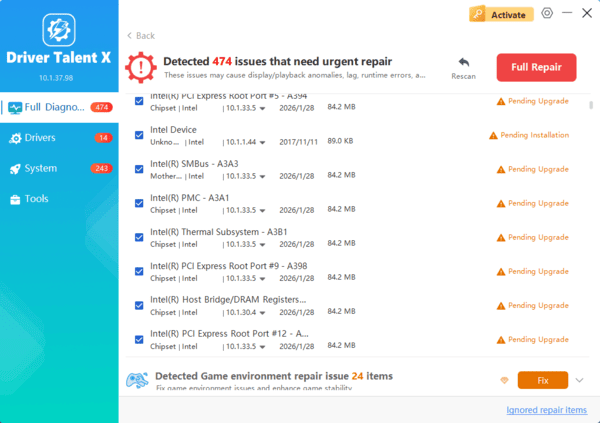
The tool will automatically download and install the latest, verified versions of every driver at once.
Restart Your PC:
After the updates are complete, restart your computer to finalize the installation and prepare your system for the printer setup.
Method 1: Wireless Setup with the HP Smart App (Recommended)
This is the most popular and easiest method. It uses the HP Smart app to guide you through connecting your printer to your home Wi-Fi network and your computer.
Unbox and Power On:
Remove the printer from its box, plug in the power cord, and turn it on.
Wait for the printer to stabilize.
Install the Ink Cartridges:
Open the ink cartridge access door and wait for the carriage to move to the center.
Remove the protective tape from your new HP ink cartridges, then snap them firmly into their respective slots (black on the right, tri-color on the left).
Close the access door.
Use HP Smart:
On your PC, open Microsoft Store, search for the HP Smart app and click "Get" to download.

Open the HP Smart app.
Click on "Set up a new printer" and follow the on-screen prompts.
The app will detect your HP DeskJet 2700, help you connect it to your Wi-Fi network, and complete the installation of the necessary drivers.
Method 2: USB Cable Setup
If you don't have a Wi-Fi network or prefer a direct connection, you can set up the printer using a USB cable.
Unbox and Power On: Unpack the printer, plug it in, and turn it on.

Install the Ink Cartridges: Follow the same steps as in the wireless method to install the ink cartridges.
Connect the USB Cable: With the printer on, connect one end of a USB cable to the back of the printer and the other end to an available USB port on your PC.
Install the Driver: Your Windows operating system will typically detect the new hardware and automatically begin installing the necessary drivers. If it doesn't, you can use Driver Talent X to download the drivers for your printer.
Common Questions & Answers
Q: The printer won't connect to my Wi-Fi. What should I do?
A: Make sure you've entered the correct Wi-Fi password. You should also ensure the printer is close enough to your router and that the router's 2.4 GHz band is enabled, as the DeskJet 2700 does not support 5 GHz Wi-Fi.
Q: The setup asks for a driver, but I don't have a CD. How do I get it?
A: You don't need a CD. Go to 123.hp.com and the website will automatically detect your printer model and provide you with a link to download the HP Smart app or the full driver package.
Q: How do I install the ink cartridges?
A: Open the front access door to expose the cartridge carriage. Remove the tape from the new cartridges and simply push them into their correct slots until you hear them click into place.
Conclusion
Setting up your HP DeskJet 2700 printer is a straightforward process, whether you choose the easy wireless method or the traditional USB connection.
By taking the time to prepare your PC with updated drivers and following these steps, you can avoid common issues and start printing, scanning, and copying in no time.
