Maintaining up-to-date device drivers is essential for the optimal performance, stability, and security of any Lenovo laptop or desktop, whether you use a ThinkPad, IdeaPad, or Yoga model. Outdated drivers are a primary source of common issues, including system crashes, Wi-Fi connectivity problems, battery drain, and poor peripheral performance.
A successful driver update process requires identifying the correct driver version for your specific Lenovo model and ensuring a clean installation. This comprehensive guide provides step-by-step solutions for downloading and installing Lenovo drivers, starting with the most efficient method for system synchronization.
Part I: Driver Integrity and System Synchronization
For any Lenovo PC, stability relies on a complex network of drivers (including the chipset, power management (ACPI), and individual peripheral drivers) working in perfect synchronization.
Automated Driver Update with Driver Talent X
Manually searching for and updating the myriad of drivers required for a Lenovo system can be tedious, and installing an incorrect driver version can lead to instability. A specialized utility automates this process, ensuring all necessary components are perfectly compatible with your specific Lenovo model.
Download and Install:
Click the "Download" button to download the software package.
Install it on your Lenovo PC.
Run Scan:
Launch the application and go to "Drivers" > "Scan", click "Scan".
The software will perform a deep analysis of your system, focusing on all core Lenovo components.
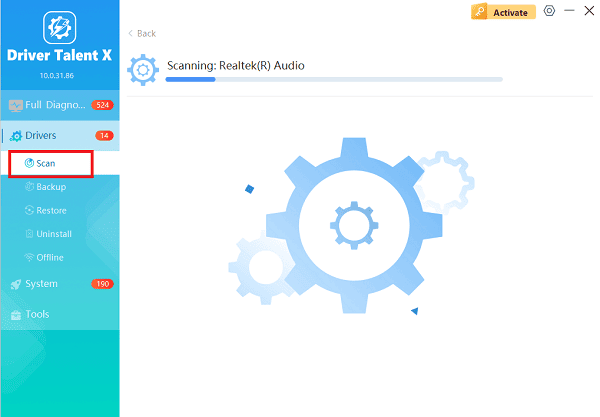
Execute Update:
After the scan is complete, the software will display a list of all drivers that need attention. Select the necessary drivers and click the "Upgrade" or "Repair Now" button.
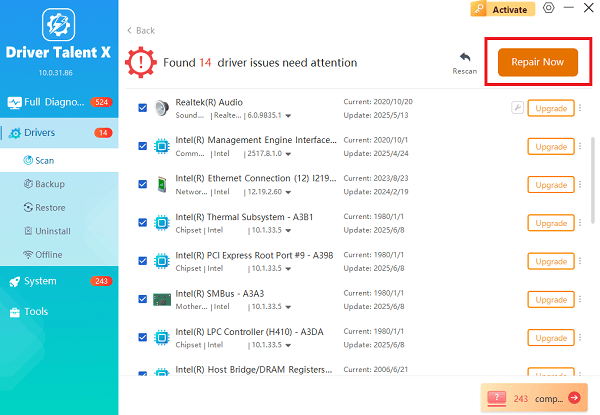
Driver Talent X will download the latest, certified versions specific to your Lenovo hardware, crucial for eliminating system conflicts.
Finalize:
After the installation is complete, restart your computer to fully integrate the new drivers.
Part II: Official Lenovo Download Methods
Lenovo provides dedicated tools to help users manage and install drivers directly from the manufacturer.
Method 1: Use the Lenovo System Update Tool
Lenovo provides a pre-installed application, often called System Update or Lenovo Vantage, which scans your specific hardware and delivers only Lenovo-approved updates.
Launch Lenovo Vantage: Search for and open the Lenovo Vantage application (or Lenovo System Update, depending on your model).
Check for Updates: Navigate to the "System Update" or "Driver and Software Update" section.
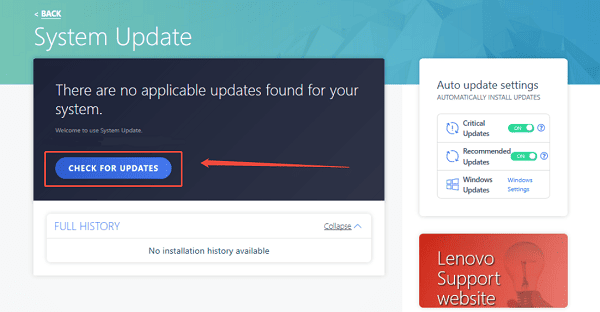
Install Updates: The tool will check the Lenovo servers for updates specific to your device's serial number. Select the recommended updates (including BIOS/UEFI firmware, if listed) and click "Install".
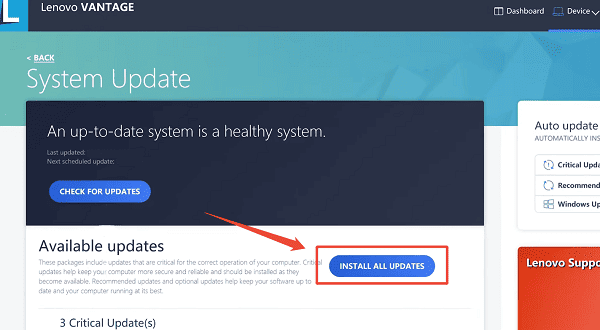
Restart: Follow the prompts to restart your PC to finalize the installations.
Method 2: Manual Download from the Lenovo Support Website
If you are performing a clean Windows install or suspect major conflicts, downloading drivers manually is an option.
Find Serial Number: Locate your laptop's serial number (usually on a sticker on the bottom).
Go to Support: Visit the official Lenovo Support website and enter your serial number.
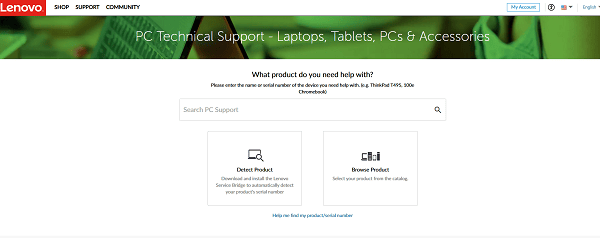
Select Drivers: Navigate to the "Drivers & Software" section. Select your operating system (Windows 10 or 11).
Download Categories: Download drivers by category (e.g., Chipset, Power Management, Display and Video, Networking) and install them one by one. Always start with the Chipset and Power Management drivers first.
Part III: Troubleshooting and Configuration
These steps address common roadblocks encountered during or after the driver update process.
Method 1: Clean Reinstallation via Device Manager
If a specific peripheral (like a touchpad or network card) is malfunctioning after an update, a clean reinstallation can fix the corrupted driver.
Press Windows Key + X and select "Device Manager".
Expand the relevant category (e.g., "Network adapters").
Right-click on the faulty device and select "Uninstall device".
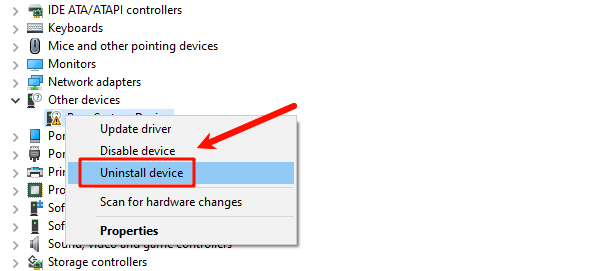
Check the box to delete the driver software.
Click "Action" > "Scan for hardware changes". Windows will attempt to detect the device and load a fresh, default driver.
Method 2: Use the Windows Update Optional Drivers
Windows Update sometimes carries certified Lenovo drivers that can resolve immediate problems.
Press Windows Key + I to open Settings.
Go to "Update & Security" > "Windows Update" > "Advanced options".
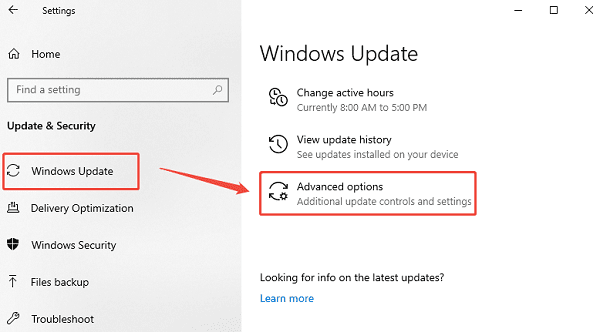
Click "Optional updates" > "Driver updates".
If any Lenovo-specific drivers are listed, select and install them.
Conclusion
Maintaining a high-performing Lenovo device requires diligent driver management. The most reliable method is to first ensure system-wide driver synchronization and stability with Driver Talent X. By combining this foundational approach with the official Lenovo Vantage application and performing clean reinstallation on malfunctioning components, you can guarantee a stable, efficient, and up-to-date system.
