NVIDIA graphics drivers play a critical role in gaming performance, creative workflows, and overall system stability. However, there are situations where uninstalling them becomes necessary—such as experiencing frequent crashes, corrupted installations, failed updates, or preparing for a clean driver reinstall. Removing NVIDIA drivers improperly can lead to display problems, reduced performance, or even system instability. That's why it's important to follow a safe and structured process when uninstalling them on Windows 11. This guide walks you through the most reliable step-by-step methods to safely uninstall NVIDIA drivers, ensuring your system is fully prepared for a clean reinstall or fresh update without issues.
Signs You Might Need to Uninstall NVIDIA Drivers
Frequent crashes or blue screens of death (BSODs) when launching games or applications
Screen flickering, artifacting, or display errors
Driver installation failures during new driver updates
Noticeable drops in FPS or performance in GPU-intensive applications
Conflicts with Windows updates or other hardware drivers
If you experience any of these issues consistently, a driver uninstall followed by a clean installation is often the most effective solution
Pre-Uninstall Preparation
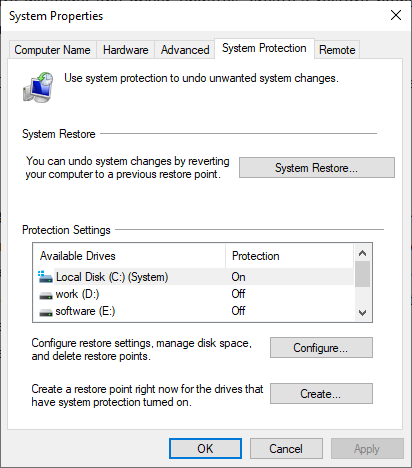
Create a System Restore Point
Press Windows + S → Search "Create a restore point" → Open
Click Create, name the restore point, and save it
Close all GPU-intensive programs
Record your GPU model and driver version
Disable Antivirus
Temporarily disable antivirus software to prevent interference during uninstallation
These steps ensure you can revert to a stable system if any issues occur.
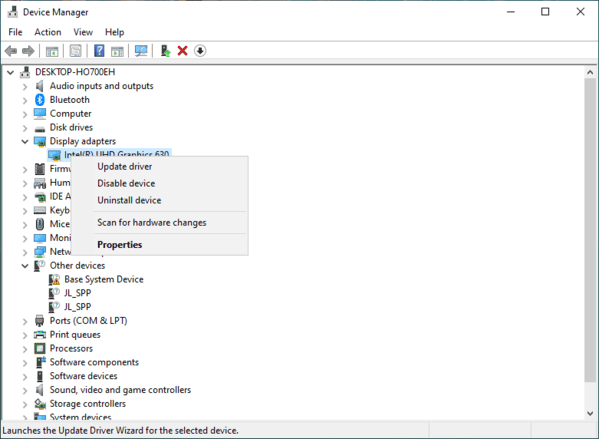
Uninstall NVIDIA Drivers via Device Manager
Device Manager provides a built-in, reliable method:
Press Windows + X → Device Manager
Expand Display adapters → NVIDIA GPU
Right-click the GPU → Uninstall device
Check Delete the driver software for this device
Confirm and restart your PC
Advantages: This method is fast, safe, and uses built-in Windows tools to remove the driver cleanly.
Uninstall NVIDIA Drivers via Windows Settings
Windows 11 Settings allows removal of both drivers and related software:
Open Control → Click Uinstall Program
Locate NVIDIA Graphics Driver in the list
Click Uninstall → Follow the prompts
Optionally, remove related software components like GeForce Experience, PhysX, and NVIDIA HD Audio
Restart the system after completion
This approach ensures you remove leftover NVIDIA software that may interfere with future installations.

Reinstalling Drivers After Uninstall
Once drivers are uninstalled, you should reinstall to restore GPU functionality:
GeForce Experience
Downloads GeForce Experience from Official Website
Open and installs the latest NVIDIA drivers

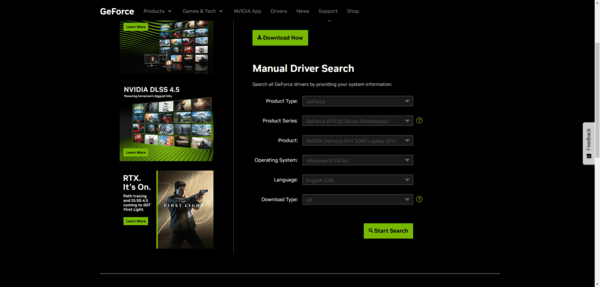
Manual installation
Download from the NVIDIA website, select Custom → Clean Install, and restart your system
Restart PC after installation complete
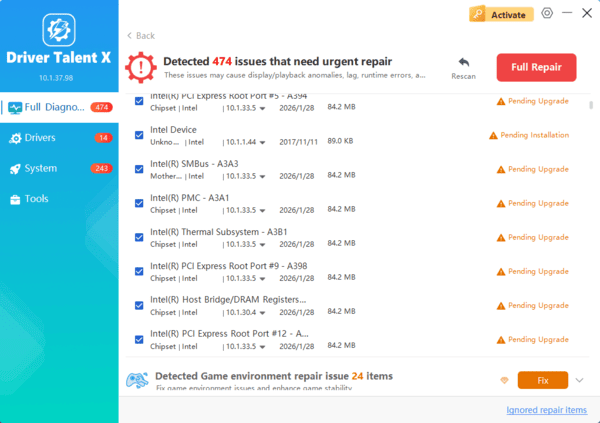
Using Driver Talent X
One-click reinstall and repair
Automatically detects missing or corrupted drivers, updates them, and restores system stability
Reinstalling immediately ensures your GPU performs correctly without display or performance issues.
Preventing Future NVIDIA Driver Issues
Schedule regular driver scans and backups with tools like Driver Talent X
Maintain updated BIOS and system firmware
Avoid beta or unofficial drivers unless necessary
Test new drivers in controlled environments before heavy usage
Keep System Restore Points updated for emergencies
Conclusion
Uninstalling NVIDIA drivers on Windows 11 is often necessary to fix crashes, corruption, or prepare for a clean driver update. By following these methods—Device Manager, Windows Settings, DDU, and professional tools like Driver Talent X—you can safely remove NVIDIA drivers and maintain system stability. Routine maintenance, backups, and careful reinstallations guarantee that your GPU continues to perform at its best, whether for gaming, creative work, or daily computing tasks.
